前言
最近在研究建站的事情,wordpress不论从保有量还是生态丰富的层面,并且作为一个老牌的开源系统,解决方案非常丰富,所以我打
算使用wordpress作为建站工具,研究下如何使用wordpress建站。
研究过程中踩了不少的坑,记录下,提供下简洁明了可用的安装过程。
遇到的坑
php版本过高的问题
本来买的1c1g的小水管机器,为了节约机器,打算使用免费的数据库云服务。
找到了2个产品,分别的plantscale和supabase,第一个是mysql的云服务,但是要绑信用卡,就放弃了。第二个是postgressql,免费的服务,不需要绑定信用卡,所以就注册了一个pg库。
我在冲浪的时候看到别人也推荐pg,占用资源少,性能更好,所以我也倾向于使用
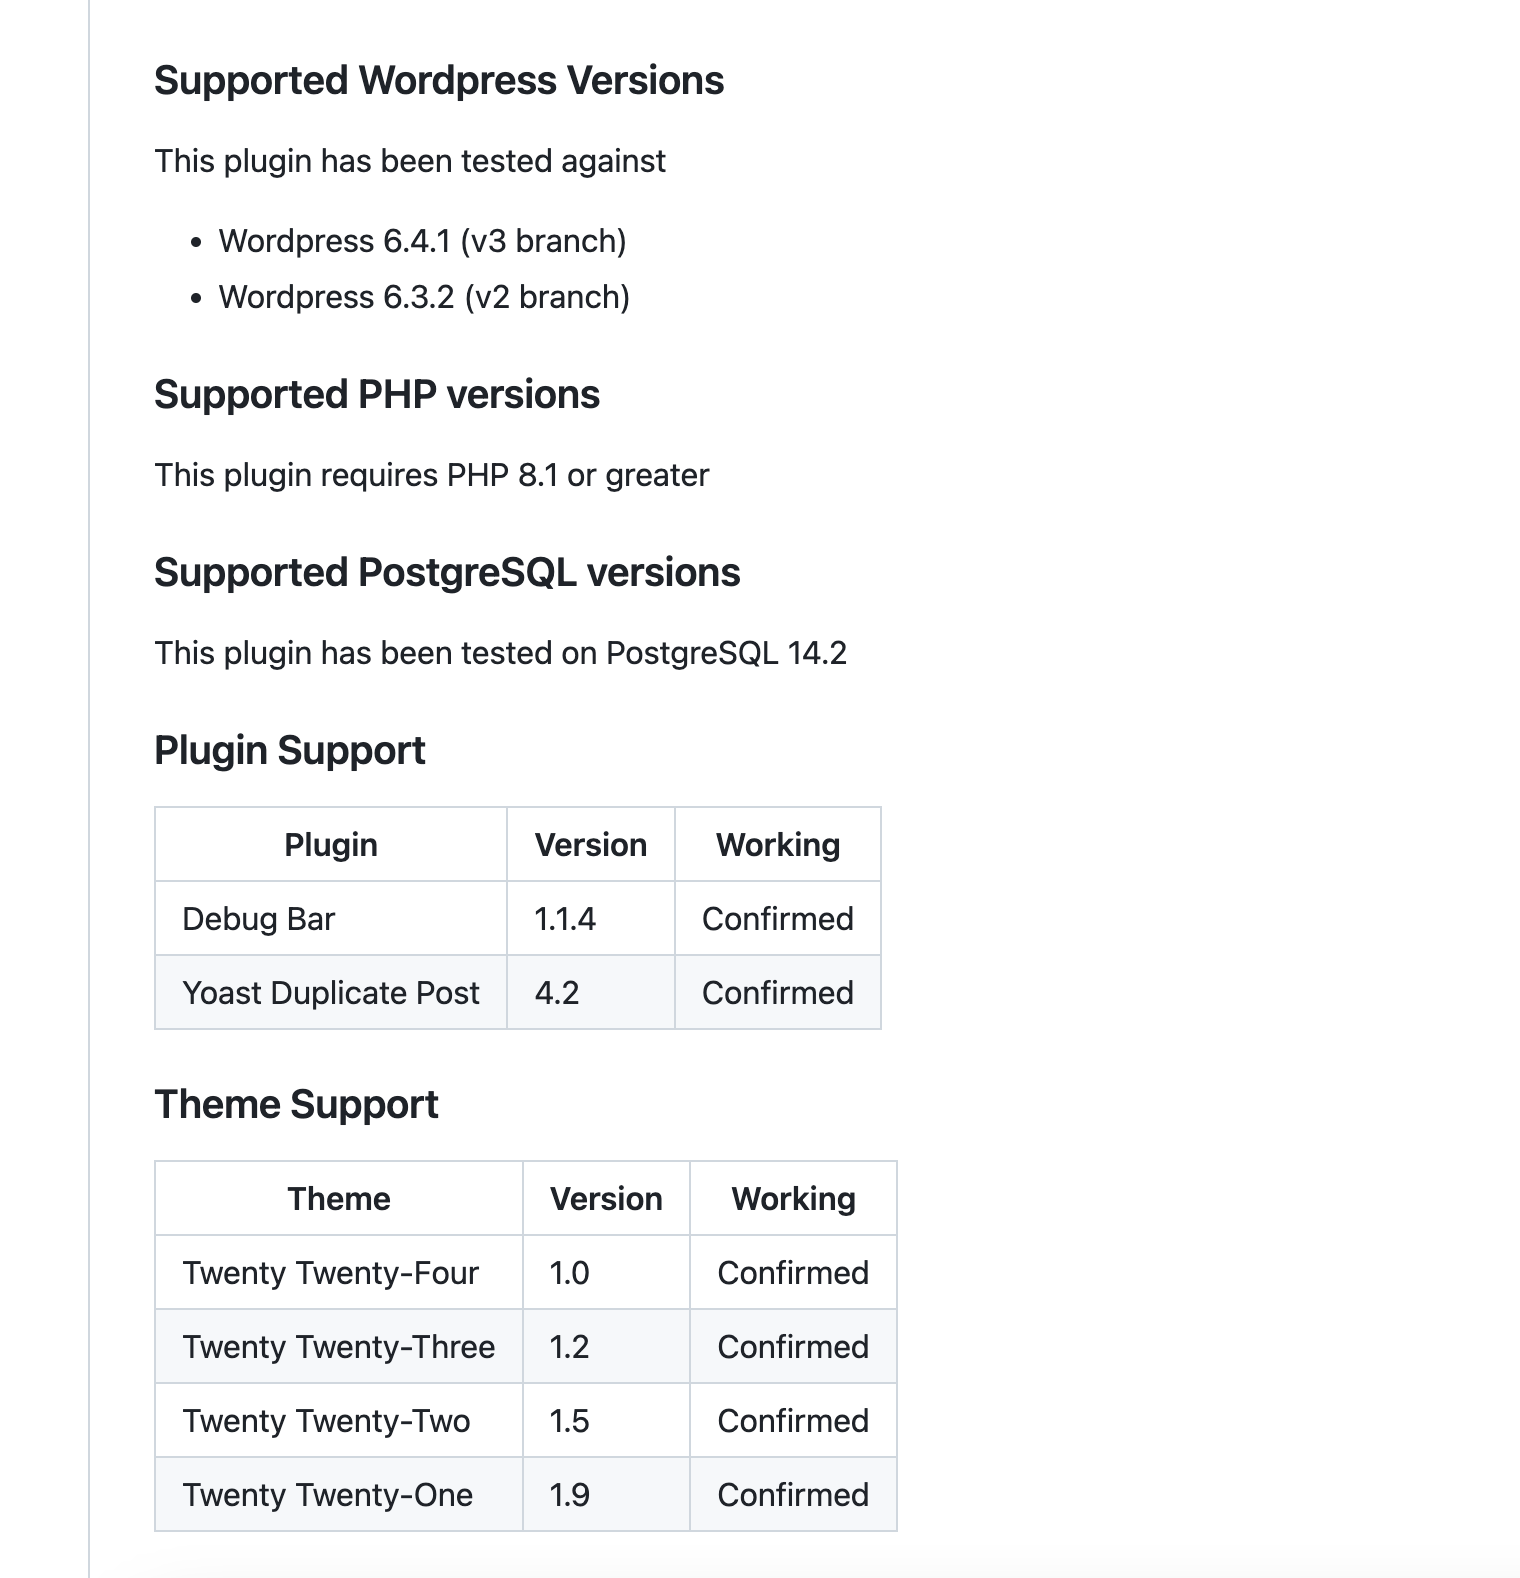
然后磨人的就来了,由于wordpress原生只支持MySQL,想使用pg就得找个插件,这一步就掉坑里了,我冲浪的时候发现pg4wp这个插
件最新版需要php8.1以上,然后安装这个插件之后各种连接超时,权限问题,我是真的被折磨的有点惨。
通过Nginx访问wp-admin/install.php,报错connection timeout,各种搜索解决不了。后来灵机一动,把pg4wp插件挪走,php版本从
8.2降到7.4就好了。。。。
嘿,果然安装还是按照文档来,切忌一上来就想法比较多,使用其他最新的组件,比如pg。
各种403,404,502,504,搜遍英文网站找不到结果,试了又试,错误依旧,绝望,我都有点怀疑自己了。
wordpress6.4.2要求php7.4+,但是pg4wp要求php8.1+,虽然一般会版本向下兼容,但是不兼容的事还是被我遇到了,看pg4wp的
readme,在6.4.1上通过了兼容性测试,6.4.2就多了一个小版本,真的是。
安装文档缺失关键步骤
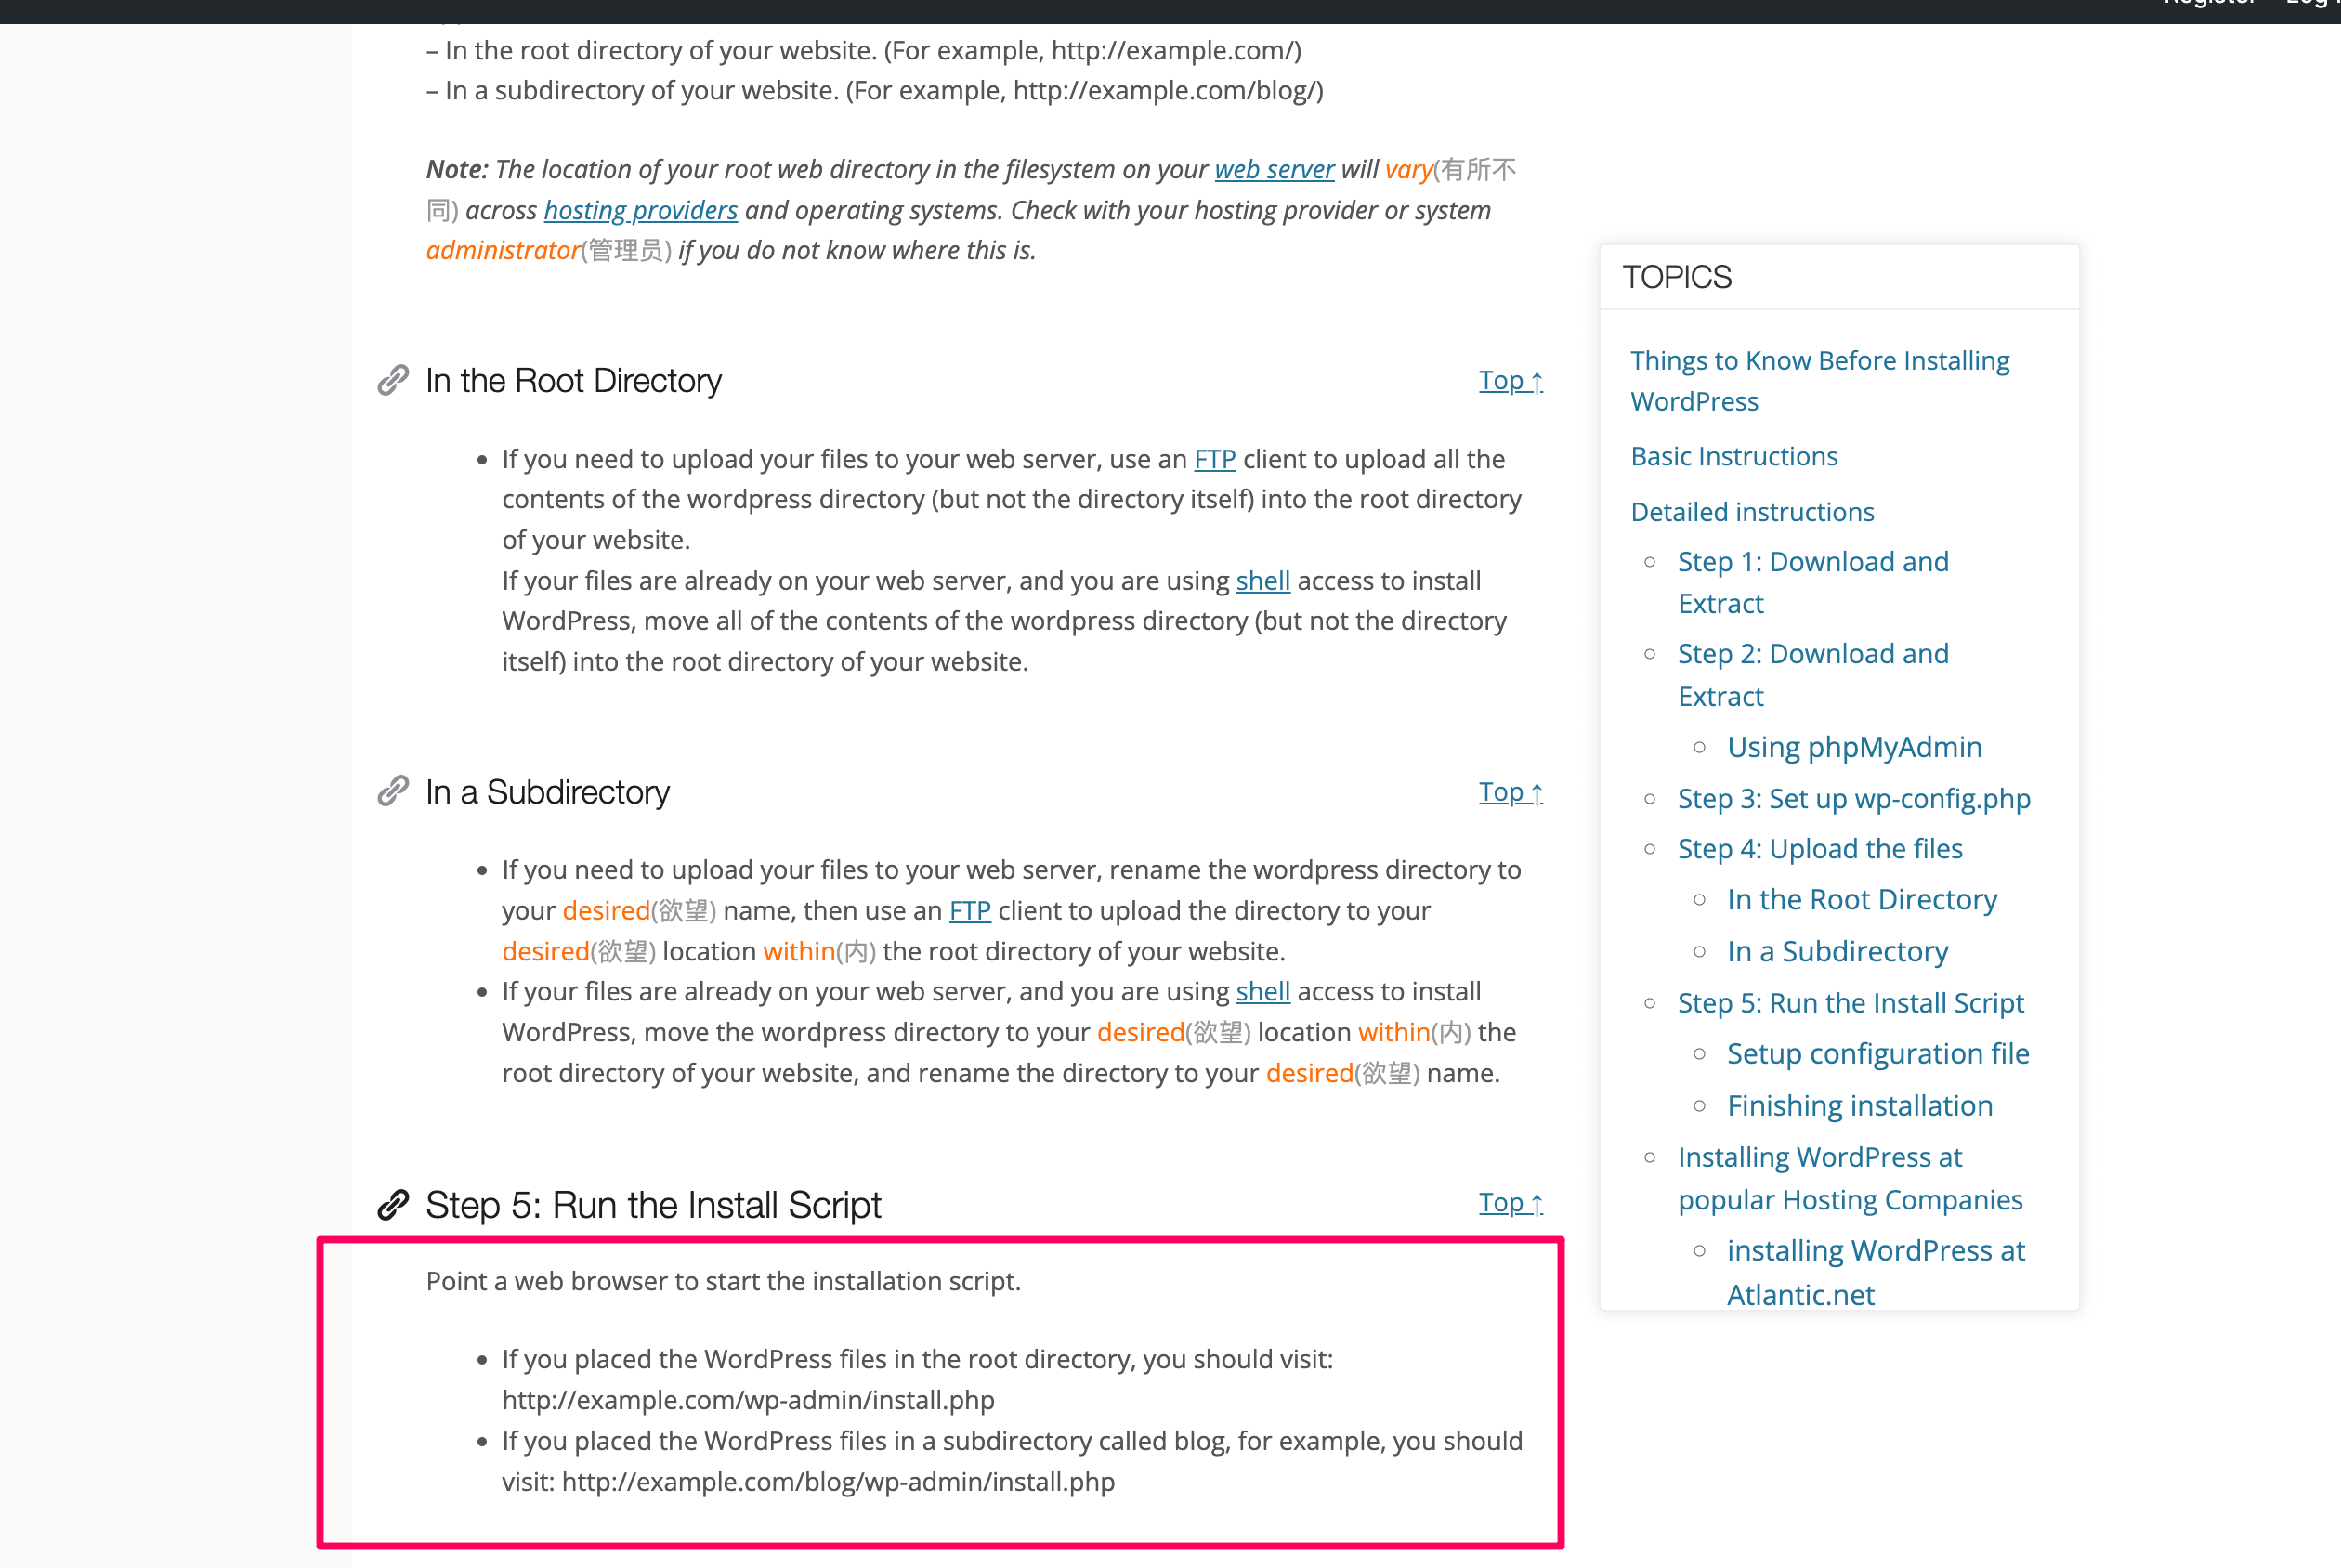
wordpress有一个经典的五步安装法,但是缺少了一些关键的描述,比如如何访问install.php,文档介绍是使用web服务器,但具体怎么
做没有详细介绍,导致我进去就掉坑里了。还有一些其他的细节没有补充。
而且基本是英文文档,看下来略微有点吃力。
这是wordpress开发者网站的安装步骤,我最需要的一步,如何在浏览器里访问install.php没写,让你用web浏览器去访问,用apache还
是用nginx还是别的,一点都没写。
英文文档看下来还是要点时间的。
文件权限问题
由于是使用root用户登录的,所以我第一次安装目录是/root/wordpress,nginx访问报文件权限问题,挪到非root目录nginx访问就正常了。
所以省事起见,wordpress不要放在root。
另外wordpress目录的用户组和目录权限需要为www-data:www-data和755。其中www-data是php7.4-fpm进程的用户组。
本篇文章力求把一些配置,关键步骤解释清楚,不踩无谓的坑。
前置依赖
Wordpress是一个服务,需要我们部署服务之后去访问wordpress的页面,最少需要一台机器部署wordpress整套服务.
如果需要使用域名访问的话,还需要买一个域名,解析到我们机器的ip上才行。
wordpress自身需要如下的组件
- 一台linux机器,我这次安装的机器版本是ubuntu222.04
- wordpress安装包,在wordpress.org下载最新的安装包,最新版本是6.4.2
- 机器上安装了php,版本最好是7.4
- 一个可用的mysql服务,版本需要5.7或者8.0+或者对应版本的mariadb(和mysql同一个作者)
- 机器上安装Nginx,nginx版本为1.18.0+
如果需要域名访问,则需要购买一个域名,购买域名之后解析到自己的linux机器上
- 购买一个域名
- 将域名解析到linux机器所在ip
以下将基于如上的依赖条件,逐步进行安装
手动安装
安装的机器系统是ubuntu22.04,1c1g的配置,在racknerd上购买的一个低配机器
ubuntu的包管理工具为apt,可以使用apt执行安装、更新、卸载应用等功能
更新系统
登录机器之后,终端执行如下命令,查看系统版本
lsb_release -a
可以看到如下输出,系统版本为ubuntu22.04 LTS(长期支持版本)
No LSB modules are available.
Distributor ID:	Ubuntu
Description:	Ubuntu 22.04.3 LTS
Release:	22.04
Codename:	jammy
然后执行如下命令,先将系统的应用更新到最新版本,如果缺失其他的包,使用apt install进行安装即可
sudo apt update && sudo apt upgrade
安装nginx
我们需要通过nginx访问wordpress页面,所以我们需要先安装一个nginx
刚安装的系统没有自带nginx,系统提示我们可以自行安装
root@racknerd-7c9c56:~# nginx -v
Command 'nginx' not found, but can be installed with:
apt install nginx-core    # version 1.18.0-6ubuntu14.4, or
apt install nginx-extras  # version 1.18.0-6ubuntu14.4
apt install nginx-light   # version 1.18.0-6ubuntu14.4
执行如下命令安装nginx
sudo apt install nginx
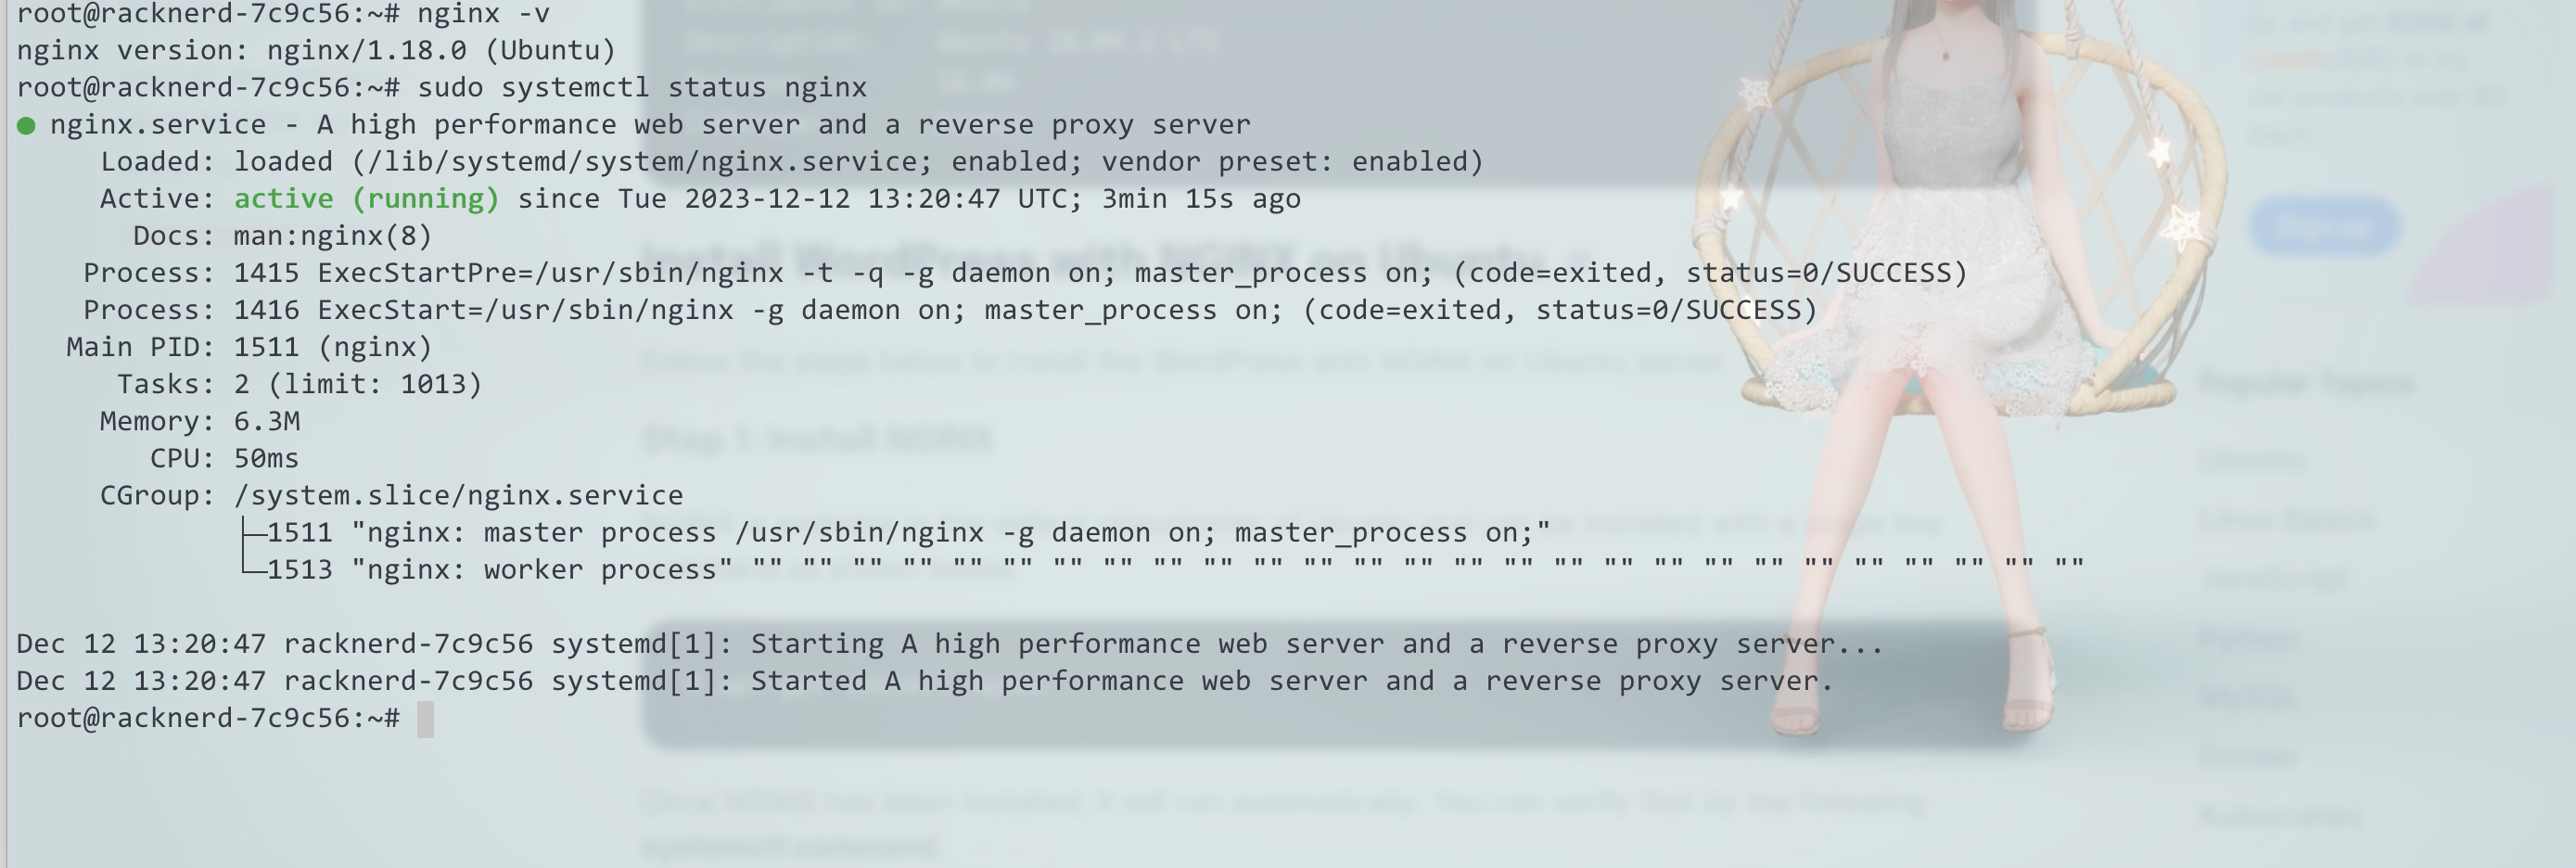
安装完之后查看nginx版本,可以看到不指定版本,默认是安装了1.18.0
root@racknerd-7c9c56:~# nginx -v
nginx version: nginx/1.18.0 (Ubuntu)
查看nginx服务状态,当前服务状态正常
root@racknerd-7c9c56:~# sudo systemctl status nginx
● nginx.service - A high performance web server and a reverse proxy server
     Loaded: loaded (/lib/systemd/system/nginx.service; enabled; vendor preset: enabled)
     Active: active (running) since Tue 2023-12-12 13:20:47 UTC; 3min 15s ago
       Docs: man:nginx(8)
    Process: 1415 ExecStartPre=/usr/sbin/nginx -t -q -g daemon on; master_process on; (code=exited, status=0/SUCCESS)
    Process: 1416 ExecStart=/usr/sbin/nginx -g daemon on; master_process on; (code=exited, status=0/SUCCESS)
   Main PID: 1511 (nginx)
      Tasks: 2 (limit: 1013)
     Memory: 6.3M
        CPU: 50ms
     CGroup: /system.slice/nginx.service
             ├─1511 "nginx: master process /usr/sbin/nginx -g daemon on; master_process on;"
             └─1513 "nginx: worker process" "" "" "" "" "" "" "" "" "" "" "" "" "" "" "" "" "" "" "" "" "" "" "" "" "" "" ""

Dec 12 13:20:47 racknerd-7c9c56 systemd[1]: Starting A high performance web server and a reverse proxy server...
Dec 12 13:20:47 racknerd-7c9c56 systemd[1]: Started A high performance web server and a reverse proxy server.
安装MySQL
nginx安装好之后,我们需要安装mysql。 mysql是wordpress默认的数据库,如果想少折腾,安装mysql是最稳妥的方式。
安装步骤
执行如下命令安装mysql
sudo apt install mysql-server
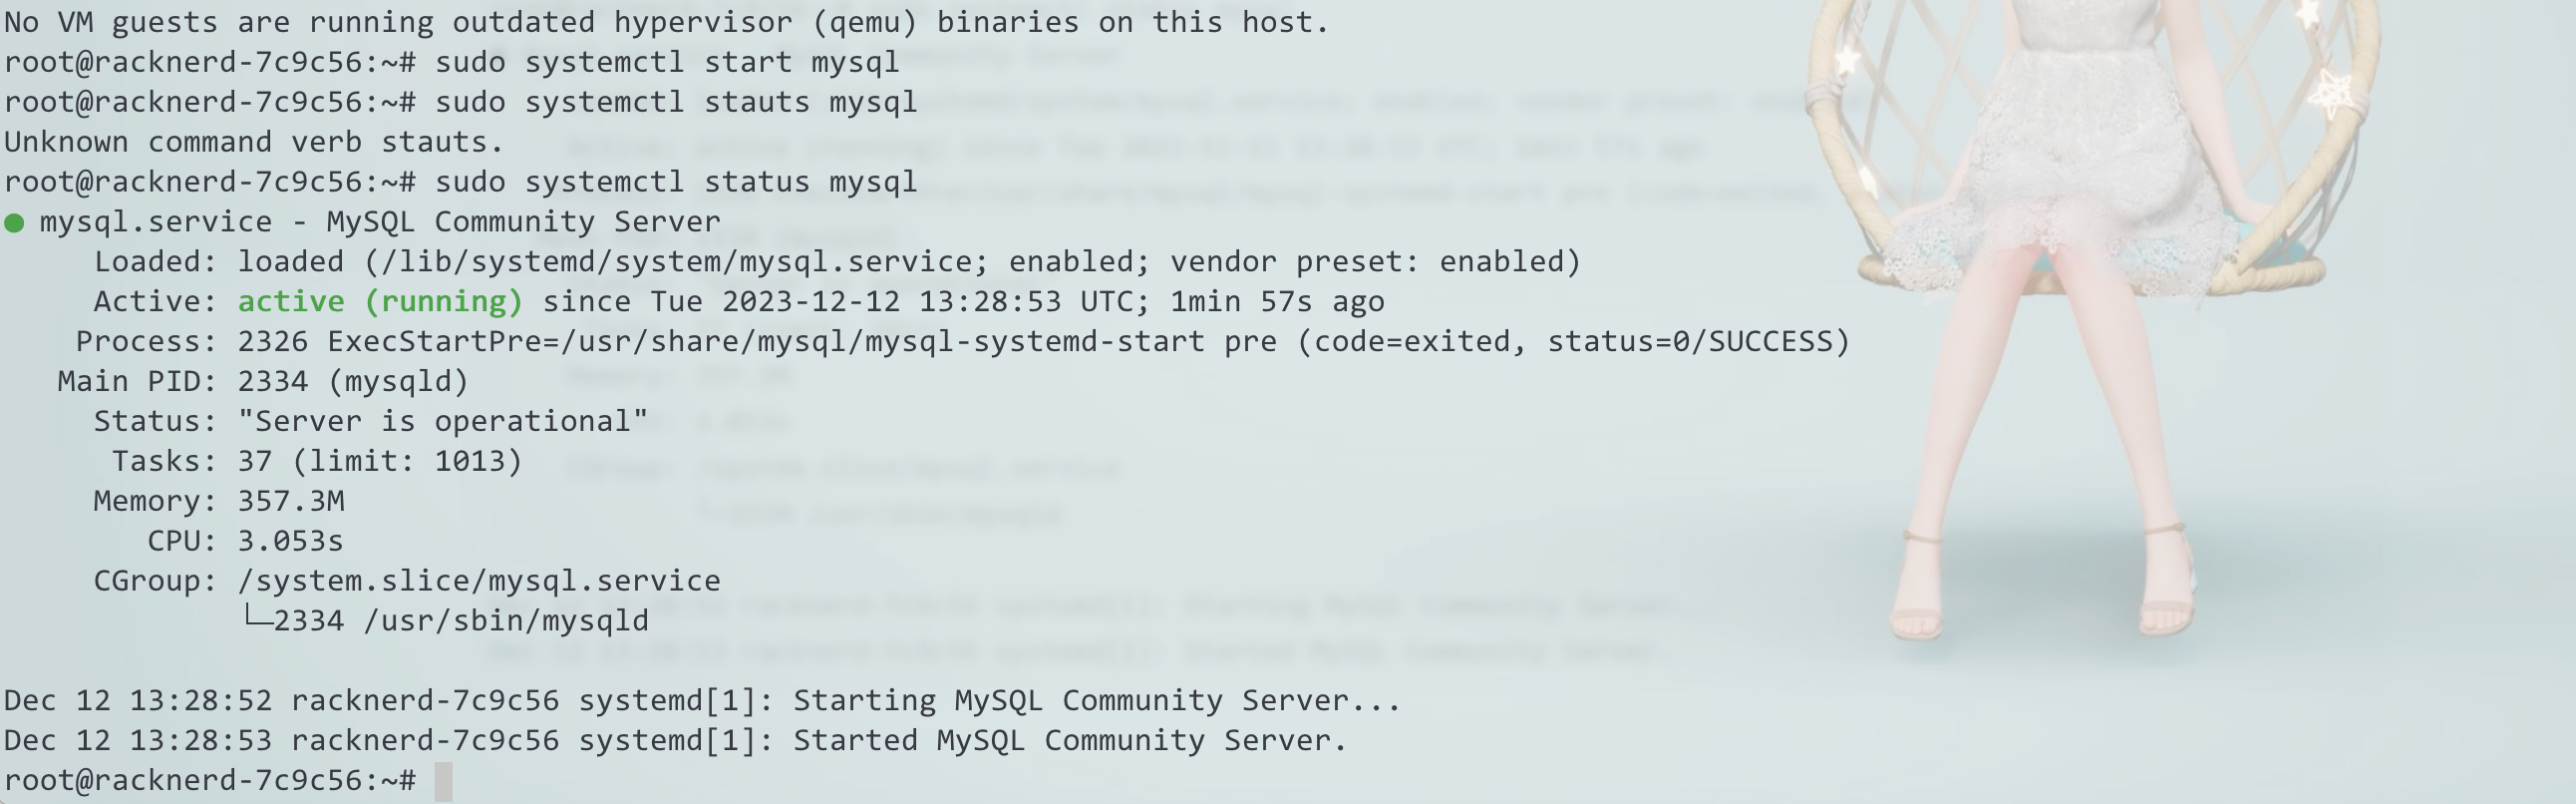
安装好之后启动mysql服务
sudo systemctl start mysql
启动之后查看mysql服务状态
root@racknerd-7c9c56:~# sudo systemctl status mysql
● mysql.service - MySQL Community Server
     Loaded: loaded (/lib/systemd/system/mysql.service; enabled; vendor preset: enabled)
     Active: active (running) since Tue 2023-12-12 13:28:53 UTC; 1min 57s ago
    Process: 2326 ExecStartPre=/usr/share/mysql/mysql-systemd-start pre (code=exited, status=0/SUCCESS)
   Main PID: 2334 (mysqld)
     Status: "Server is operational"
      Tasks: 37 (limit: 1013)
     Memory: 357.3M
        CPU: 3.053s
     CGroup: /system.slice/mysql.service
             └─2334 /usr/sbin/mysqld

Dec 12 13:28:52 racknerd-7c9c56 systemd[1]: Starting MySQL Community Server...
Dec 12 13:28:53 racknerd-7c9c56 systemd[1]: Started MySQL Community Server.
查看mysql版本,可以发现是8.0
root@racknerd-7c9c56:~# mysql -v
Welcome to the MySQL monitor.  Commands end with ; or \g.
Your MySQL connection id is 8
Server version: 8.0.35-0ubuntu0.22.04.1 (Ubuntu)

Copyright (c) 2000, 2023, Oracle and/or its affiliates.

Oracle is a registered trademark of Oracle Corporation and/or its
affiliates. Other names may be trademarks of their respective
owners.

Reading history-file /root/.mysql_history
Type 'help;' or '\h' for help. Type '\c' to clear the current input statement.
安装以及启动之后我们需要为root用户设置密码,执行以下命令,会进行mysql终端
sudo mysql
进入终端之后我们需要在终端为root用户创建密码,最后一
root@racknerd-7c9c56:~# sudo mysql
Welcome to the MySQL monitor.  Commands end with ; or \g.
Your MySQL connection id is 9
Server version: 8.0.35-0ubuntu0.22.04.1 (Ubuntu)

Copyright (c) 2000, 2023, Oracle and/or its affiliates.

Oracle is a registered trademark of Oracle Corporation and/or its
affiliates. Other names may be trademarks of their respective
owners.

Type 'help;' or '\h' for help. Type '\c' to clear the current input statement.

mysql> ALTER USER 'root'@'localhost' IDENTIFIED WITH mysql_native_password BY 'password123';
如下命令会修改root用户的密码为password123
mysql> ALTER USER 'root'@'localhost' IDENTIFIED WITH mysql_native_password BY 'password123';
修改好root密码之后退出
mysql> exit
然后使用账号密码重新登录,输入root密码会再次进入mysql终端
mysql -u root -p
创建wordpress数据库
为wordpress创建一个数据库,用于存放wordpress数据
mysql> create database wordpress;
Query OK, 1 row affected (0.01 sec)
安全配置(可选)
虽然是自用的机器和服务,不过安全服务还是要考虑一下,万一以后做大做强了呢
命令行执行如下命令,会有一些交互
- 需要不需要校验密码,需要的话下一步
- 密码强度级别选择,Low的话相当于弱密码,比较危险,级别越高,密码复杂度要求越高
- 是否更新root密码,更新之后会根据之前选择的密码校验级别,要求你输入新的root密码
- 是否需要移除匿名用户,移除之后登录mysql必须要使用密码了
- 是否需要禁用root远程登录,禁用之后只能在本机登录mysql
- 是否需要移除test库和其访问权限,移除之后就无法访问test库了
- 刷新权限之后以上修改则生效
root@racknerd-7c9c56:~# sudo mysql_secure_installation

Securing the MySQL server deployment.

Enter password for user root:

VALIDATE PASSWORD COMPONENT can be used to test passwords
and improve security. It checks the strength of password
and allows the users to set only those passwords which are
secure enough. Would you like to setup VALIDATE PASSWORD component?

Press y|Y for Yes, any other key for No: y

There are three levels of password validation policy:

LOW    Length >= 8
MEDIUM Length >= 8, numeric, mixed case, and special characters
STRONG Length >= 8, numeric, mixed case, special characters and dictionary                  file

Please enter 0 = LOW, 1 = MEDIUM and 2 = STRONG: 2
Using existing password for root.

Estimated strength of the password: 50
Change the password for root ? ((Press y|Y for Yes, any other key for No) : y

New password:

Re-enter new password:

Estimated strength of the password: 100
Do you wish to continue with the password provided?(Press y|Y for Yes, any other key for No) : y
By default, a MySQL installation has an anonymous user,
allowing anyone to log into MySQL without having to have
a user account created for them. This is intended only for
testing, and to make the installation go a bit smoother.
You should remove them before moving into a production
environment.

Remove anonymous users? (Press y|Y for Yes, any other key for No) : y
Success.


Normally, root should only be allowed to connect from
'localhost'. This ensures that someone cannot guess at
the root password from the network.

Disallow root login remotely? (Press y|Y for Yes, any other key for No) : y
Success.

By default, MySQL comes with a database named 'test' that
anyone can access. This is also intended only for testing,
and should be removed before moving into a production
environment.


Remove test database and access to it? (Press y|Y for Yes, any other key for No) : y
 - Dropping test database...
Success.

 - Removing privileges on test database...
Success.

Reloading the privilege tables will ensure that all changes
made so far will take effect immediately.

Reload privilege tables now? (Press y|Y for Yes, any other key for No) : y
Success.

All done!
root@racknerd-7c9c56:~# sudo mysql
ERROR 1045 (28000): Access denied for user 'root'@'localhost' (using password: NO)
root@racknerd-7c9c56:~#
以上mysql就安装好了,也为wordpress创建了一个库
安装php
由于wordpress是php写的,所以需要在机器上安装php,目前最新的wordpress版本是6.4,安装php7.4就好了,不要安装8.0+的版本,
感觉兼容有问题,折磨了我好久。
先添加php仓库
sudo add-apt-repository ppa:ondrej/php
执行到下面最后一行提示的时候按enter继续安装
CAVEATS:
1. If you are using php-gearman, you need to add ppa:ondrej/pkg-gearman
2. If you are using apache2, you are advised to add ppa:ondrej/apache2
3. If you are using nginx, you are advised to add ppa:ondrej/nginx-mainline
   or ppa:ondrej/nginx

PLEASE READ: If you like my work and want to give me a little motivation, please consider donating regularly: https://donate.sury.org/

WARNING: add-apt-repository is broken with non-UTF-8 locales, see
https://github.com/oerdnj/deb.sury.org/issues/56 for workaround:

# LC_ALL=C.UTF-8 add-apt-repository ppa:ondrej/php
More info: https://launchpad.net/~ondrej/+archive/ubuntu/php
Adding repository.
Press [ENTER] to continue or Ctrl-c to cancel.
上面执行完后,再执行以下命令安装php7.4以及相关插件和服务
sudo apt install php7.4 php7.4-fpm php7.4-mysql php7.4-curl php7.4-xml
然后使用ps命令查看fpm服务是否启动,可以看到如下fpm服务以及在运行了
root@racknerd-7c9c56:~# ps -ef|grep fpm
root       18996       1  0 14:04 ?        00:00:00 php-fpm: master process (/etc/php/7.4/fpm/php-fpm.conf)
www-data   18997   18996  0 14:04 ?        00:00:00 php-fpm: pool www
www-data   18998   18996  0 14:04 ?        00:00:00 php-fpm: pool www
root       19118    2708  0 14:05 pts/0    00:00:00 grep --color=auto fpm
后面nginx需要通过unix socket访问,socket地址具体在/etc/php/7.4/fpm/pool.d/www.conf文件里,这个配置文件有如下几个配置项值得关注一下
listen = /run/php/php7.4-fpm.sock
listen.owner = www-data
listen.group = www-data
;listen.mode = 0660
listen = /run/php/php7.4-fpm.sock这个是后续要配置到nginx配置文件中的地址,nginx通过这个地址访问php-fpm服务,然后访问我们的wordpress文件。
listen支持unix和port 2种配置方式,二选一
listen = /run/php/php7.4-fpm.sock
或者
listen = 127.0.0.1:9000
这里配置成哪种格式后面Nginx就配哪种地址,我们这里就采用默认的unix socket的模式就行
lister.owner和list.group以及list.mode这3个配置项涉及fpm进程的权限和用户组问题,nginx需要和这里保持一致,不然可能会报
奇怪的文件权限问题。
如上这几个配置项我们保持默认即可,不要去动。
下载wordpress
其他的依赖组件都处理好之后,我们下载wordpress安装包,wordpress安装包可以去 wordpress.org下载
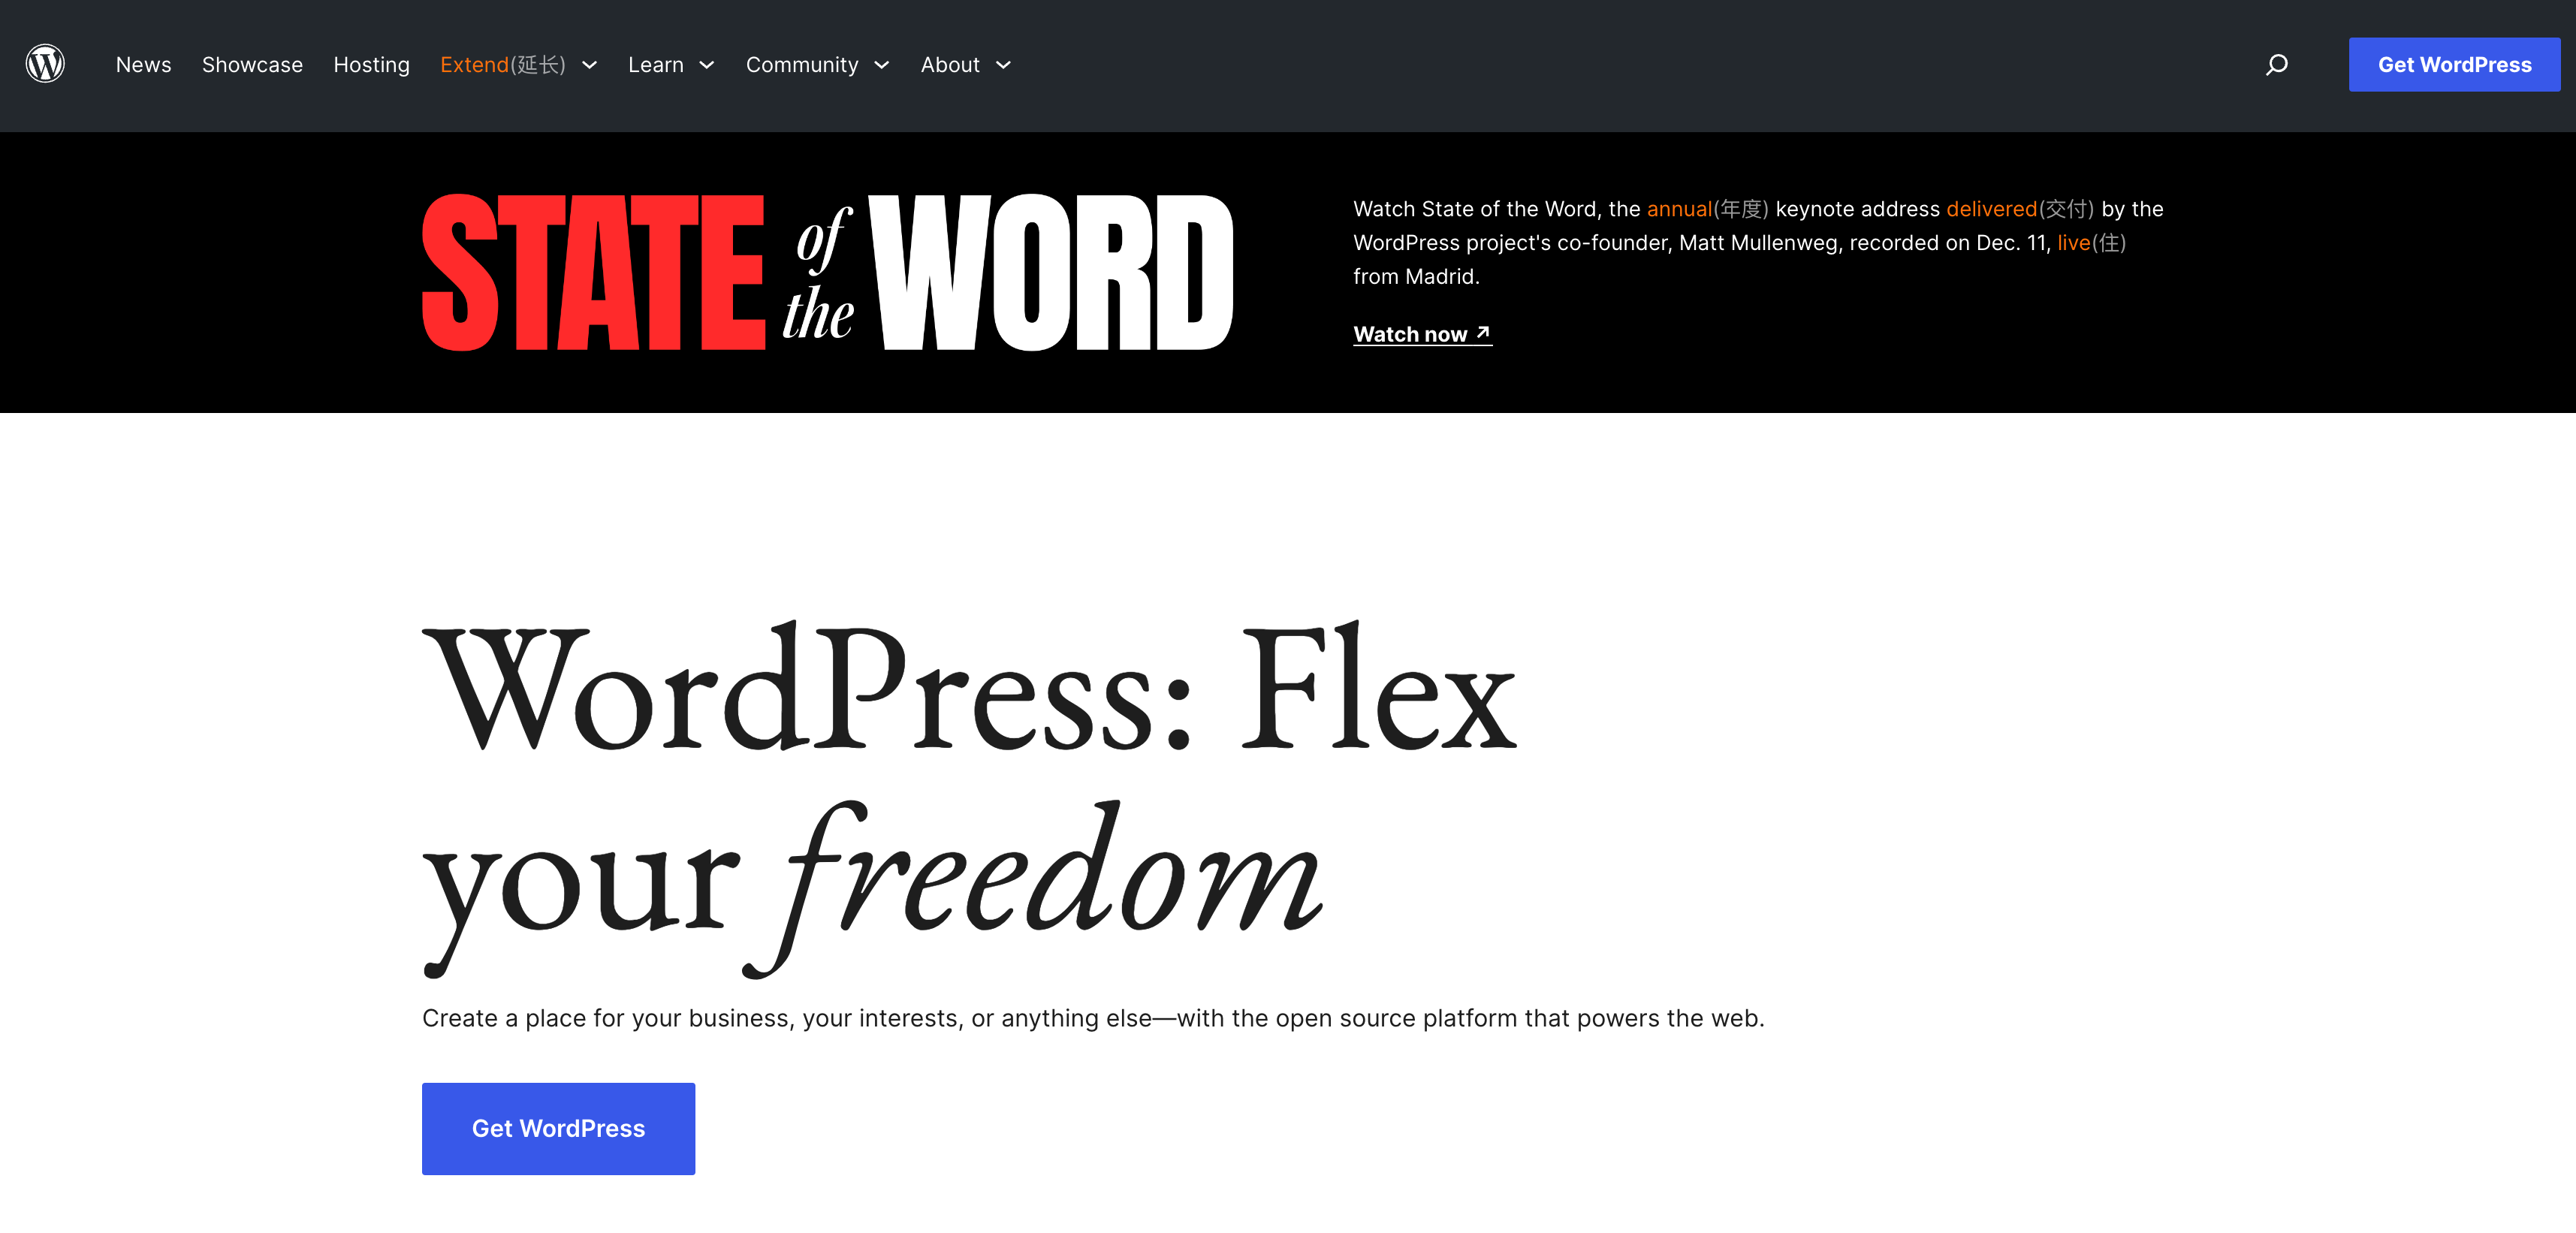
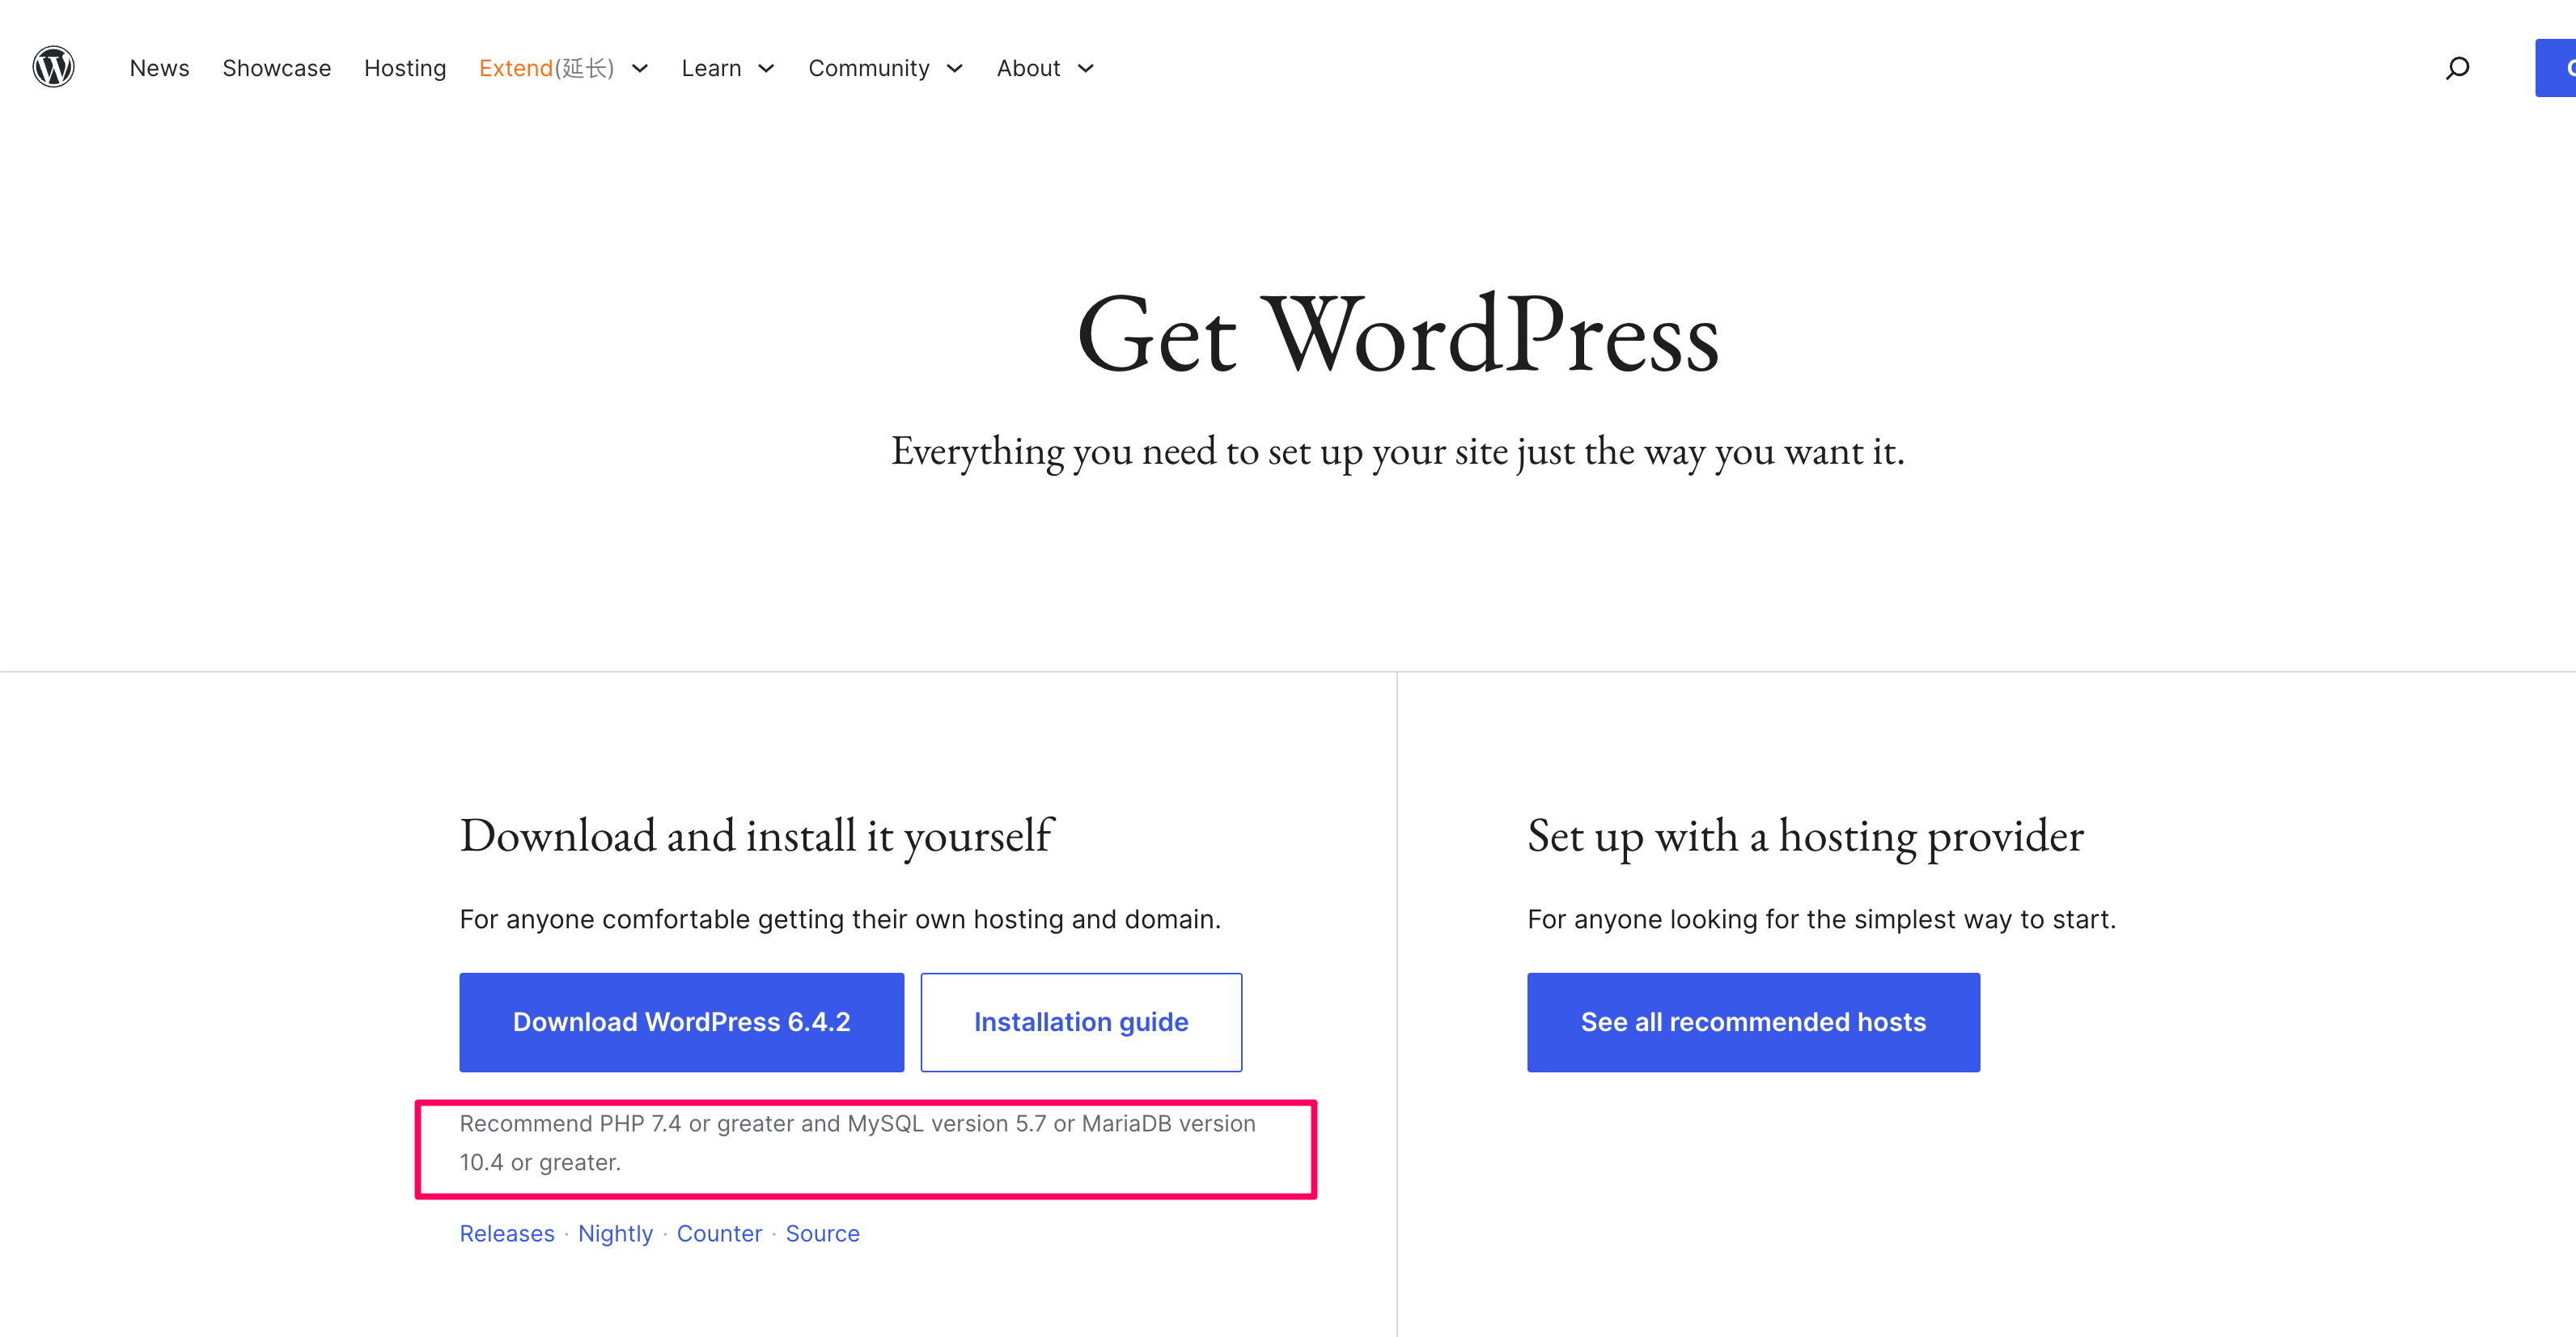
点击get wordpress,跳转到wordpress下载页
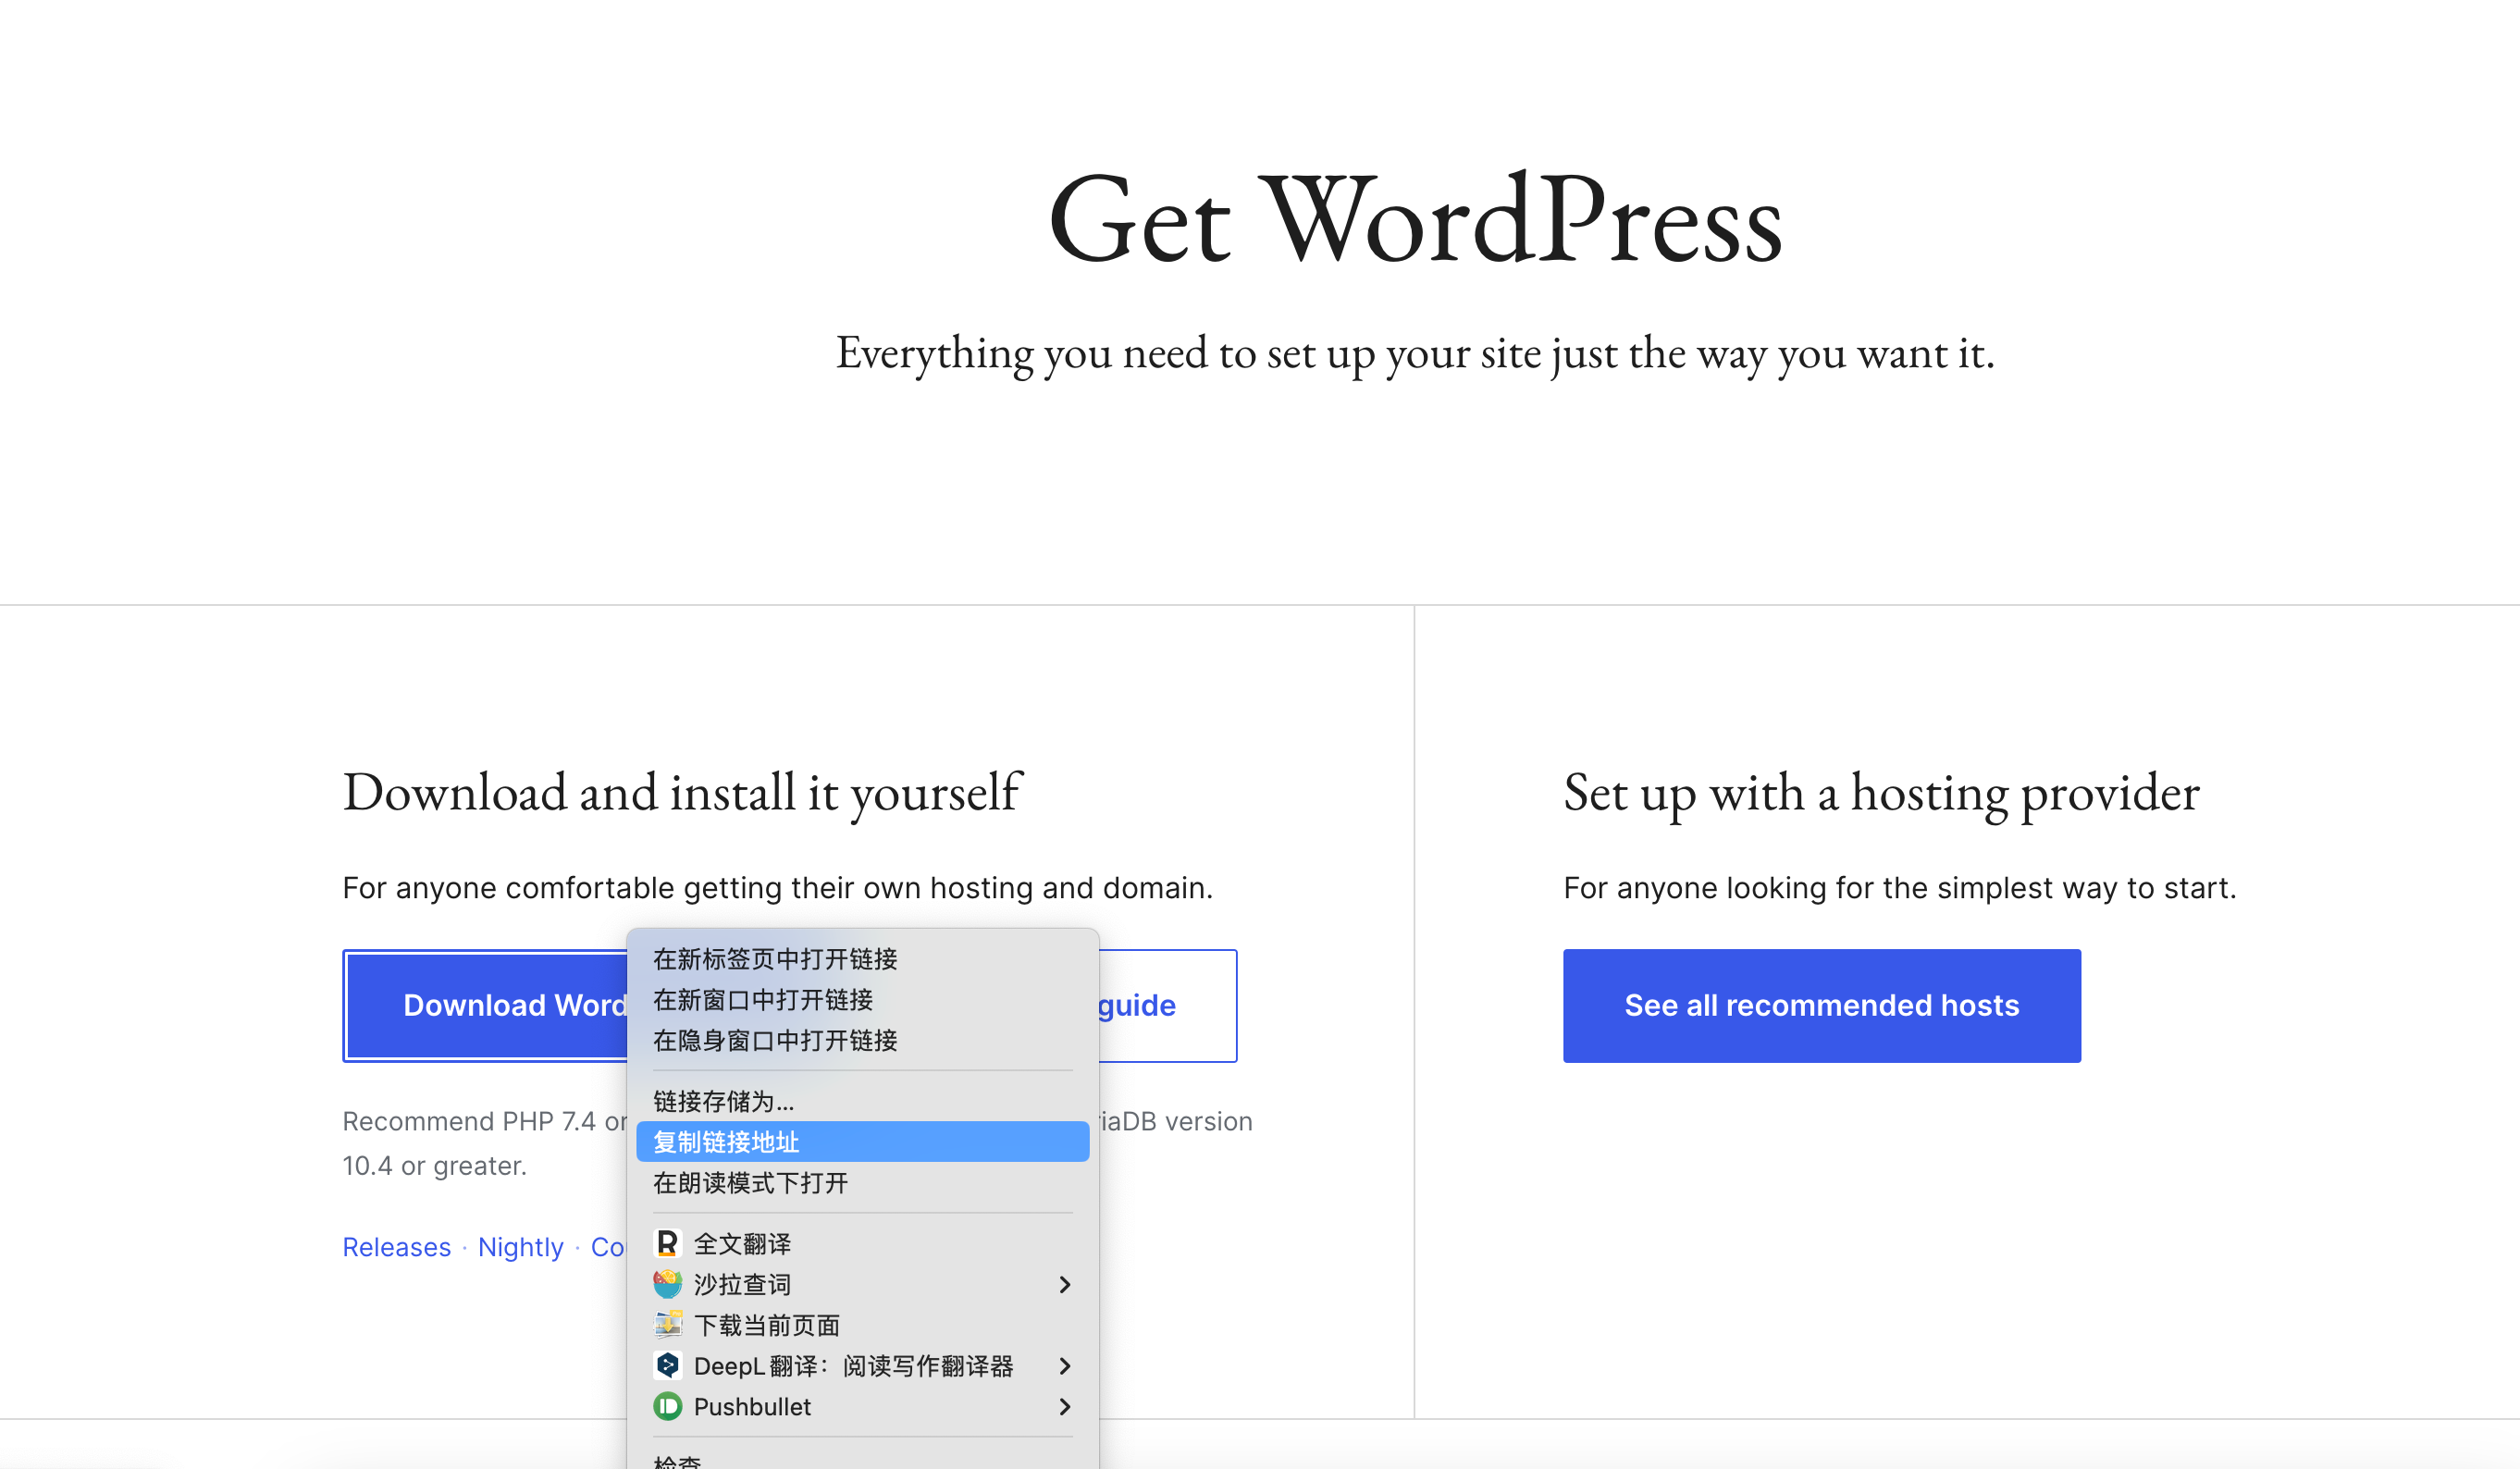
下载页左边是wordpress的安装包下载地址,当前最新的版本是6.4.2,官方推荐使用php7.4+,mysql5.7+或者mariadb10.4+, mysql
和mariadb算是同一个作者出品的,2者是兼容的,可以算同一种类型的数据库。
下载页右边是主机厂商提供的付费解决方案,wordpress已经帮你搭好了,需要按需付费购买。我为了省钱以及可控,就选择了自己搭。
安装包下载方式
那么wordpress安装包有2种下载方式
- 第一种是浏览器页面点击下载,下载到本地之后,通过scp、ftp等方式上传到linux上
- 另一种是到机器上使用wget下载安装包
我这里使用第二种,右键复制链接地址,安装包下载地址为https://wordpress.org/latest.zip
到机器上执行wget https://wordpress.org/latest.zip将安装包下载到linux机器上,这样下载会方便一点
root@racknerd-7c9c56:/opt# wget https://wordpress.org/latest.zip
--2023-12-12 14:24:43--  https://wordpress.org/latest.zip
Resolving wordpress.org (wordpress.org)... 198.143.164.252
Connecting to wordpress.org (wordpress.org)|198.143.164.252|:443... connected.
HTTP request sent, awaiting response... 200 OK
Length: 25954973 (25M) [application/zip]
Saving to: ‘latest.zip’

latest.zip                               100%[==================================================================================>]  24.75M  30.0MB/s    in 0.8s

2023-12-12 14:24:44 (30.0 MB/s) - ‘latest.zip’ saved [25954973/25954973]

root@racknerd-7c9c56:/opt# ll
total 25356
drwxr-xr-x  2 root root     4096 Dec 12 14:24 ./
drwxr-xr-x 19 root root     4096 Aug 10  2022 ../
-rw-r--r--  1 root root 25954973 Dec  6 16:26 latest.zip
我将wordpress放在了opt目录,切忌wordpress不要放在/root目录,不然nginx会有奇怪的文件权限问题,解决不了的那种
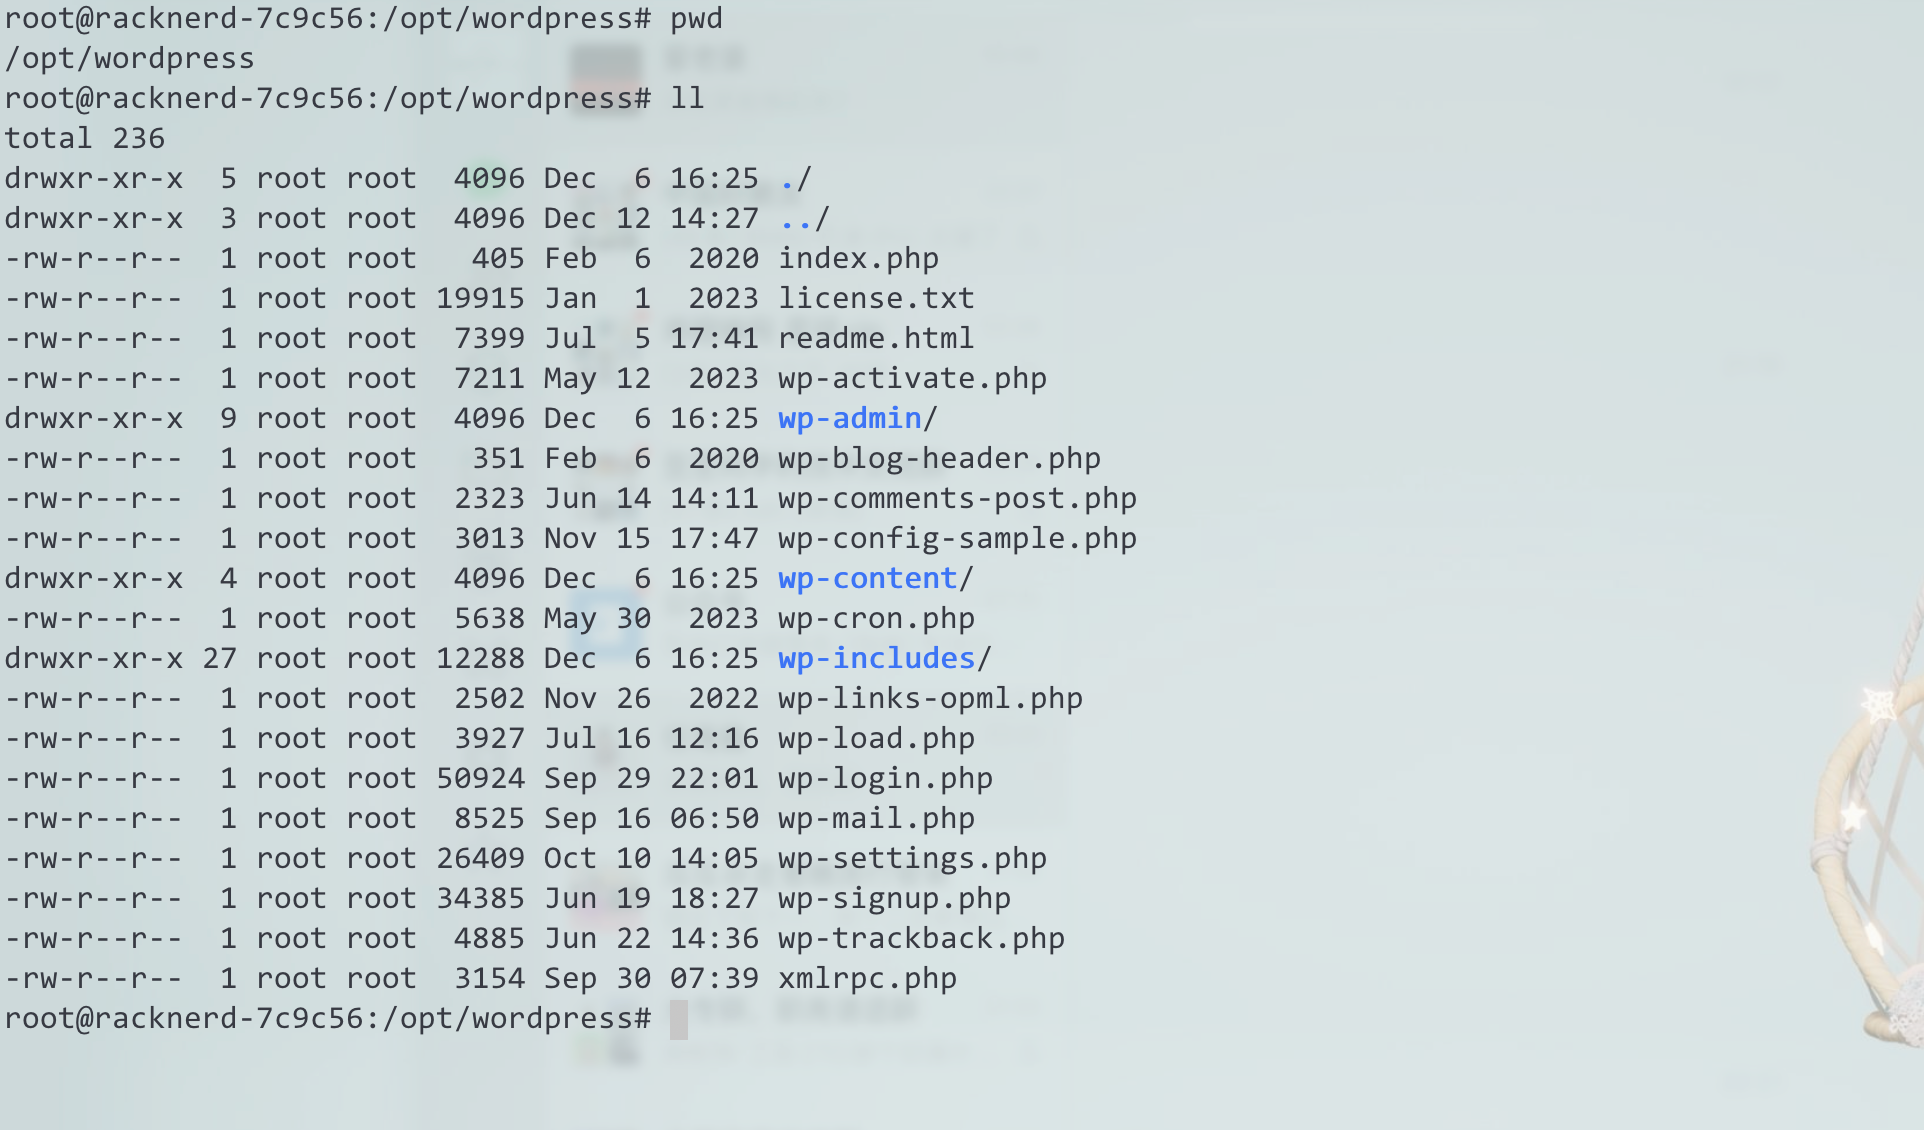
解压安装包
解压wordpress安装包,wordpress文件都在/opt/wordpess目录下
sudo apt install unzip
wordpress文件结构如下所示
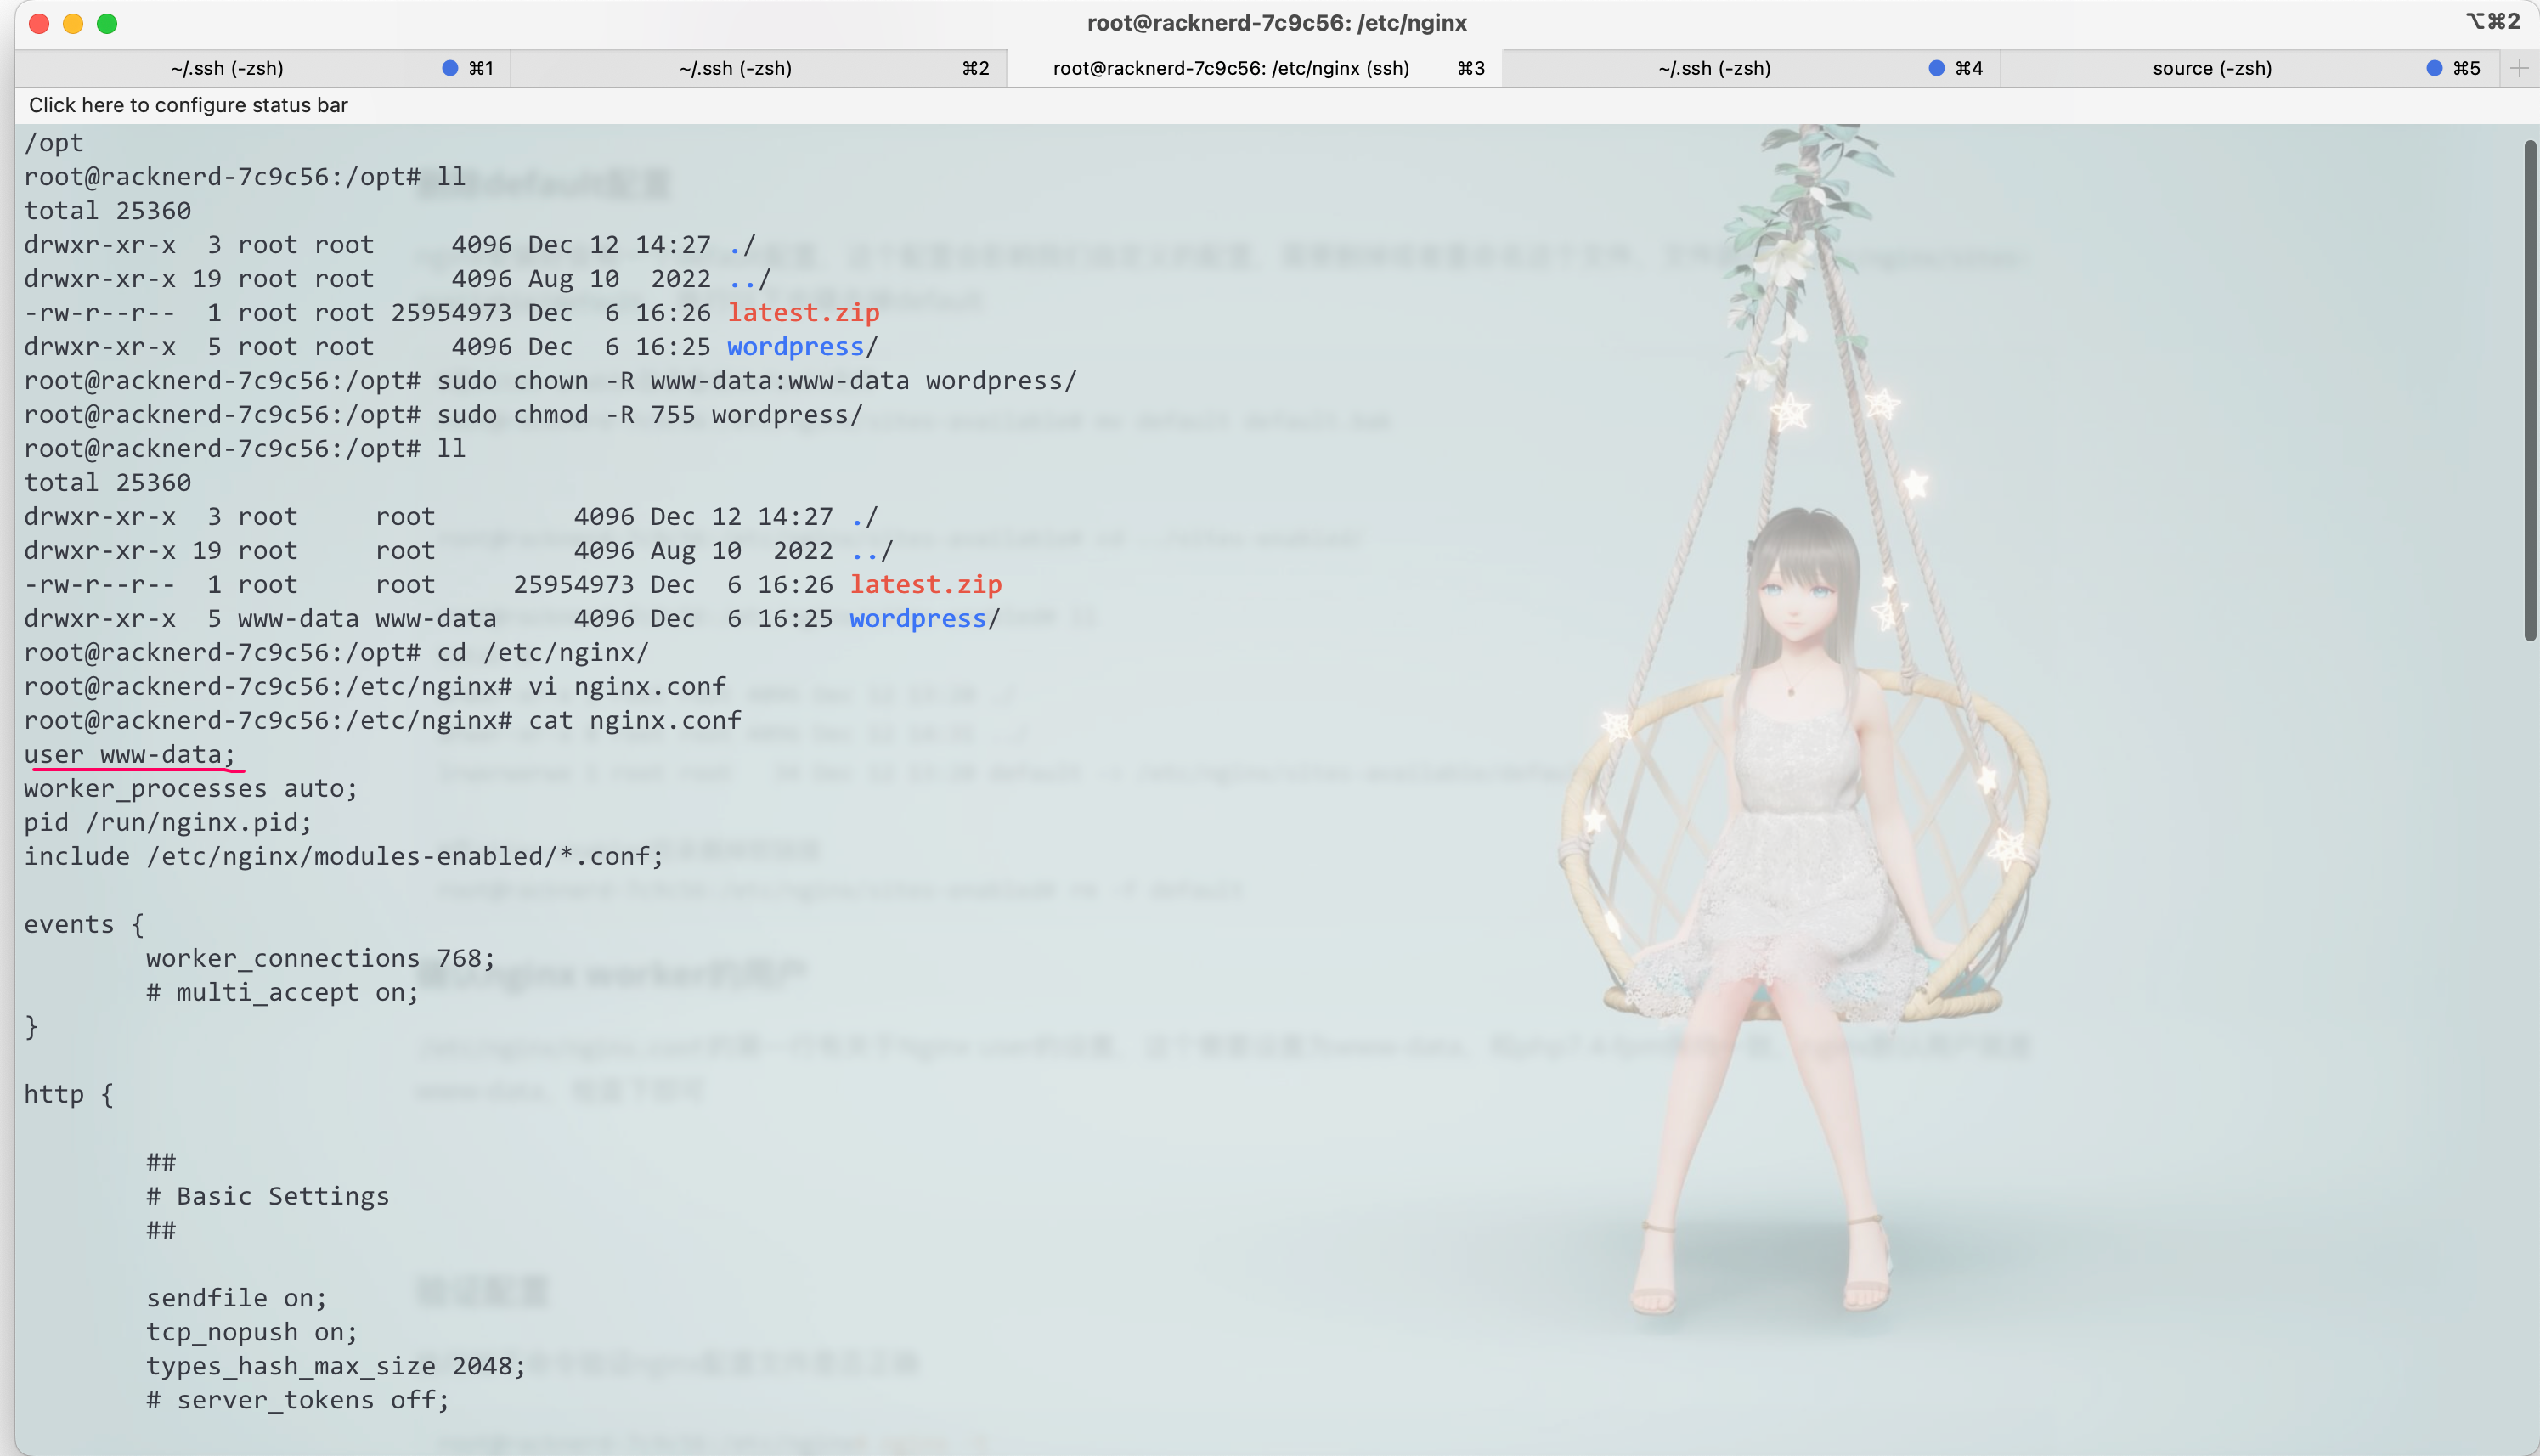
修改wordpress用户组和权限
这一步的权限比较重要,不然会有奇怪的权限问题,到opt目录下执行如下授权命令,解压之后wordpress目录的用户组都是root,需要
修改为www-data:www-data,目录权限修改为755,需要用到chown和chmod命令, -R为递归执行所有的子目录和文件
为何用户组要修改为www-data:www-data,因为php7.4-fpm的pool的用户组就是www-data:www-data
root@racknerd-7c9c56:/opt# pwd
/opt
root@racknerd-7c9c56:/opt# ll
total 25360
drwxr-xr-x  3 root root     4096 Dec 12 14:27 ./
drwxr-xr-x 19 root root     4096 Aug 10  2022 ../
-rw-r--r--  1 root root 25954973 Dec  6 16:26 latest.zip
drwxr-xr-x  5 root root     4096 Dec  6 16:25 wordpress/
root@racknerd-7c9c56:/opt# sudo chown -R www-data:www-data wordpress/
root@racknerd-7c9c56:/opt# sudo chmod -R 755 wordpress/
root@racknerd-7c9c56:/opt# ll
total 25360
drwxr-xr-x  3 root     root         4096 Dec 12 14:27 ./
drwxr-xr-x 19 root     root         4096 Aug 10  2022 ../
-rw-r--r--  1 root     root     25954973 Dec  6 16:26 latest.zip
drwxr-xr-x  5 www-data www-data     4096 Dec  6 16:25 wordpress/
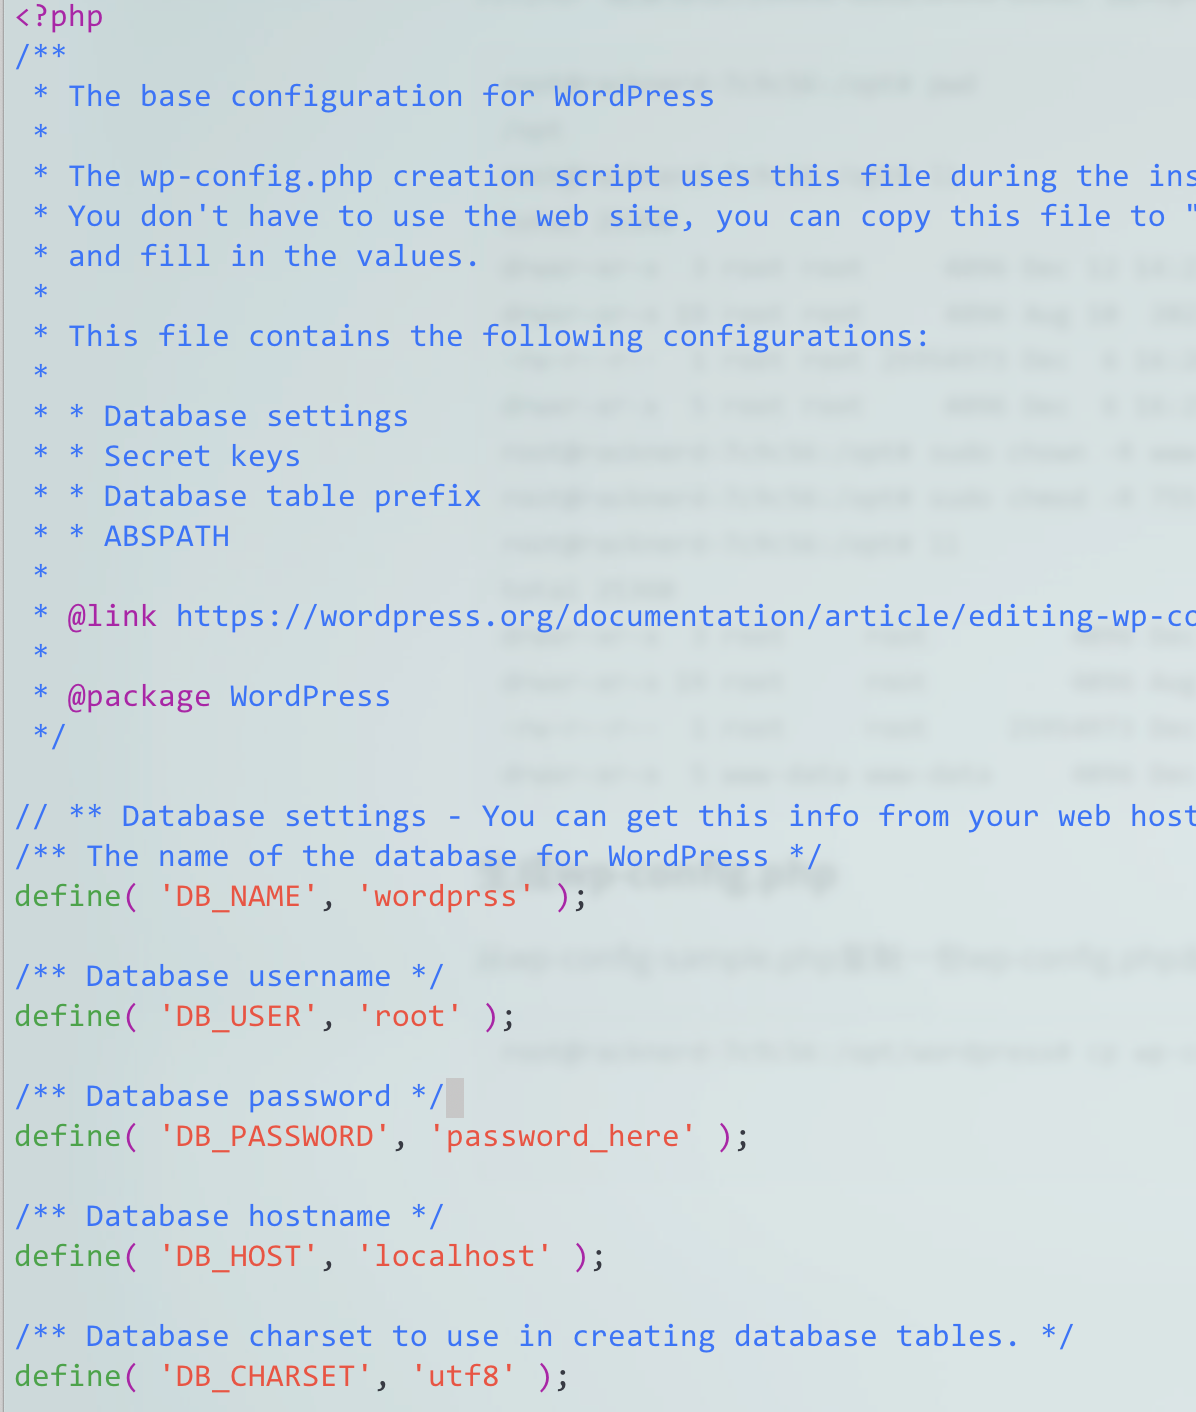
生成wp-config.php
从wp-config-sample.php复制一份wp-config.php出来,修改里面的db配置,改为之前本地安装的Mysql的账号密码数据库。
这一步如果不做的话,在安装页面会引导你填写配置生成一个wp-config.php文件。
root@racknerd-7c9c56:/opt/wordpress# cp wp-config-sample.php wp-config.php

root@racknerd-7c9c56:/opt/wordpress# vi wp-config.php
配置nginx
下载好wordpress安装包之后,下面就是配置nginx访问wordpress了,这样就可以在浏览器页面访问wordpress安装页面
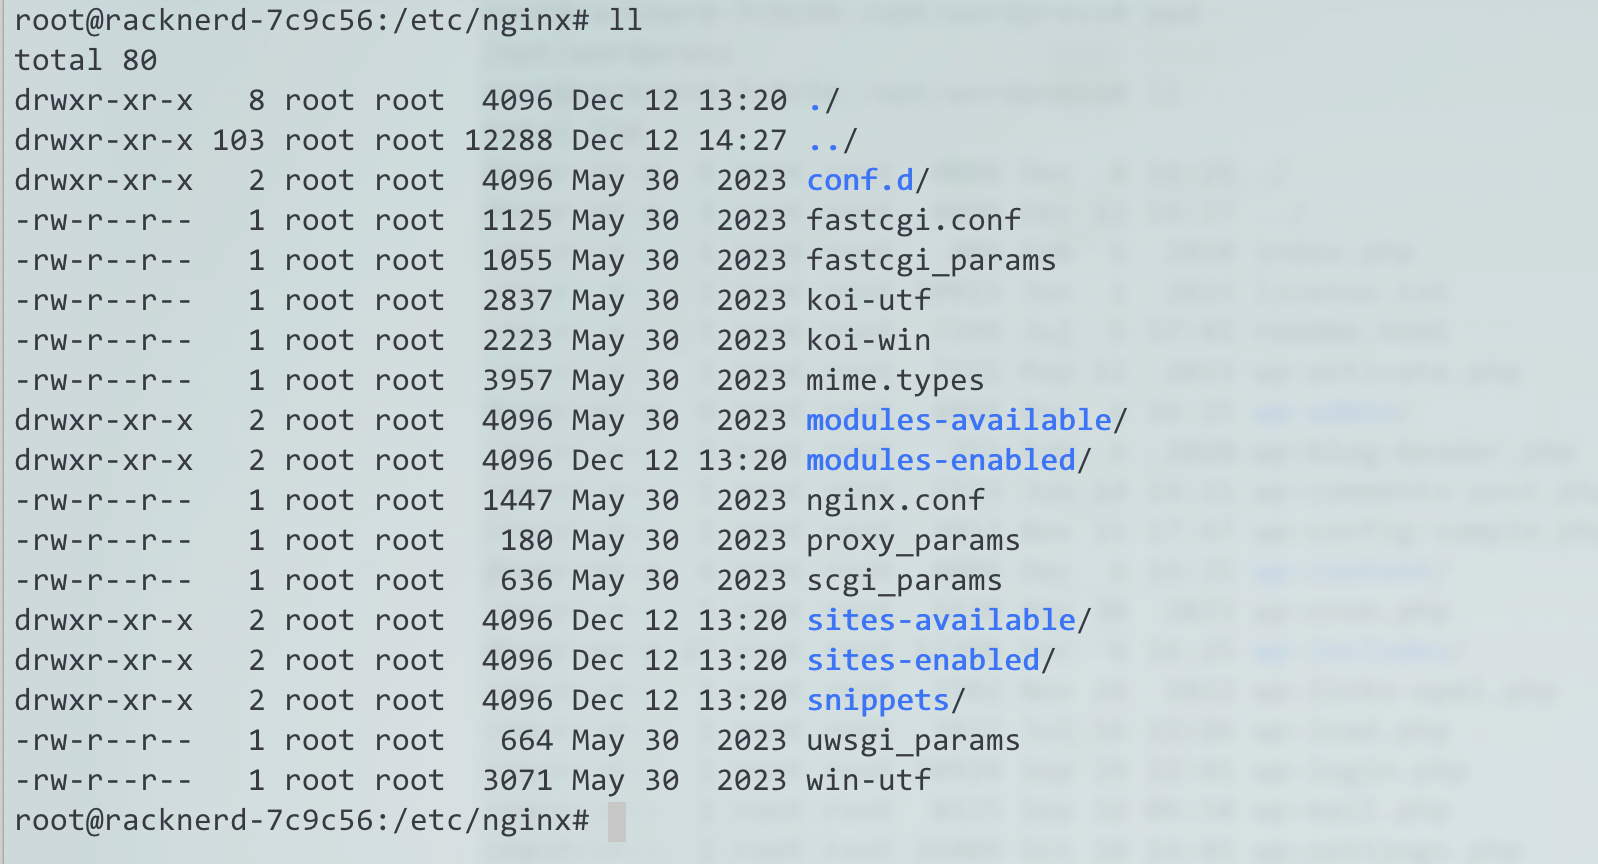
nginx配置文件在/etc/nginx/nginx.conf,/etc/nginx/conf.d/用于放自定义配置文件,nginx版本为1.18.0
自定义wordpress配置文件
不修改默认的配置文件,我们在/etc/nginx/conf.d目录下新建wordpress自己的配置文件
root@racknerd-7c9c56:/etc/nginx/conf.d# touch wp.conf
root@racknerd-7c9c56:/etc/nginx/conf.d# vi wp.conf
将以下配置更新到wp.conf里,有几个比较重要的配置解释一下
- root,这个地方配置的你的wordpress安装包的路径,配置错误会发生404等错误
- server_name,这个如果没域名的话就配置localhost
- fastcgi_pass, 这个地方要配置fpm的服务地址,注意fpm的版本,由于安装的是7.4,所以fastcpgi配置的如下unix地址
修改好自己机器的实际配置,粘贴到wp.conf,执行:wp 保存配置
server {
            listen 80;
            root /opt/wordpress;
            index index.php index.html;
            server_name localhost;

            location / {
                 try_files $uri $uri/ /index.php?$args;
            }

            location ~ \.php$ {
                 include snippets/fastcgi-php.conf;
                 fastcgi_pass unix:/run/php/php7.4-fpm.sock;
            }

            location ~ /\.ht {
                deny all;
            }

            location = /favicon.ico {
                  log_not_found off;
                  access_log off;
            }

            location = /robots.txt {
                  allow all;
                  log_not_found off;
                  access_log off;
           }

            location ~* \.(js|css|png|jpg|jpeg|gif|ico)$ {
                  expires max;
                  log_not_found off;
           }
}
删除default配置
nginx安装好会有一个default配置,这个配置会影响我们自定义的配置,需要删掉或者重命名这个文件,文件路径为/etc/nginx/sites-available/default,执行以下步骤去掉default
#在sites-enable目录备份default文件
root@racknerd-7c9c56:/etc/nginx/sites-available# mv default default.bak


root@racknerd-7c9c56:/etc/nginx/sites-available# cd ../sites-enabled/

root@racknerd-7c9c56:/etc/nginx/sites-enabled# ll
total 8
drwxr-xr-x 2 root root 4096 Dec 12 13:20 ./
drwxr-xr-x 8 root root 4096 Dec 12 14:31 ../
lrwxrwxrwx 1 root root   34 Dec 12 13:20 default -> /etc/nginx/sites-available/default

#在sites-enabled目录删掉软链接
root@racknerd-7c9c56:/etc/nginx/sites-enabled# rm -f default
确认nginx worker的用户
/etc/nginx/nginx.conf的第一行有关于Nginx user的设置,这个需要设置为www-data,和php7.4-fpm保持一致,nginx默认用户就是www-data,检查下即可

验证配置
执行如下命令验证nginx配置文件是否正确
root@racknerd-7c9c56:/etc/nginx# nginx -t
nginx: the configuration file /etc/nginx/nginx.conf syntax is ok
nginx: configuration file /etc/nginx/nginx.conf test is successful
重启Nginx
配置文件验证没问题之后,重启Nginx
sudo systemctl restart nginx
如果启动失败,执行以下2个命令排查错误原因
sudo systemctl status nginx.service

journalctl -xe
nginx默认日志路径为/var/log/nginx/access.log和/var/log/nginx/error.log,也可以通过nginx日志排查问题
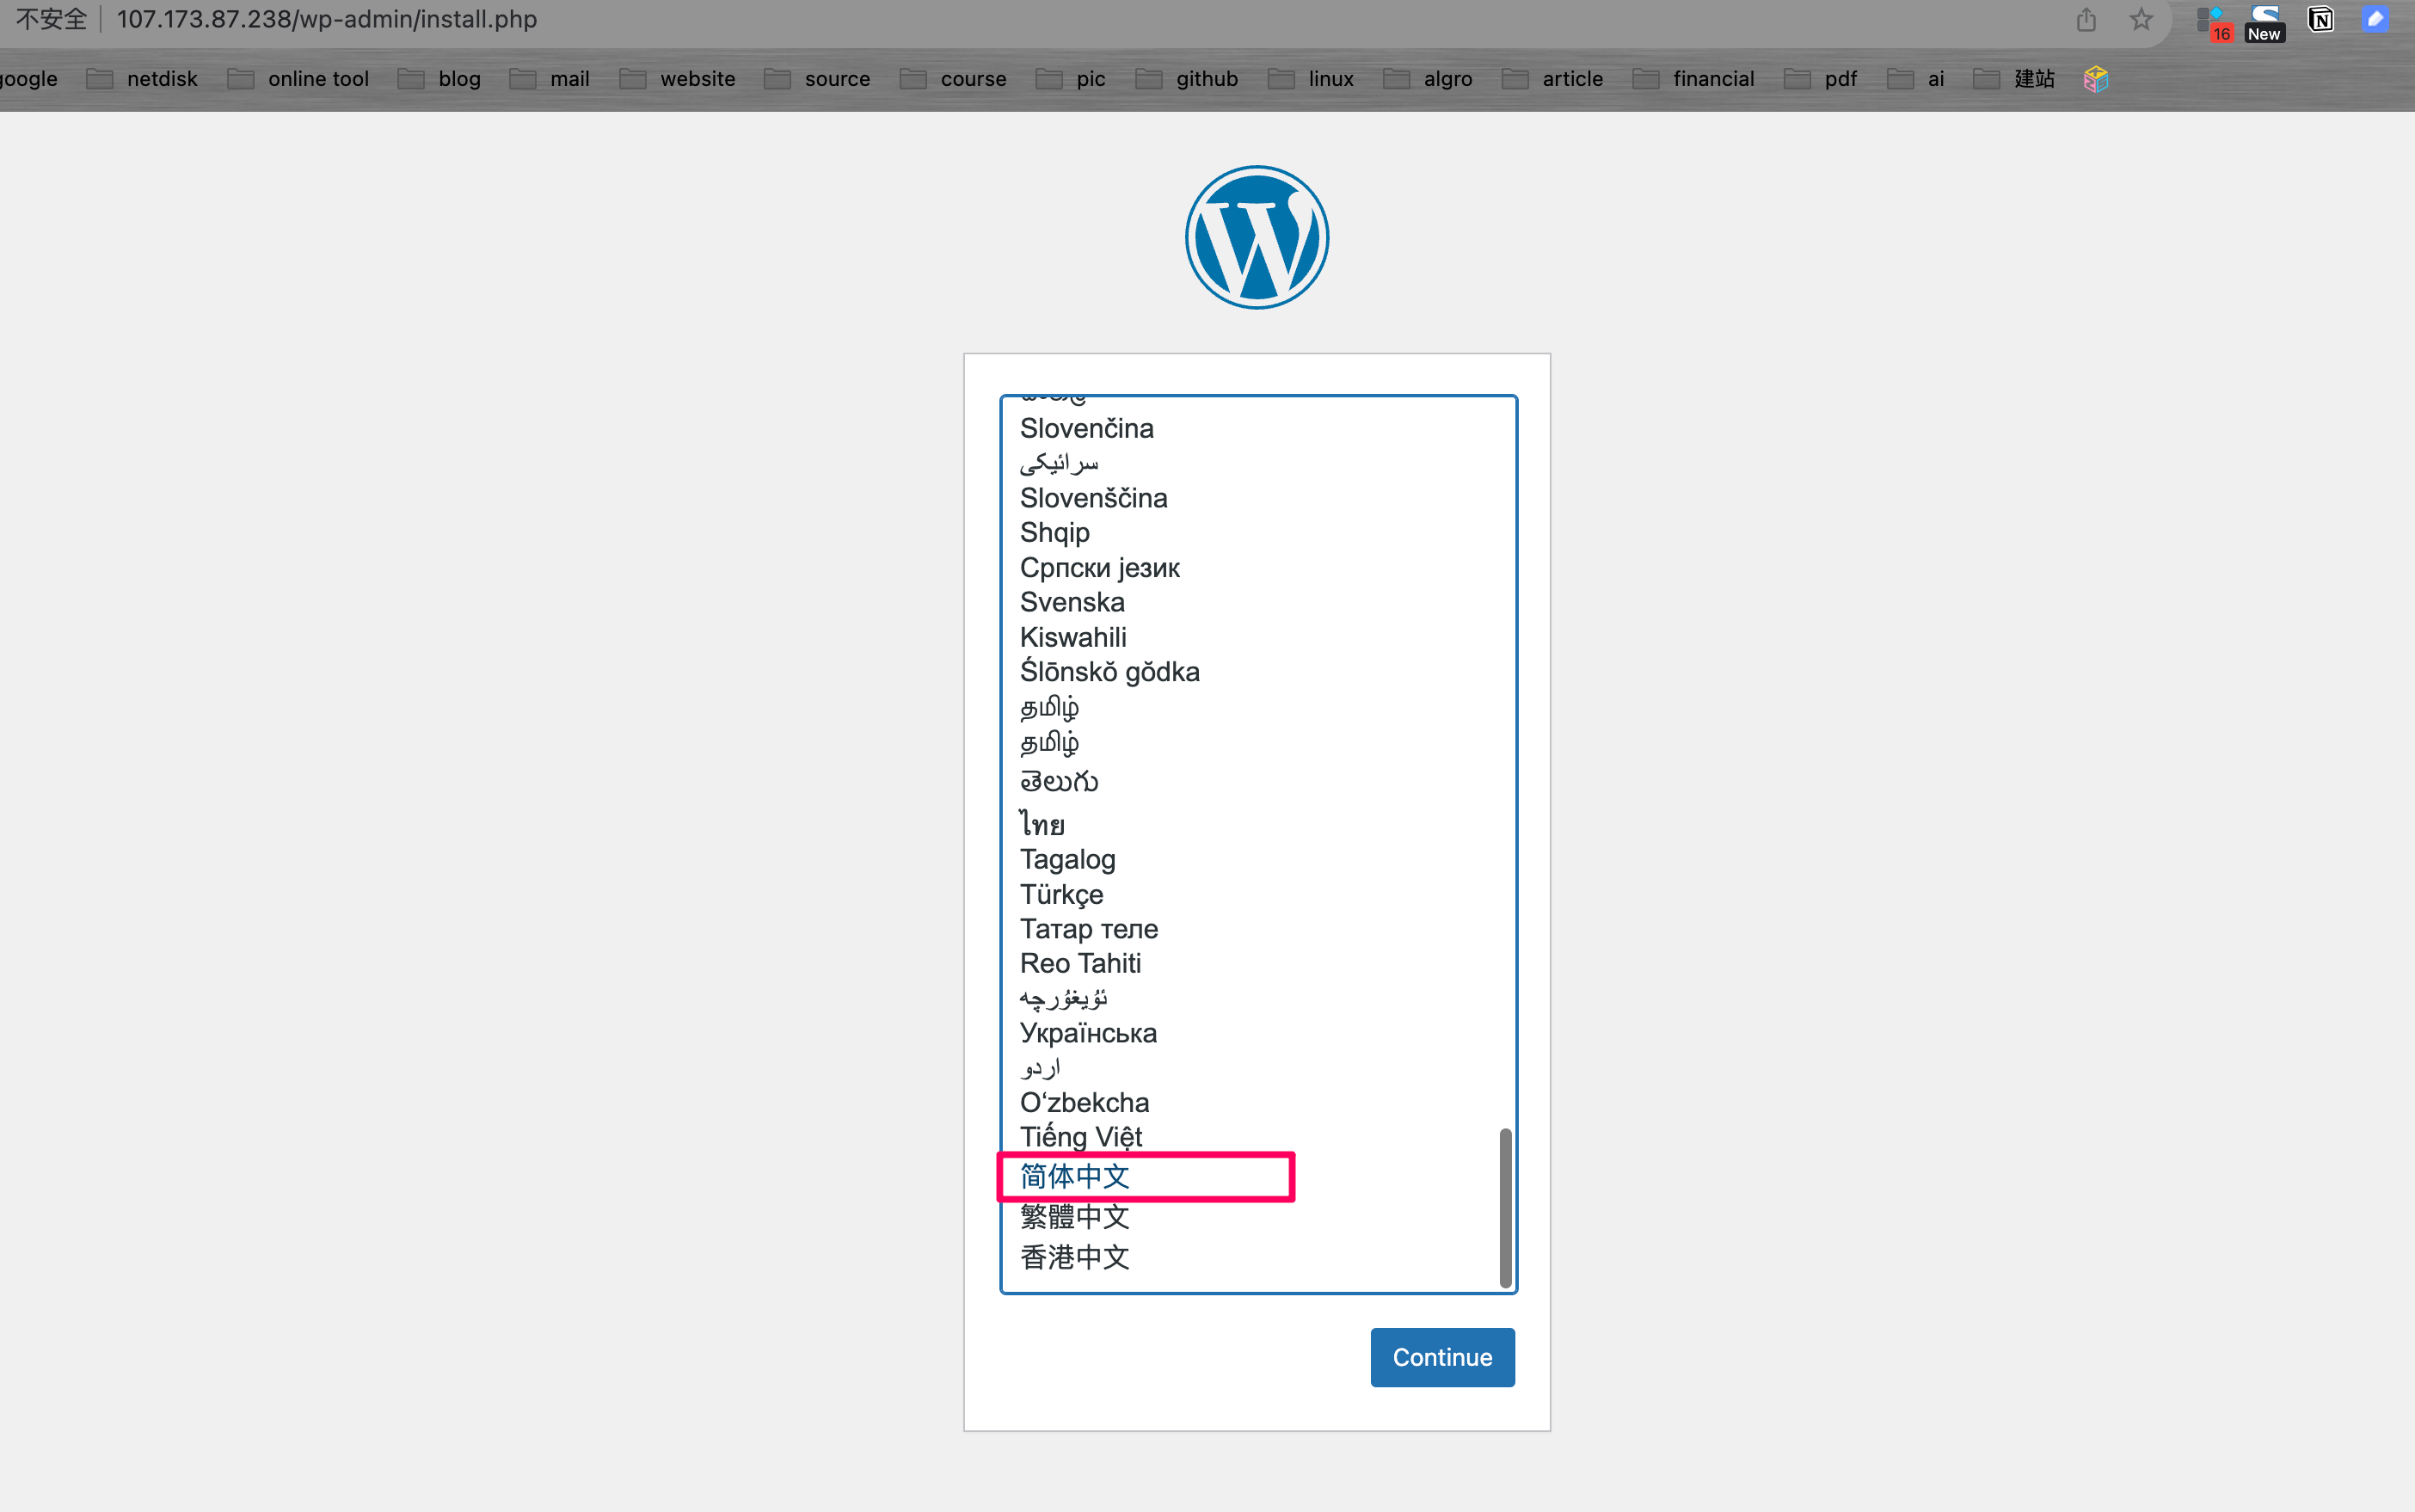
安装wordpress
上面步骤一切顺利的话,接下来就到了安装wordpress的环节了,打开浏览器,输入以下地址,其中107.173.87.238是我机器的ip,80是nginx http的端口,替换为自己的ip即可
http://107.173.87.238/wp-admin/install.php
进入安装页面,语言选择简体中文
输入必要信息之后进行安装,密码可以自定义,也可以用wp生成的强密码
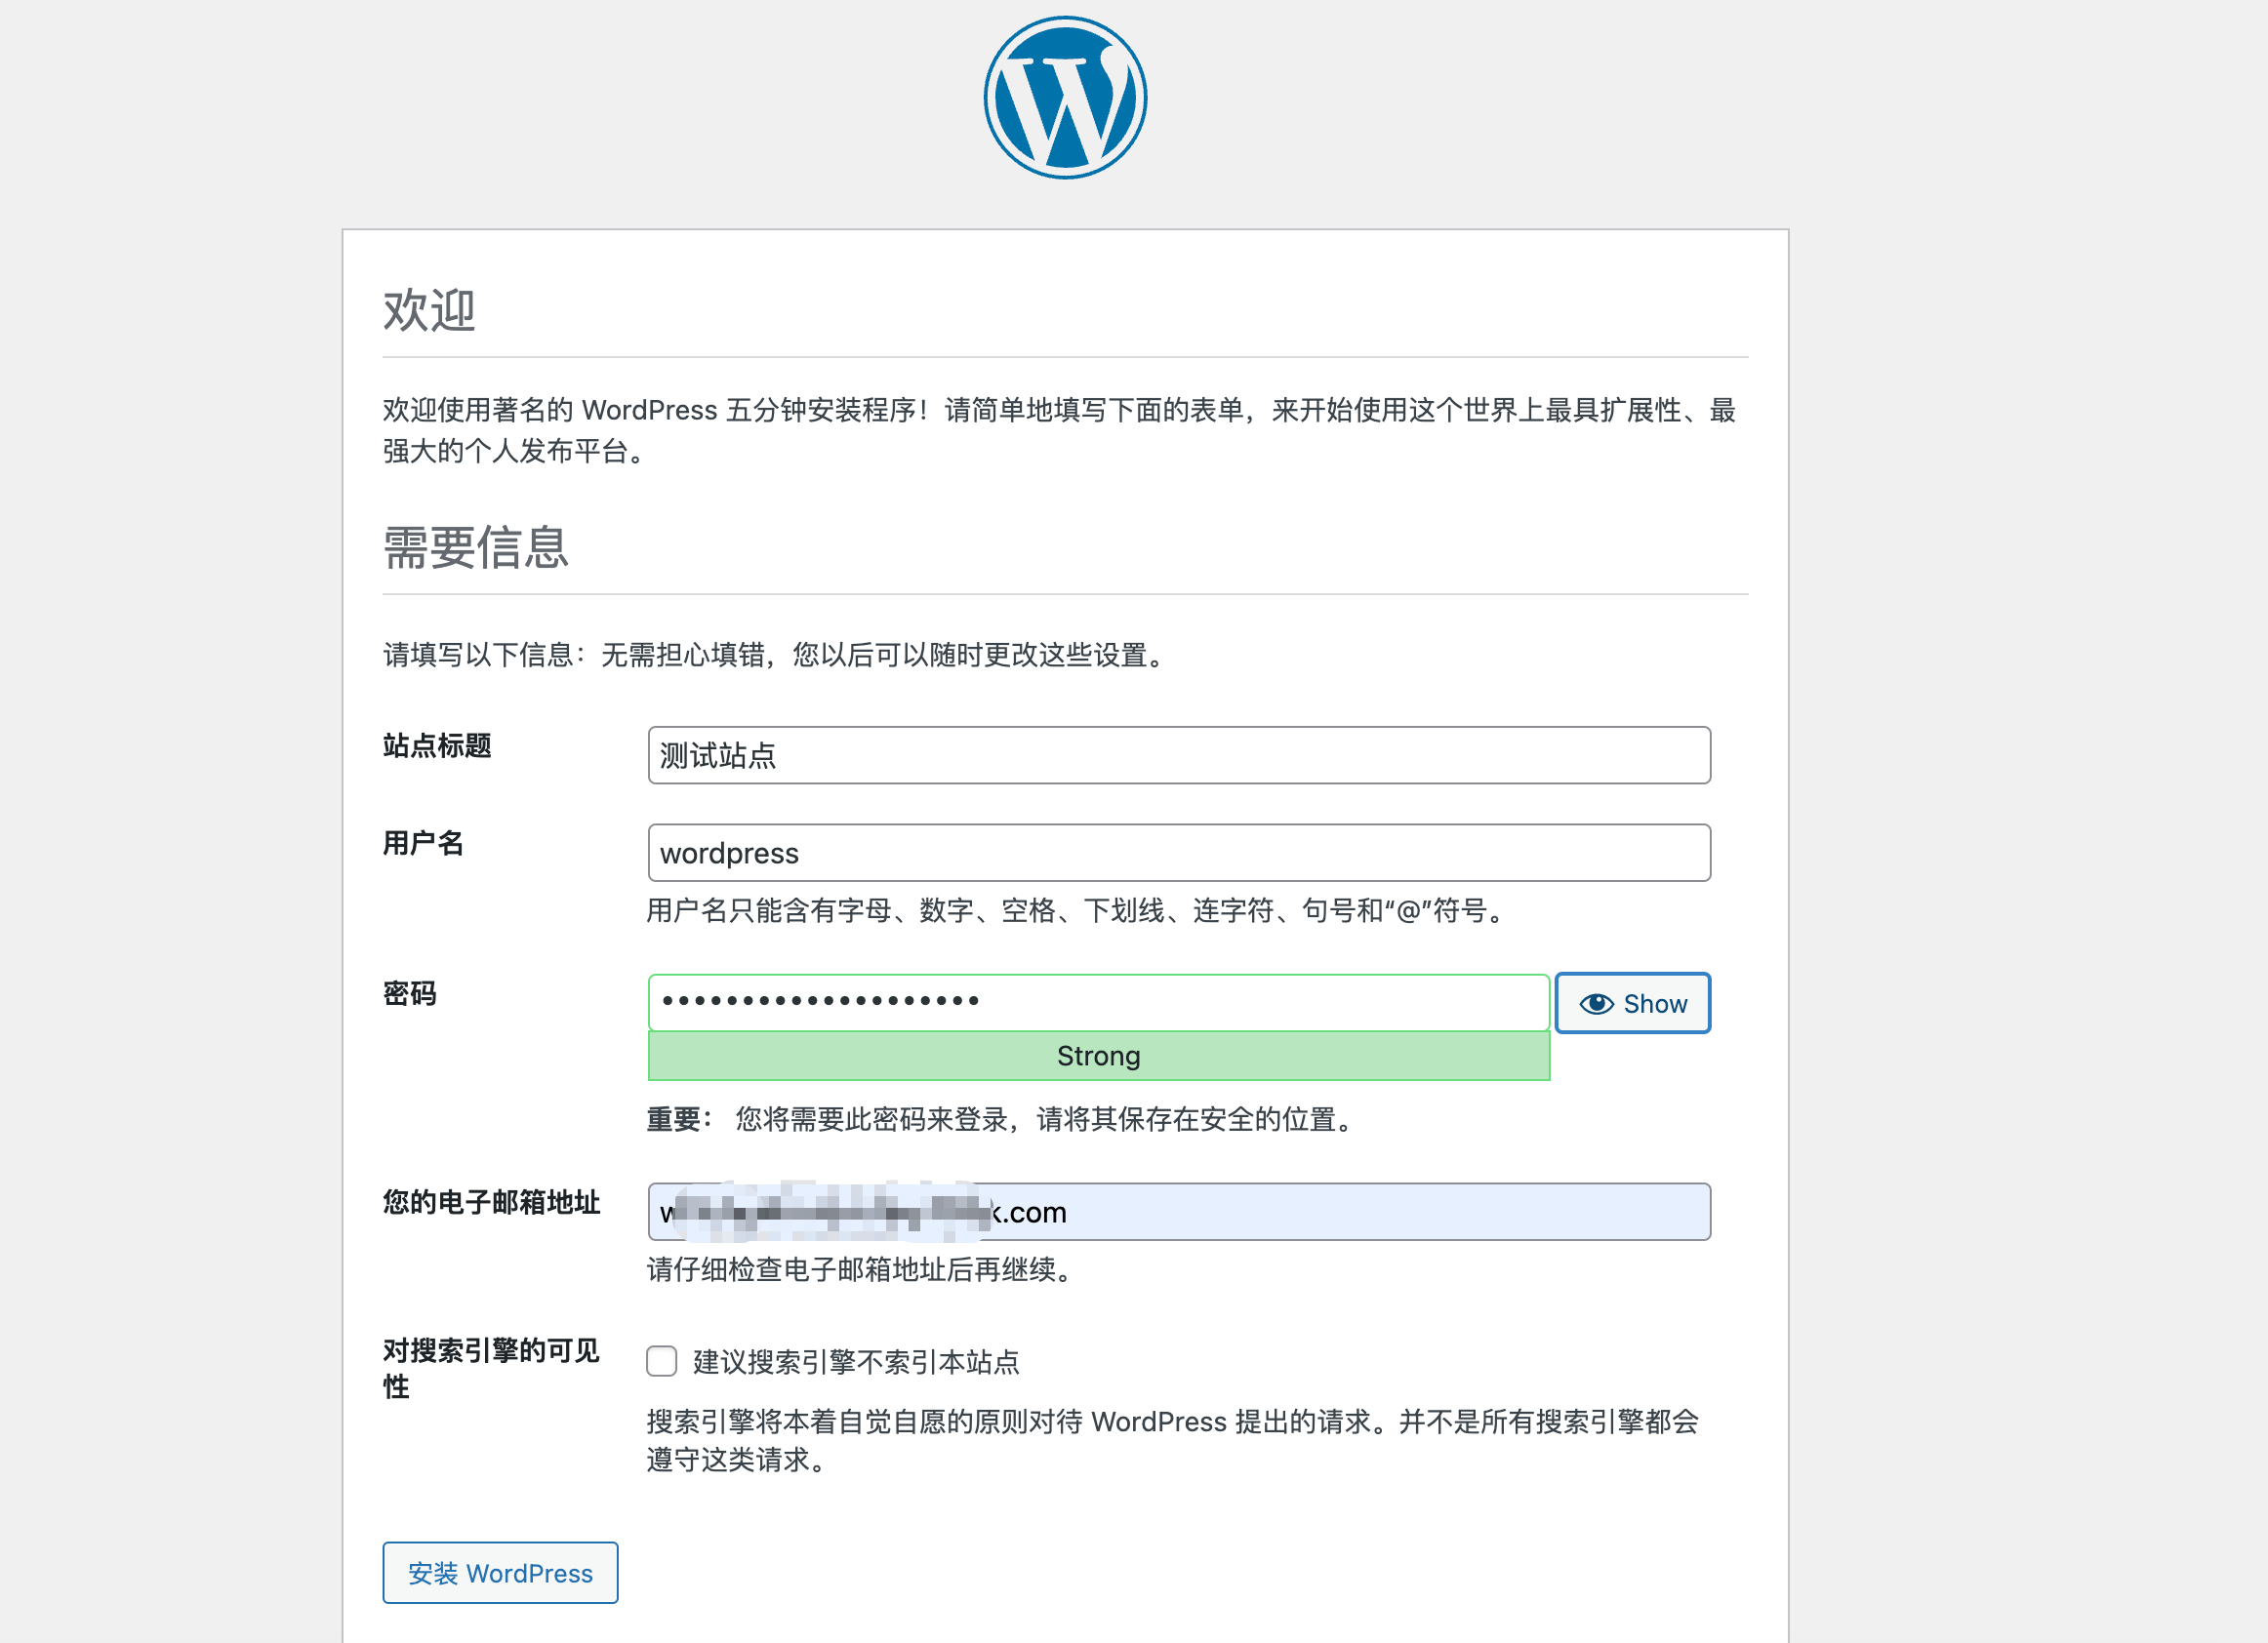
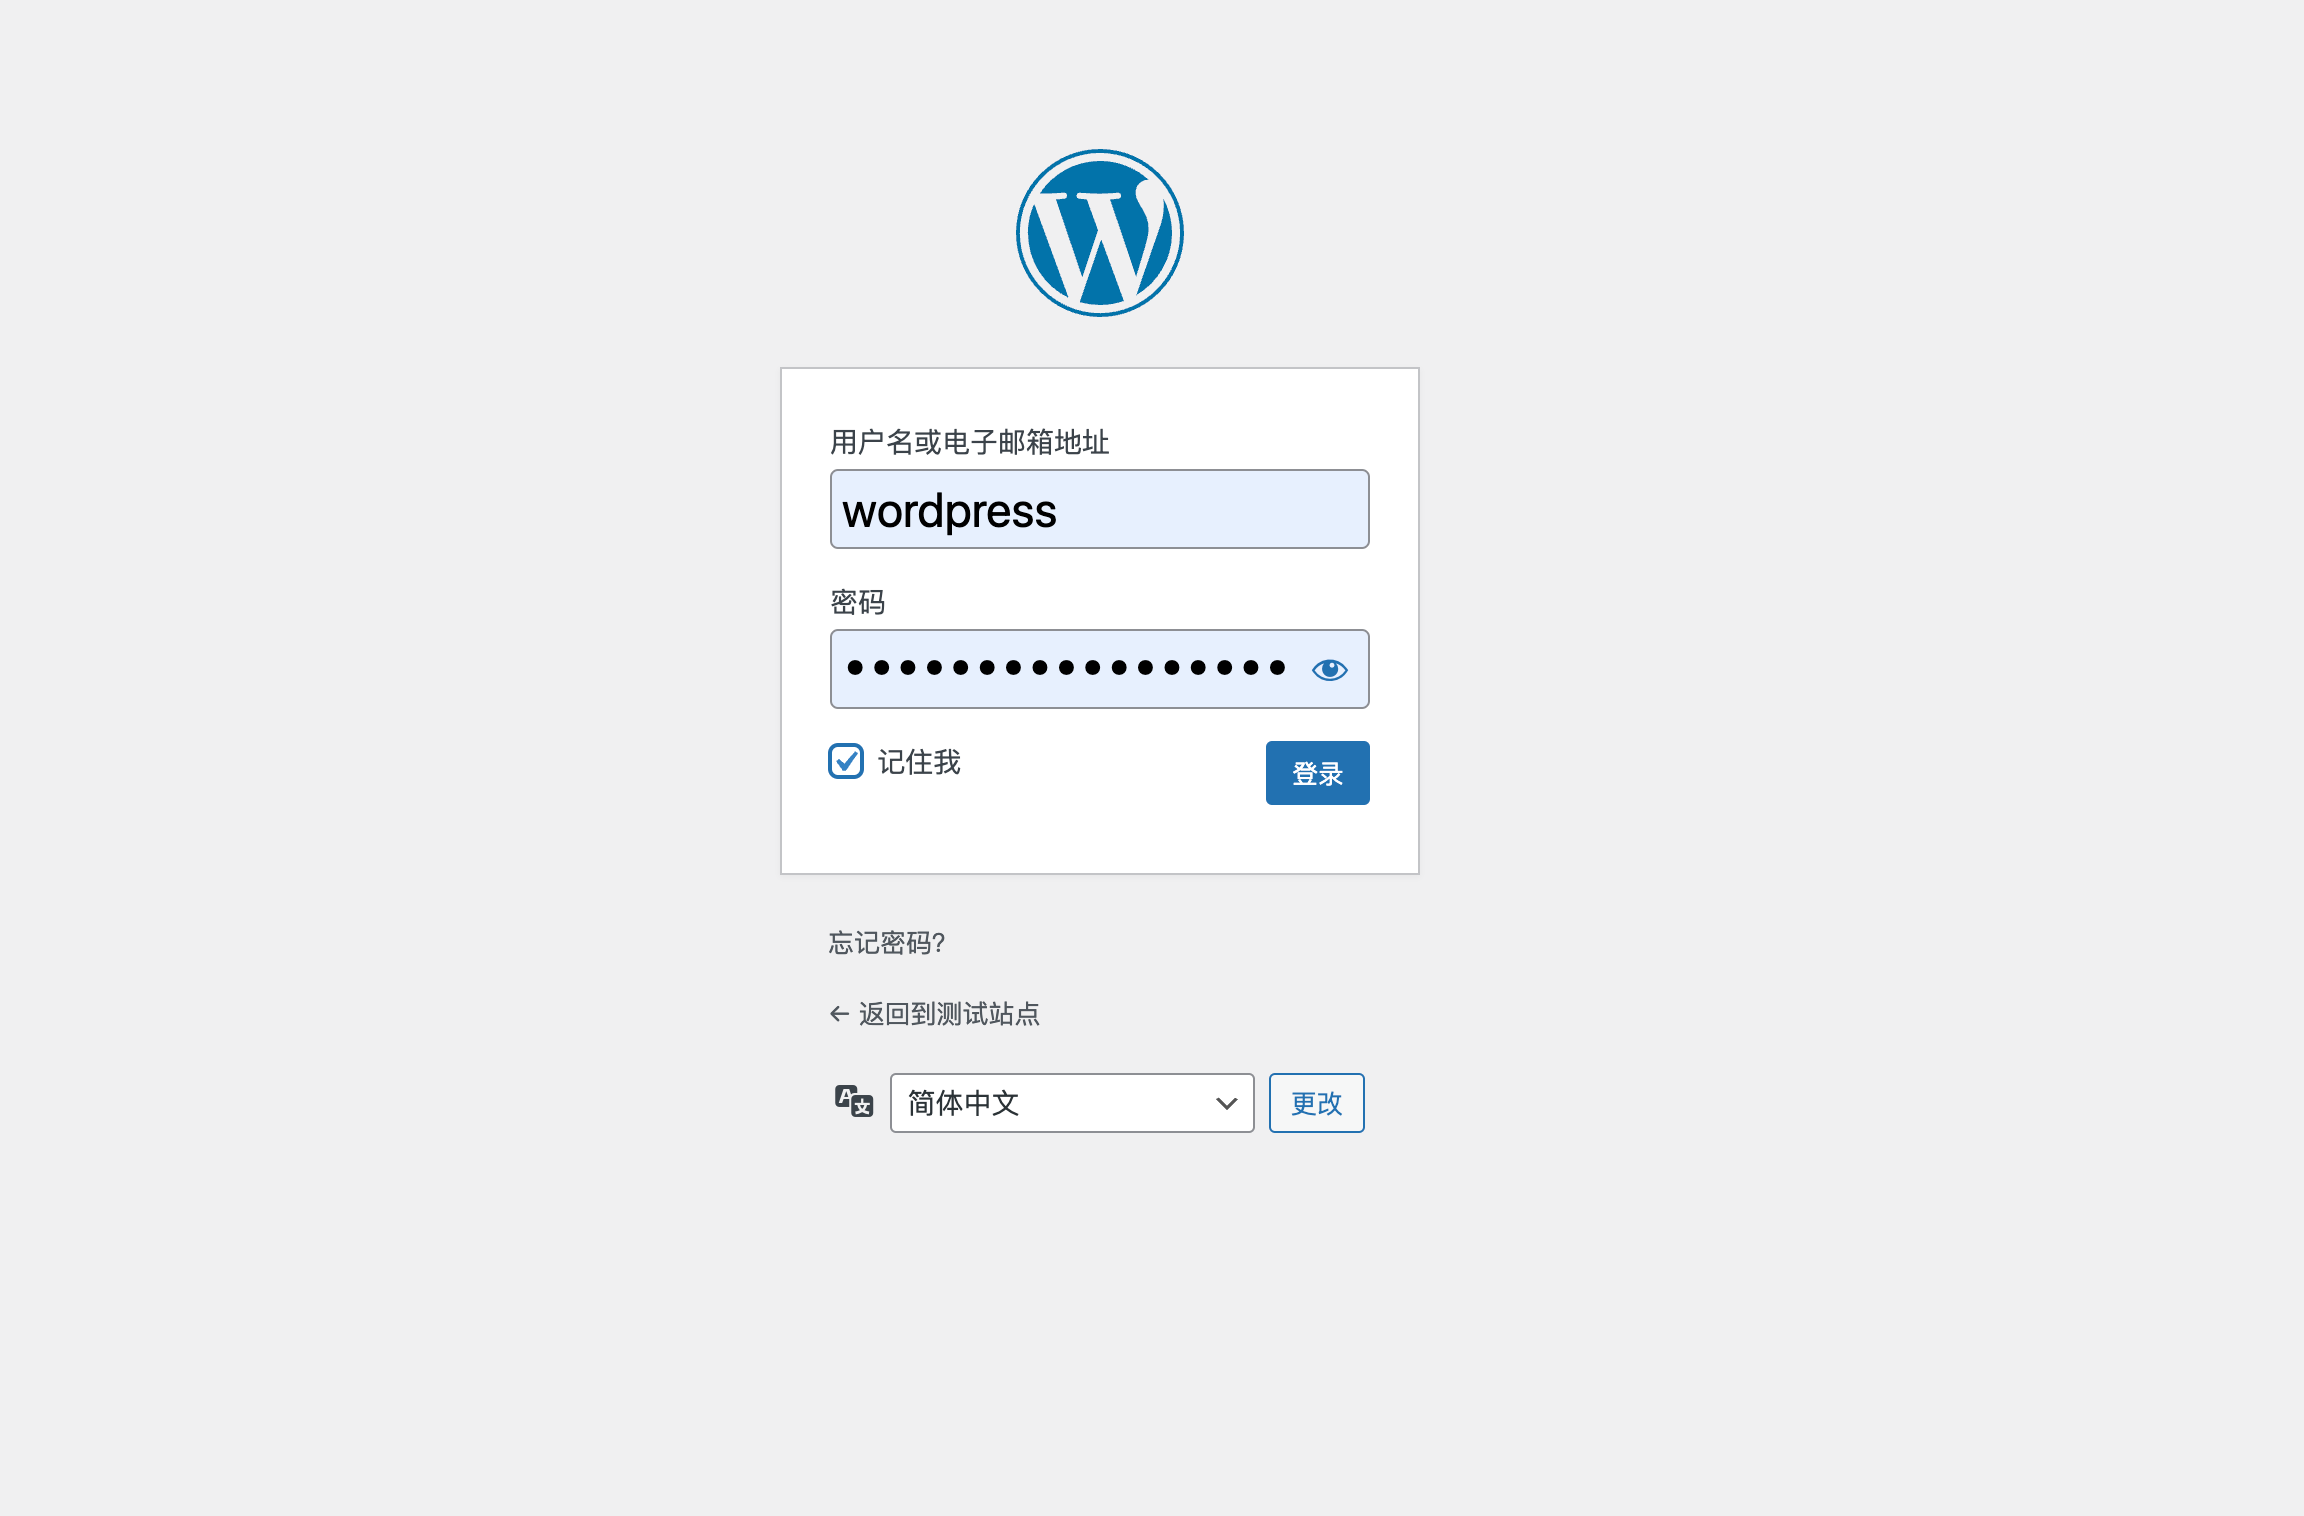
之后进行登录,就会进入wordpress管理后台,装修自己的网站了
配置ssl
上述步骤使用nginx+wordprss+mysql安装好了wordpress,已经可以访问了。
为了网站安全性以及隐藏服务器ip,下面为我们的网站配置ssl以及域名解析。
配置ss之后,所有的请求都会走https,安全会会得到很大的提高,通过域名访问,也会显得更加的专业,以及保护我们的服务器的ip,减
少被黑的风险。配域名相比ip也比ip更容易记一点。
前置依赖
- 一个属于你的域名,域名需要购买,便宜的比如godaddy上10块,20块左右就能买到一个域名了。其他的google,namecheap之类的也能买到。
- 一个dns解析器,将域名解析到服务器ip。一般域名厂商都有这个功能。
我个人比较喜欢cloudflare,功能强大,国际知名大厂,个人免费,还好使,支持中文,还能生成免费的ssl证书。
接下来以cloudflare为例,介绍如何配置域名解析,生成ssl证书,以及Nginx如何配置ssl。
生成ssl证书
没账号的可以先注册一个cloudflare账号,用邮箱注册。
打开 cloudflare控制台,需要先将域名托管到cloudflare,才能配置域名解析。其他厂商自行搜索解决。
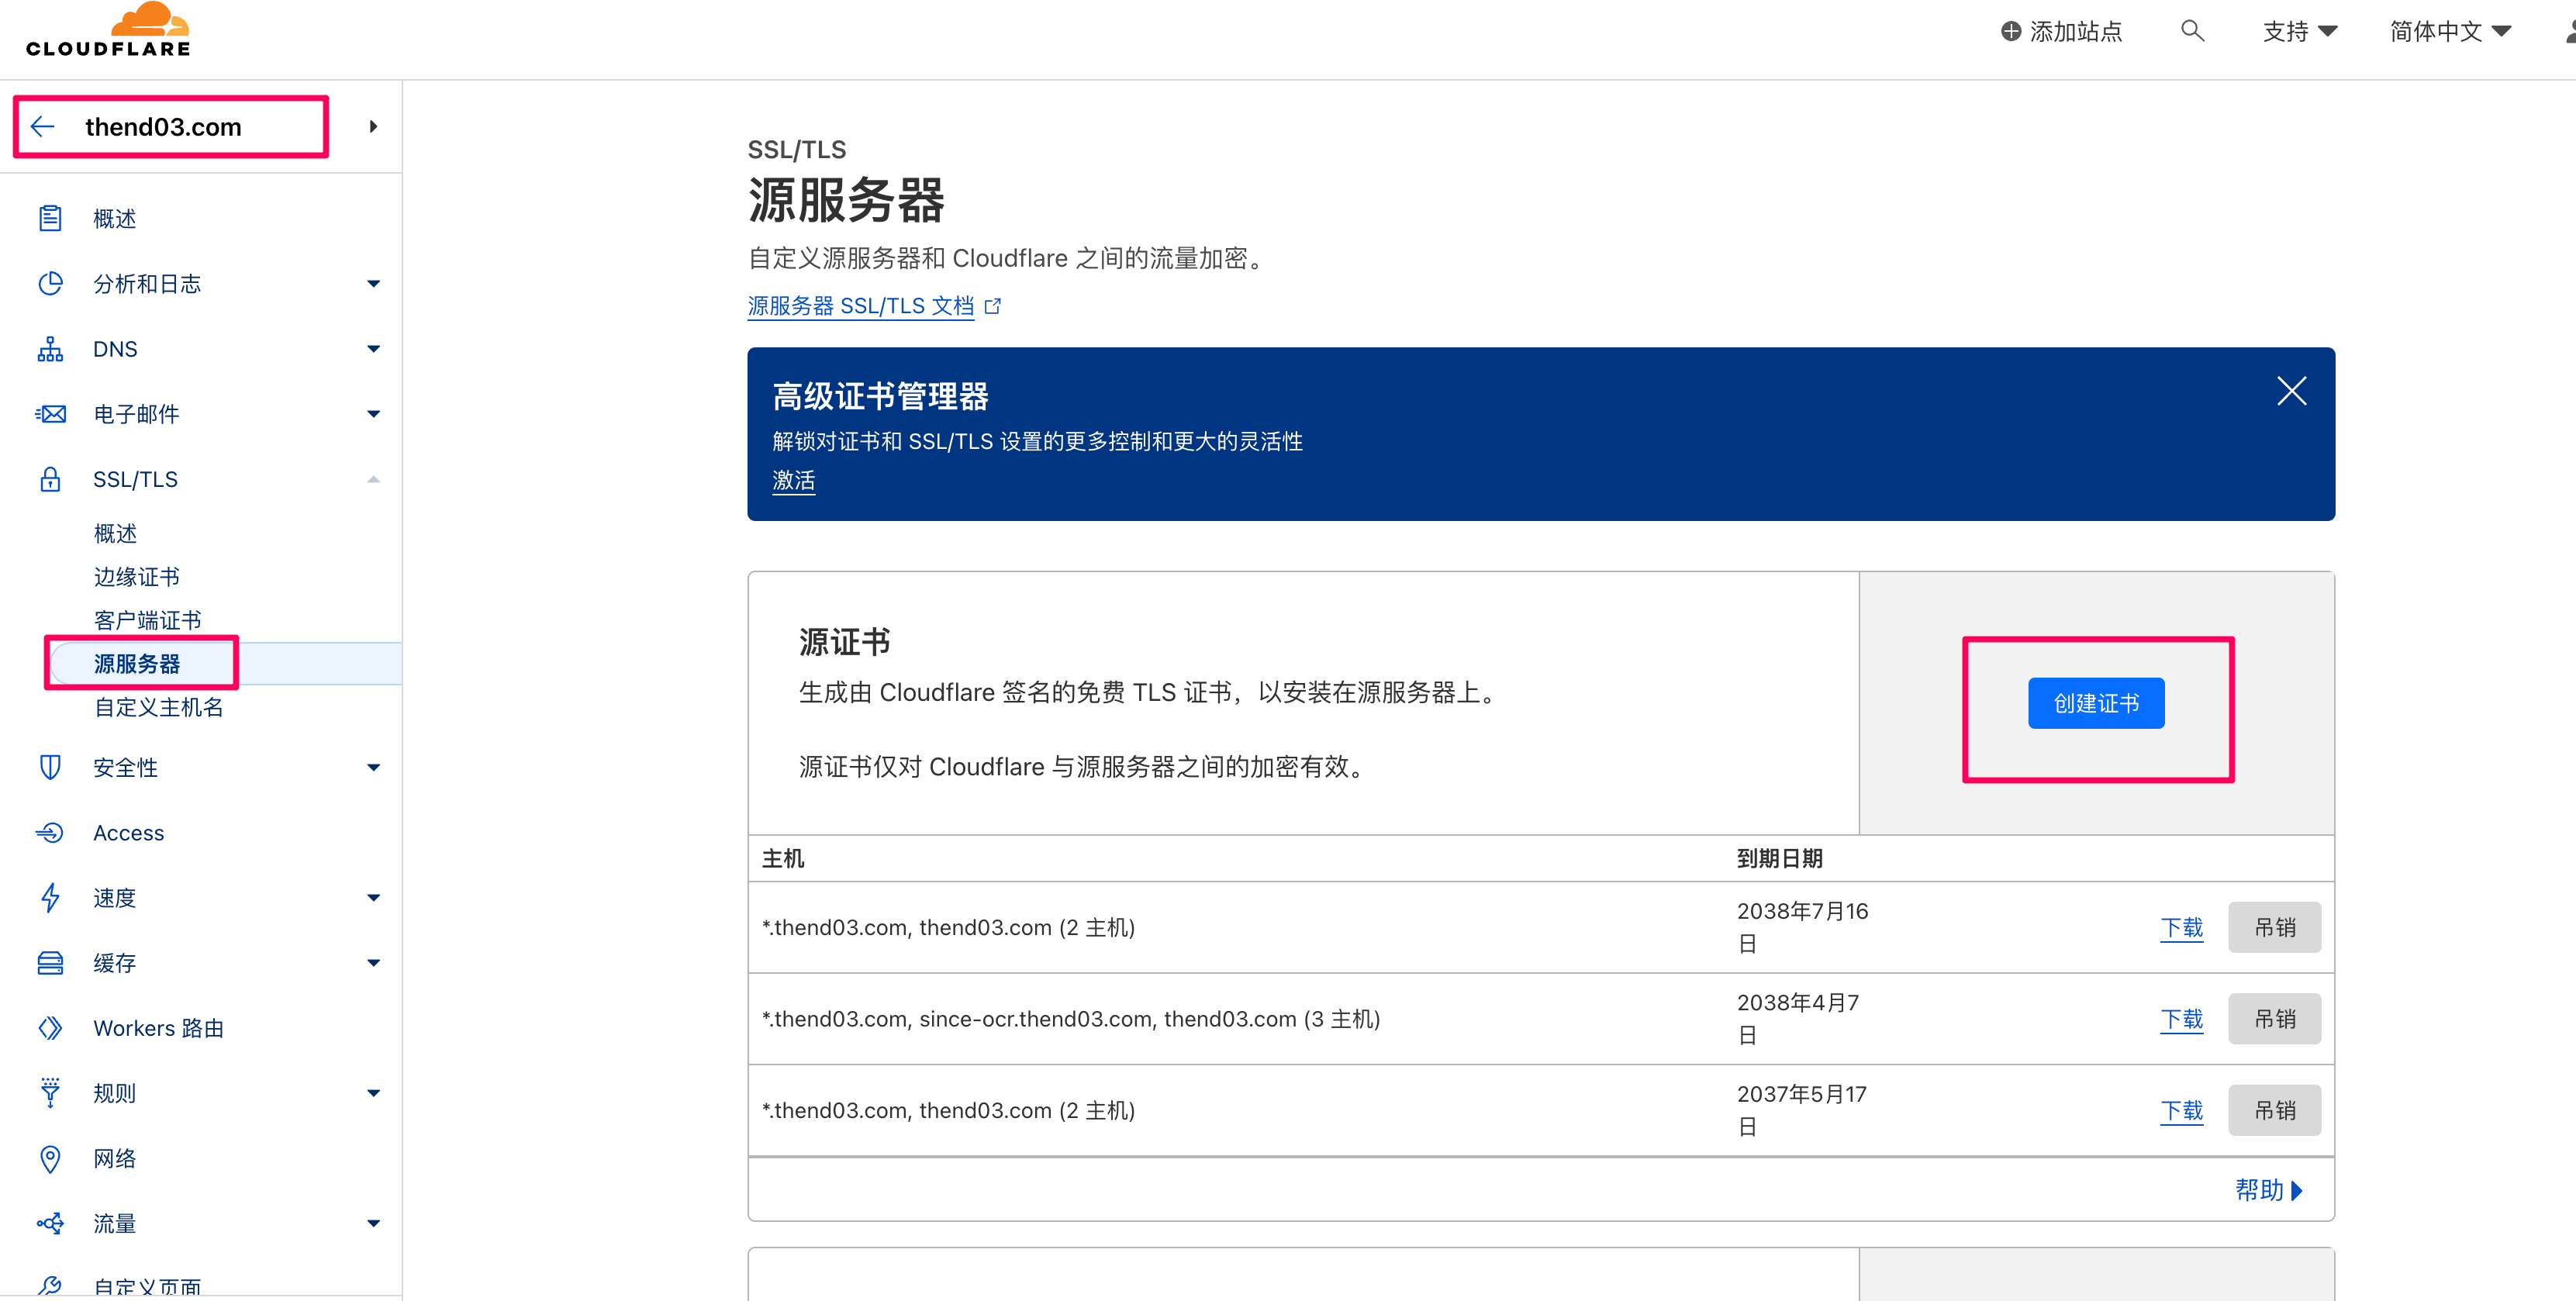
选中要配置解析的域名,打开左侧的SSL/TLS,选中源服务器,右侧点击创建证书。这个证书是用来安装到服务器上的。
进入创建页面,会有一些选项,默认即可。主机名对应nginx server{}块里的server_name,可以自定义,创建证书的时候和服务器上配
置的server_name保持一致即可。支持通配符。证书有效期最长是15年,够用了。
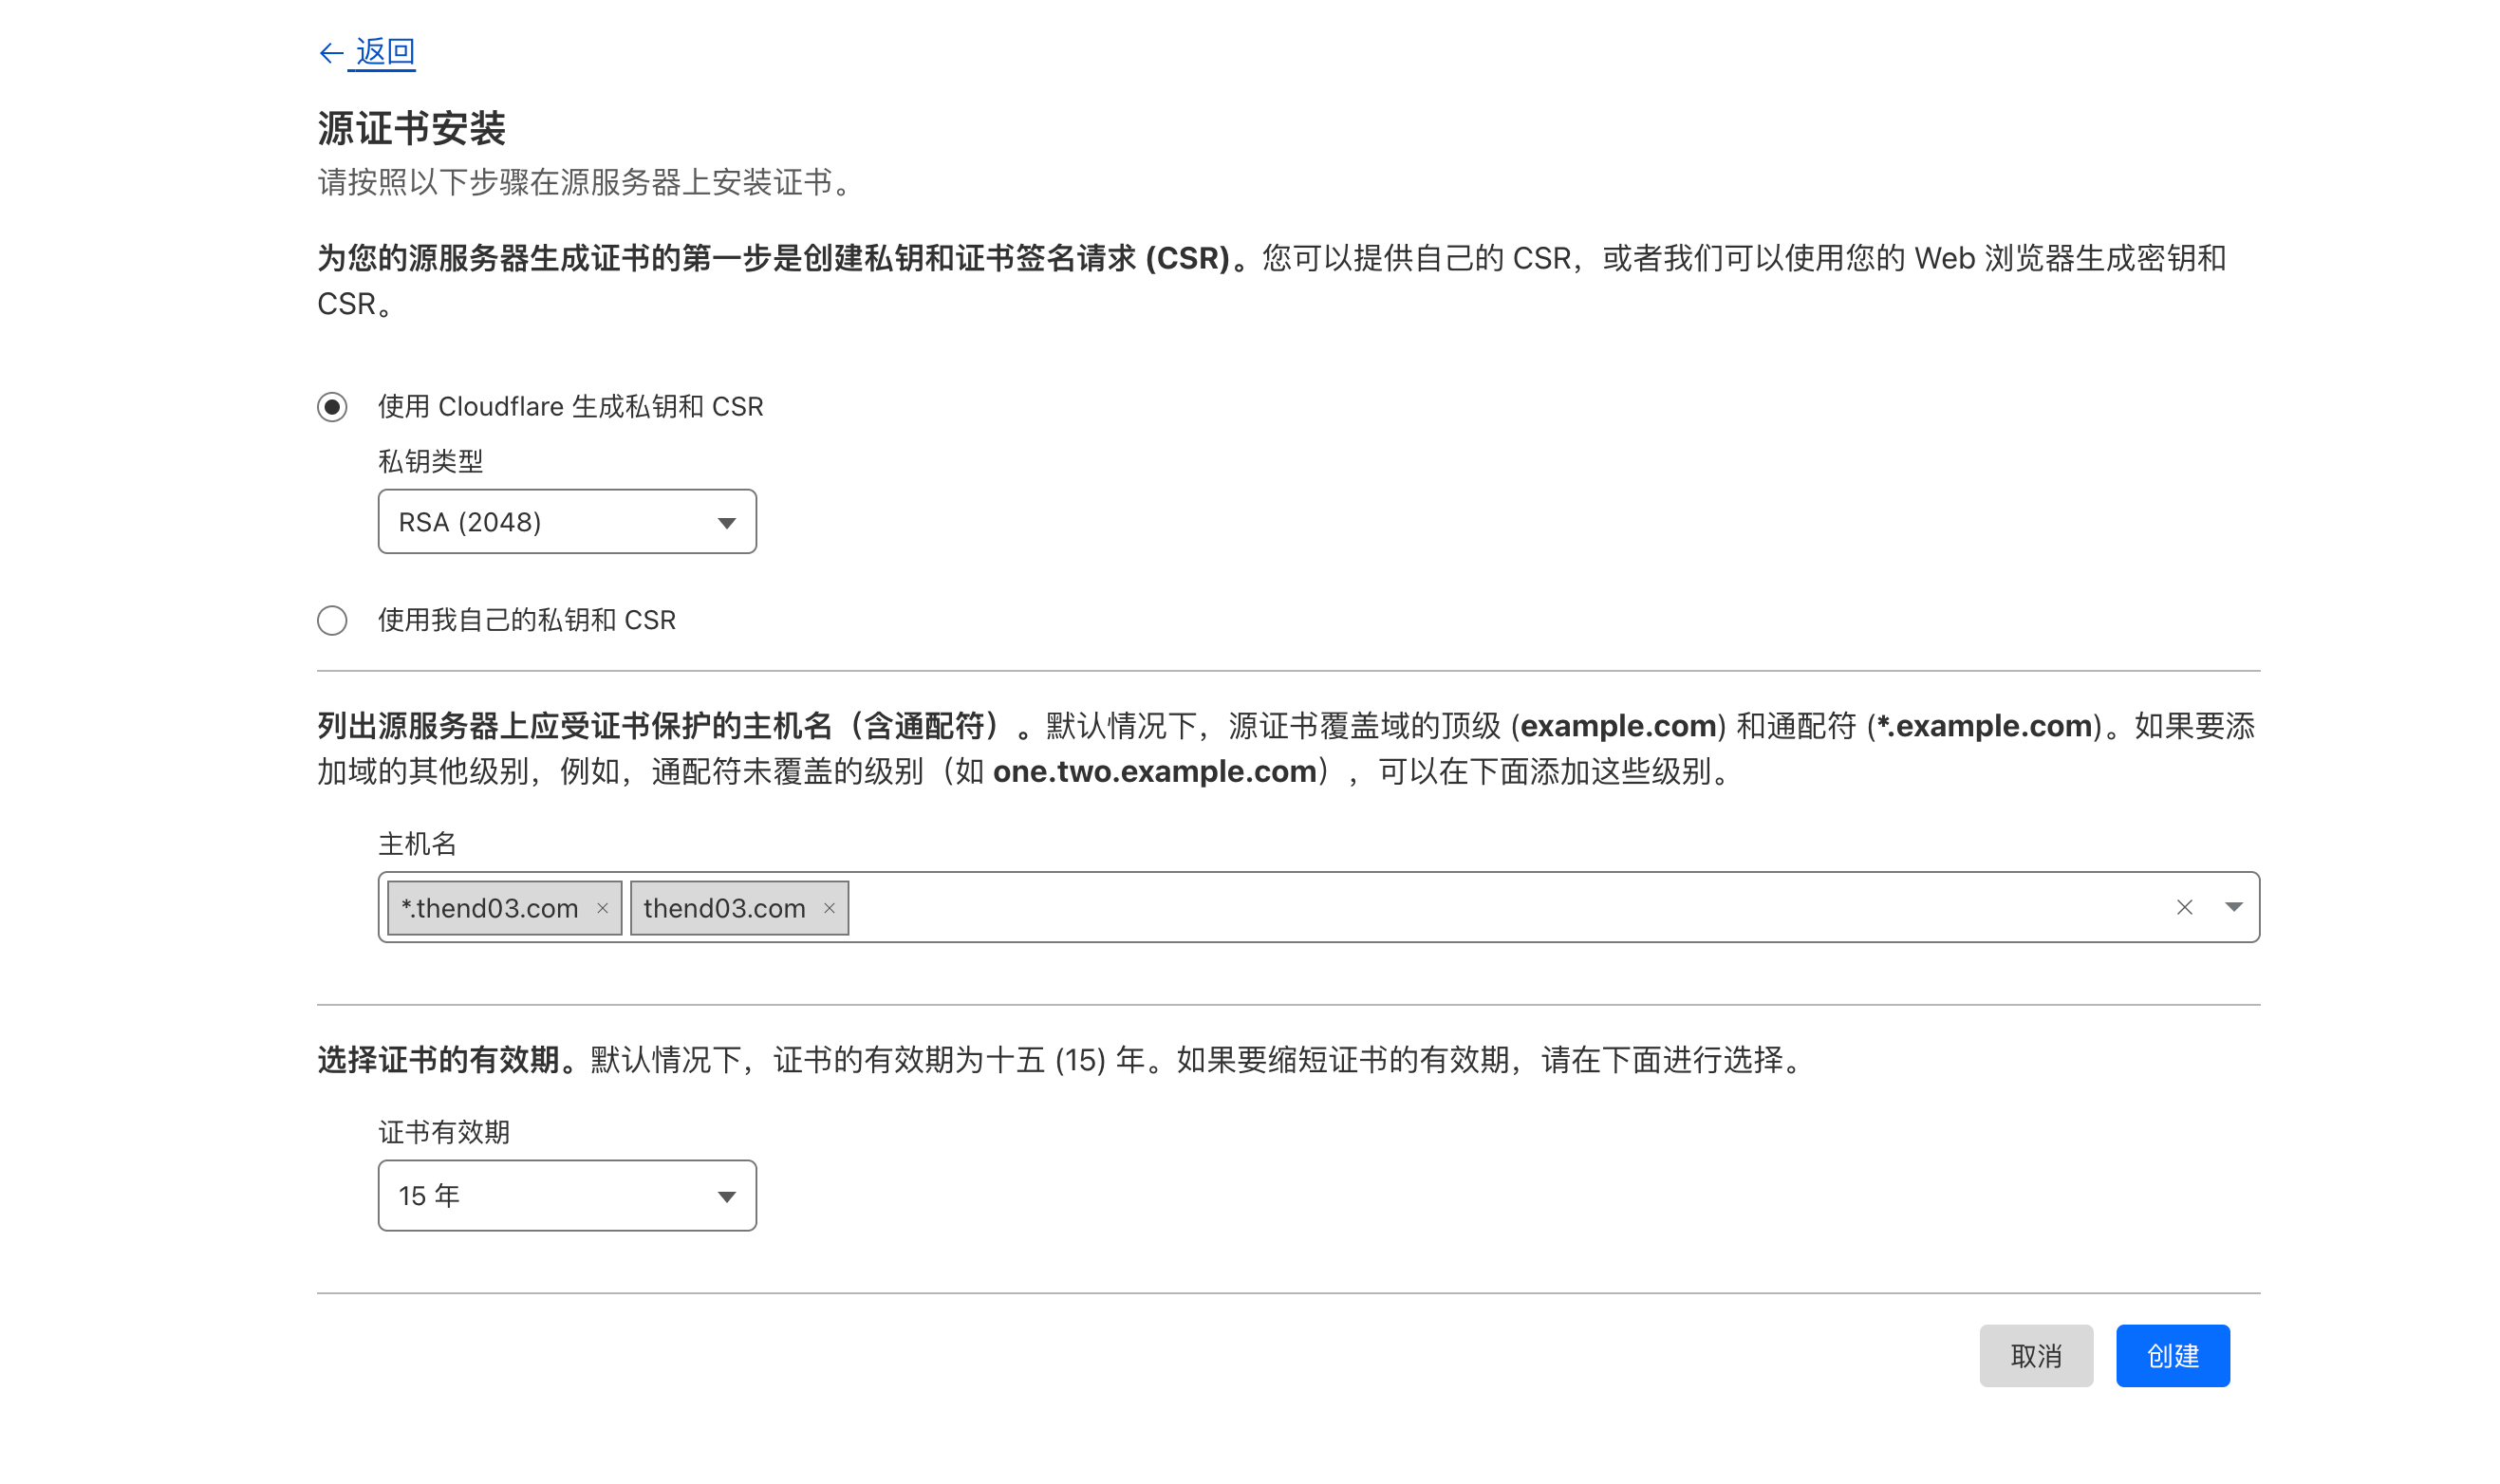
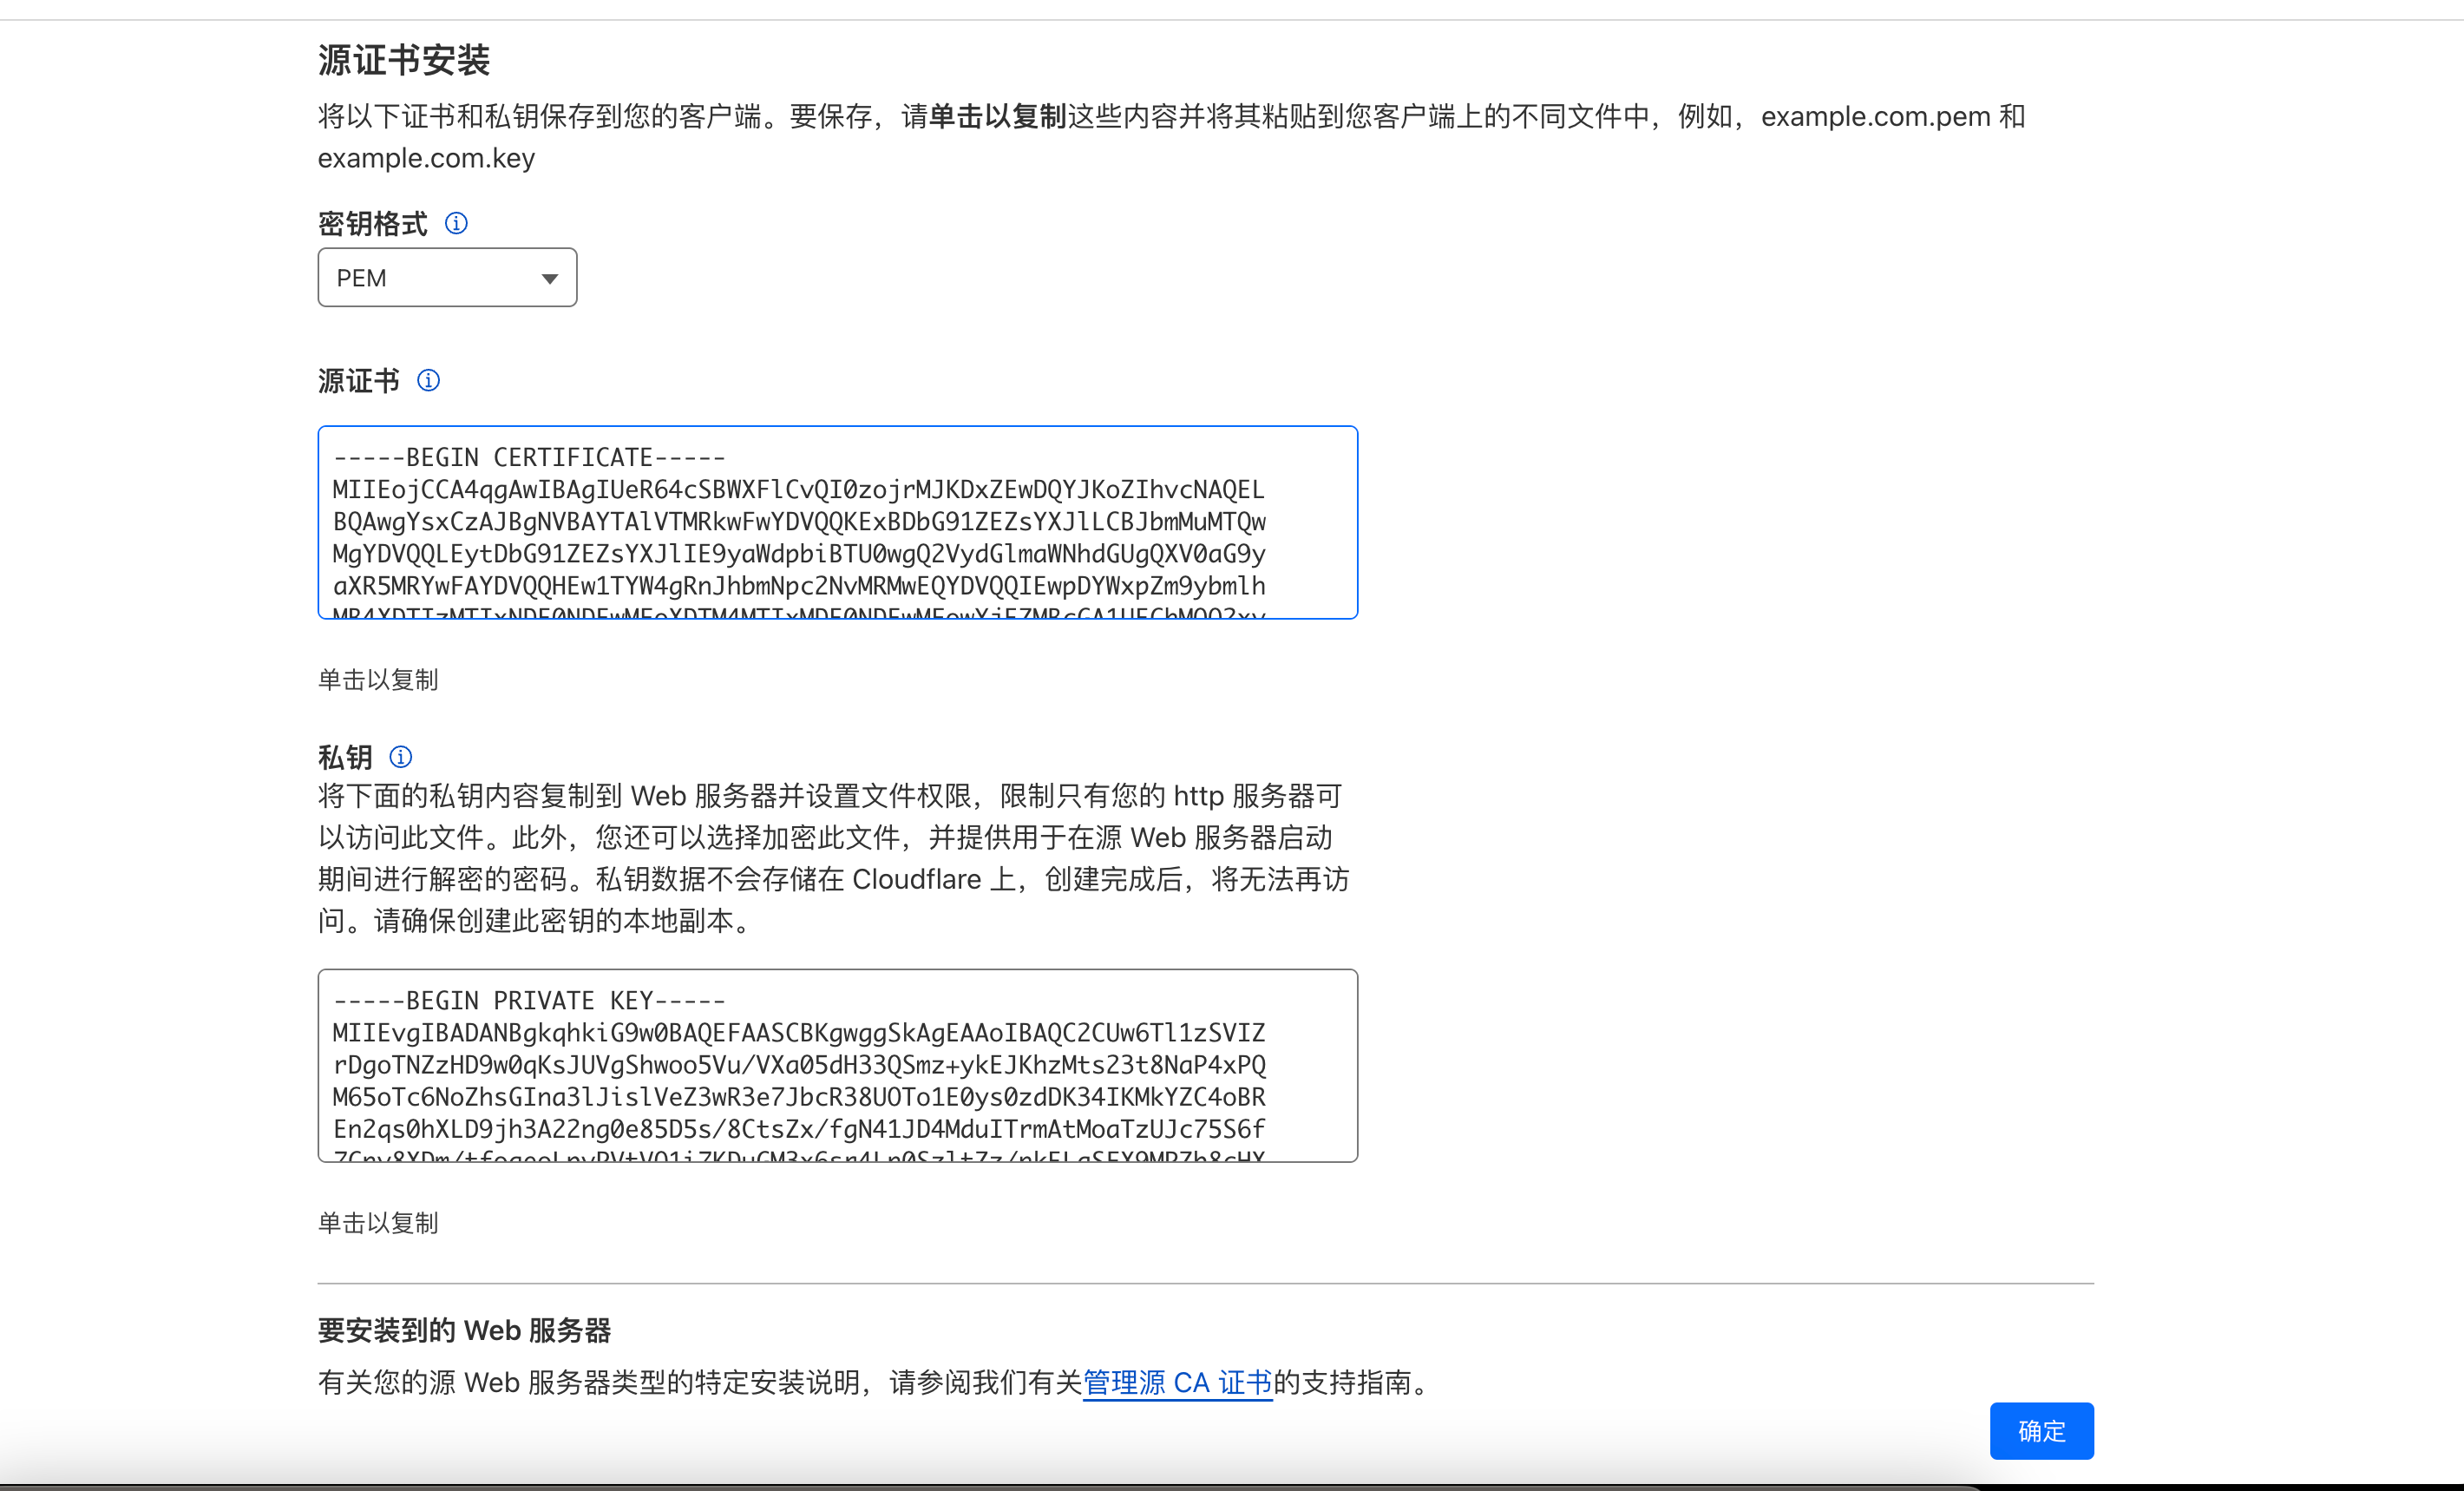
点击创建之后,会生成一个key和pem文件。key和pem都是要保存下来放到服务器上的。
私钥只有这一次机会可以复制,关闭这个页面之后就找不到了,所以私钥需要妥善保管,丢失或者遗忘只能重新创建证书了。
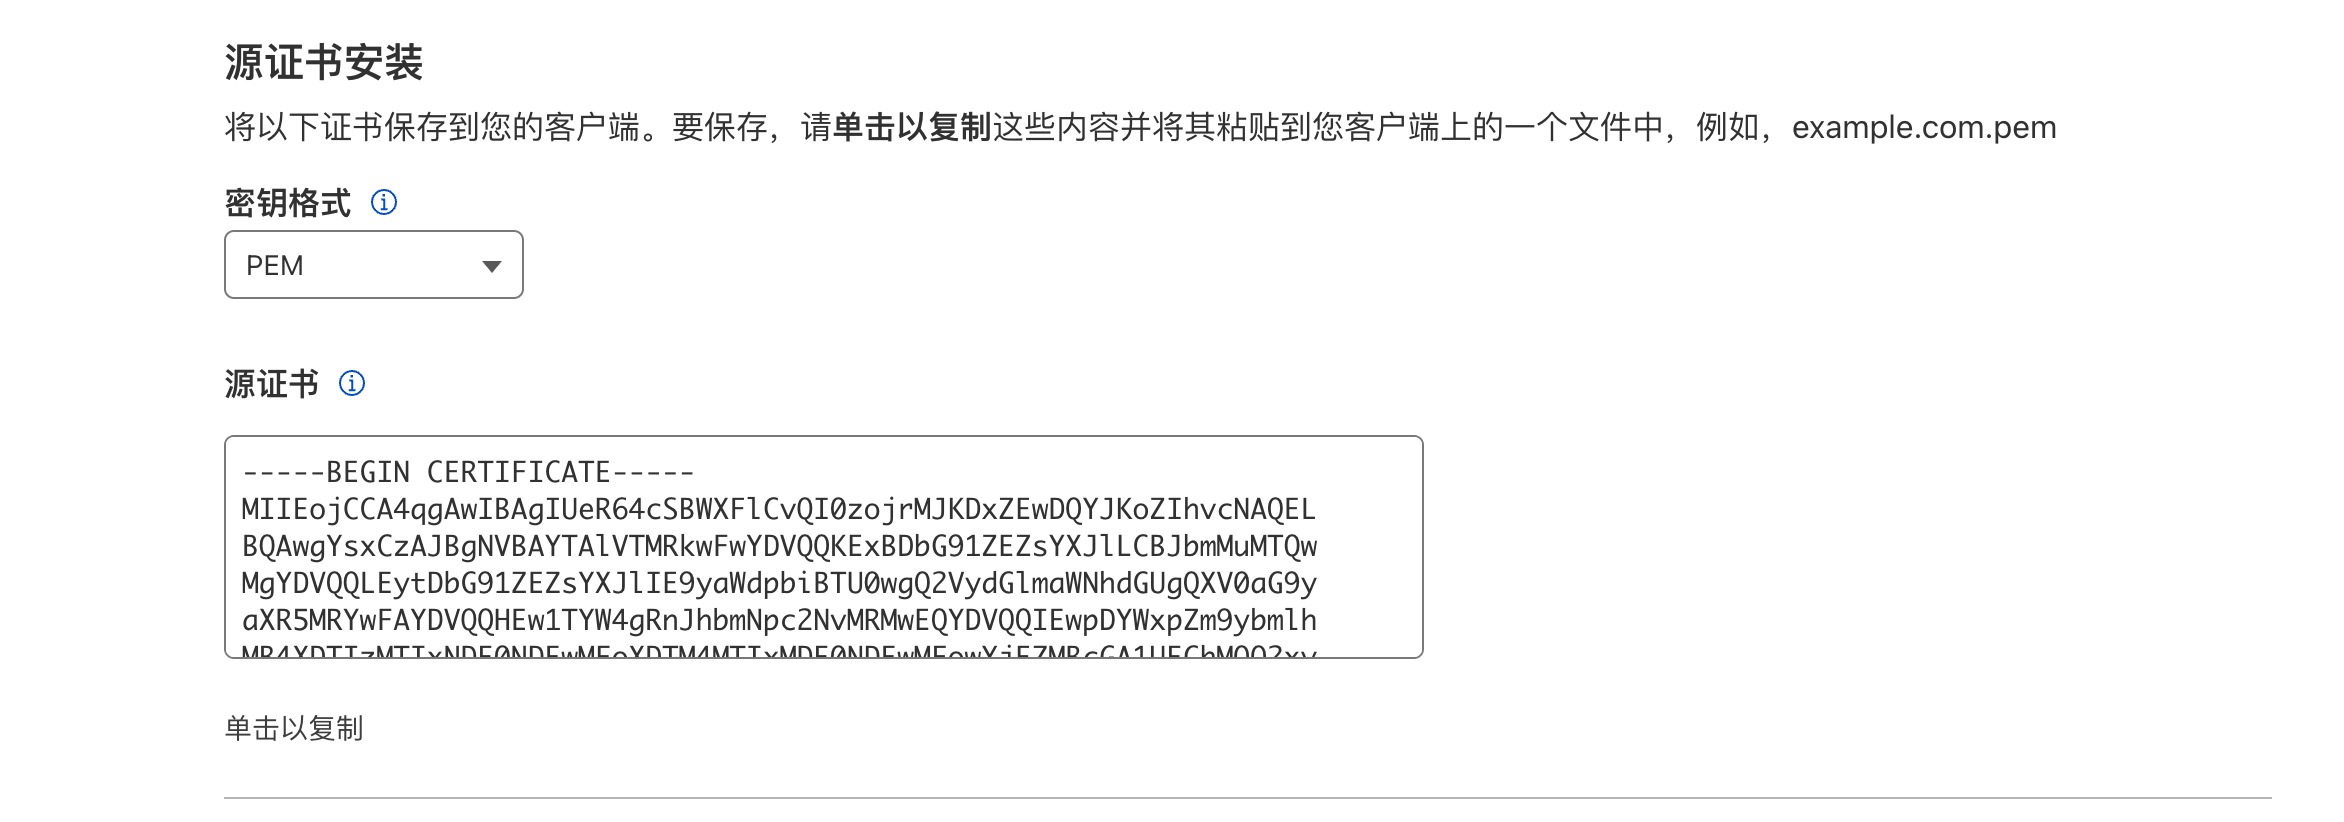
和私钥不同,pem文件之后还可以下载。
将源证书内容复制,粘贴到xxx.pem文件里。
将私钥复制,粘贴到xxx.key里。
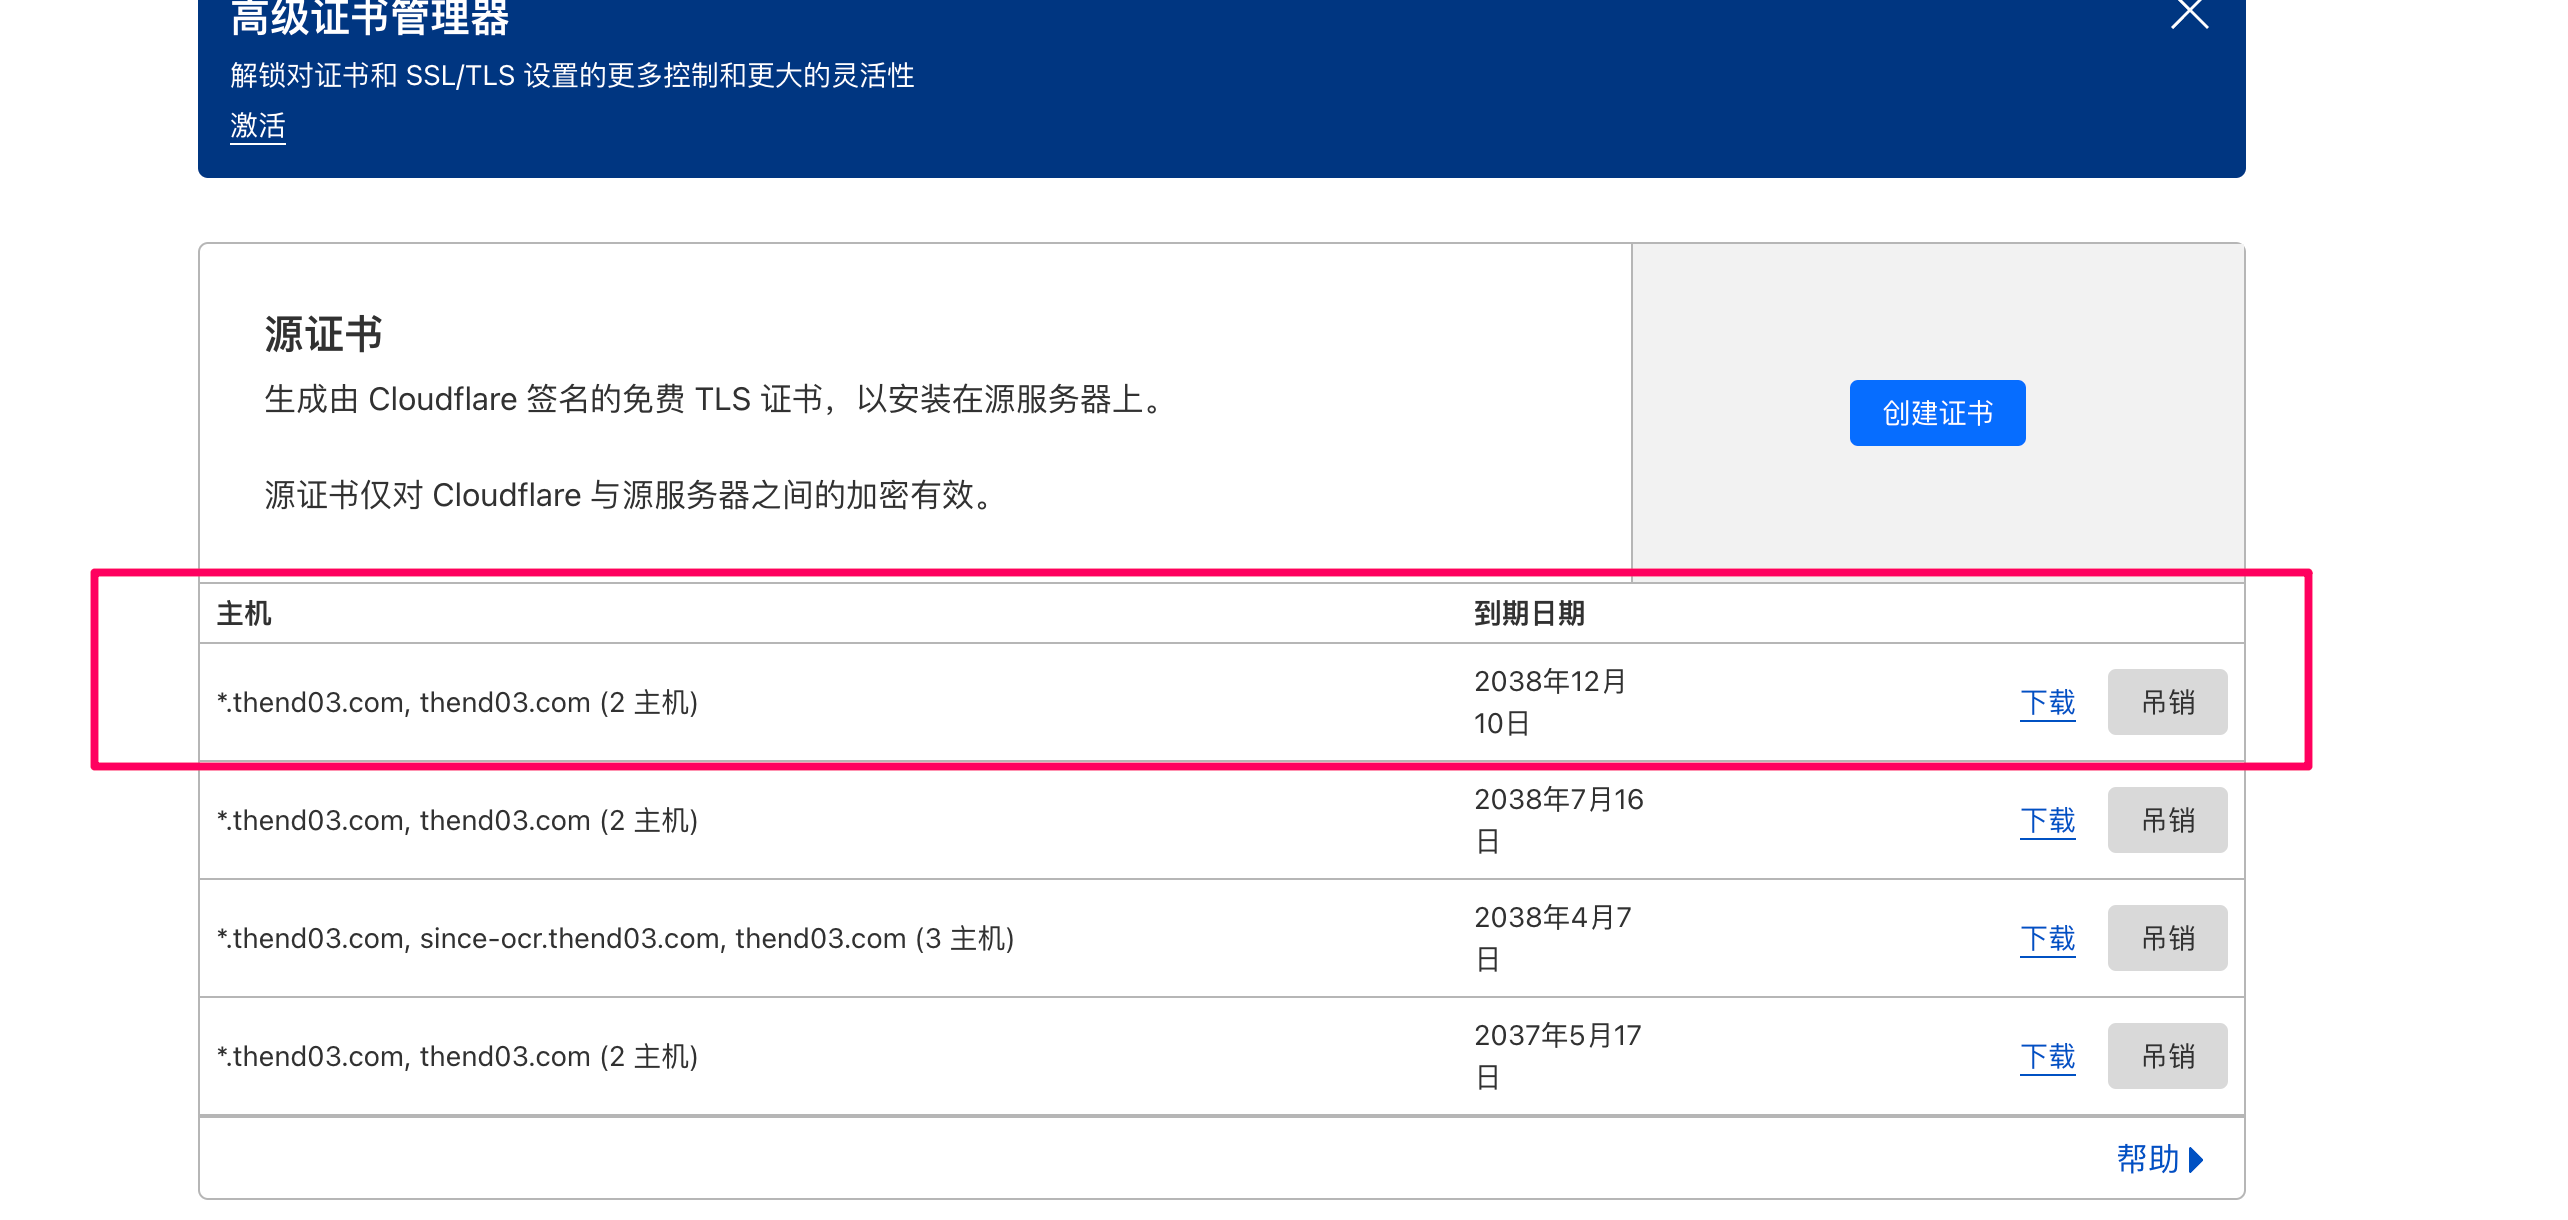
点击确定之后,会回到证书页面,可以看到,只能下载pem文件,key文件被隐藏,无法下载与访问了
nginx配置强制跳转https
前面几步,我们监听了80端口,这是Nginx的http接口,现在我们要监听443端口(https),将80端口的请求强制跳转到443端口。
首先进入/etc/nginx/config.d/目录,将wp.conf重命名为wp.conf.bak,这样原先的文件就不生效了。
然后执行touch wp.conf,重新生成空白的wp.conf文件
cd /etc/nginx/config.d
mv wp.conf wp.conf.bak
touch wp.conf
然后将下方的配置文件修改后粘贴到wp.conf里
有如下几次地方需要改成你自己的配置
- 2个server块里的server_name,这个地方要配置为上一步创建证书时选择的主机名,我这里要保护的是三级域名,符合通配条件
- 记得将ssl_certificate和ssl_certificate_key的位置配置正确
- 这个域名的日志重新写到新的文件名了,按需放开或者注释掉
其他的配置和之前80的配置一致,没有改动
# Redirect HTTP -> HTTPS
server {
	listen 80;
	server_name www.racknerd.thend03.com racknerd.thend03.com;

	return 301   https://$host$request_uri;
}

server{

	listen 443 ssl http2;
	server_name www.racknerd.thend03.com  racknerd.thend03.com;

	root /opt/wordpress;
	index index.php index.html;

	# SSL parameters
	ssl_certificate /root/thend03.com.pem;
	ssl_certificate_key /root/thend03.com.key;

	# log files
	access_log /var/log/nginx/resource.thend03.com.access.log;
	error_log /var/log/nginx/resource.thend03.com.error.log;

	location = /favicon.ico {
		log_not_found off;
		access_log off;
	}

	location = /robots.txt {
		allow all;
		log_not_found off;
		access_log off;
	}

	location / {
		try_files $uri $uri/ /index.php?$args;
	}

	location ~ \.php$ {
		include snippets/fastcgi-php.conf;
		fastcgi_pass unix:/run/php/php7.4-fpm.sock;
	}

	location ~* \.(js|css|png|jpg|jpeg|gif|ico|svg)$ {
		expires max;
		log_not_found off;
	}
}
在服务器生成证书
基于上面nginx证书的路径配置,在/root目录生成key和pem证书,并且编辑文件,将在cloudflare页面上生成的key和pem字符串复制到对应的文件里。
root@racknerd-7c9c56:/etc/nginx/conf.d# cd /root
root@racknerd-7c9c56:~# touch thend03.com.pem
root@racknerd-7c9c56:~# touch thend03.com.key
root@racknerd-7c9c56:~# vi thend03.com.pem
root@racknerd-7c9c56:~# vi thend03.com.key
重启nginx
配置好nginx 443配置文件后,执行命令重启nginx
root@racknerd-7c9c56:~# sudo systemctl restart nginx
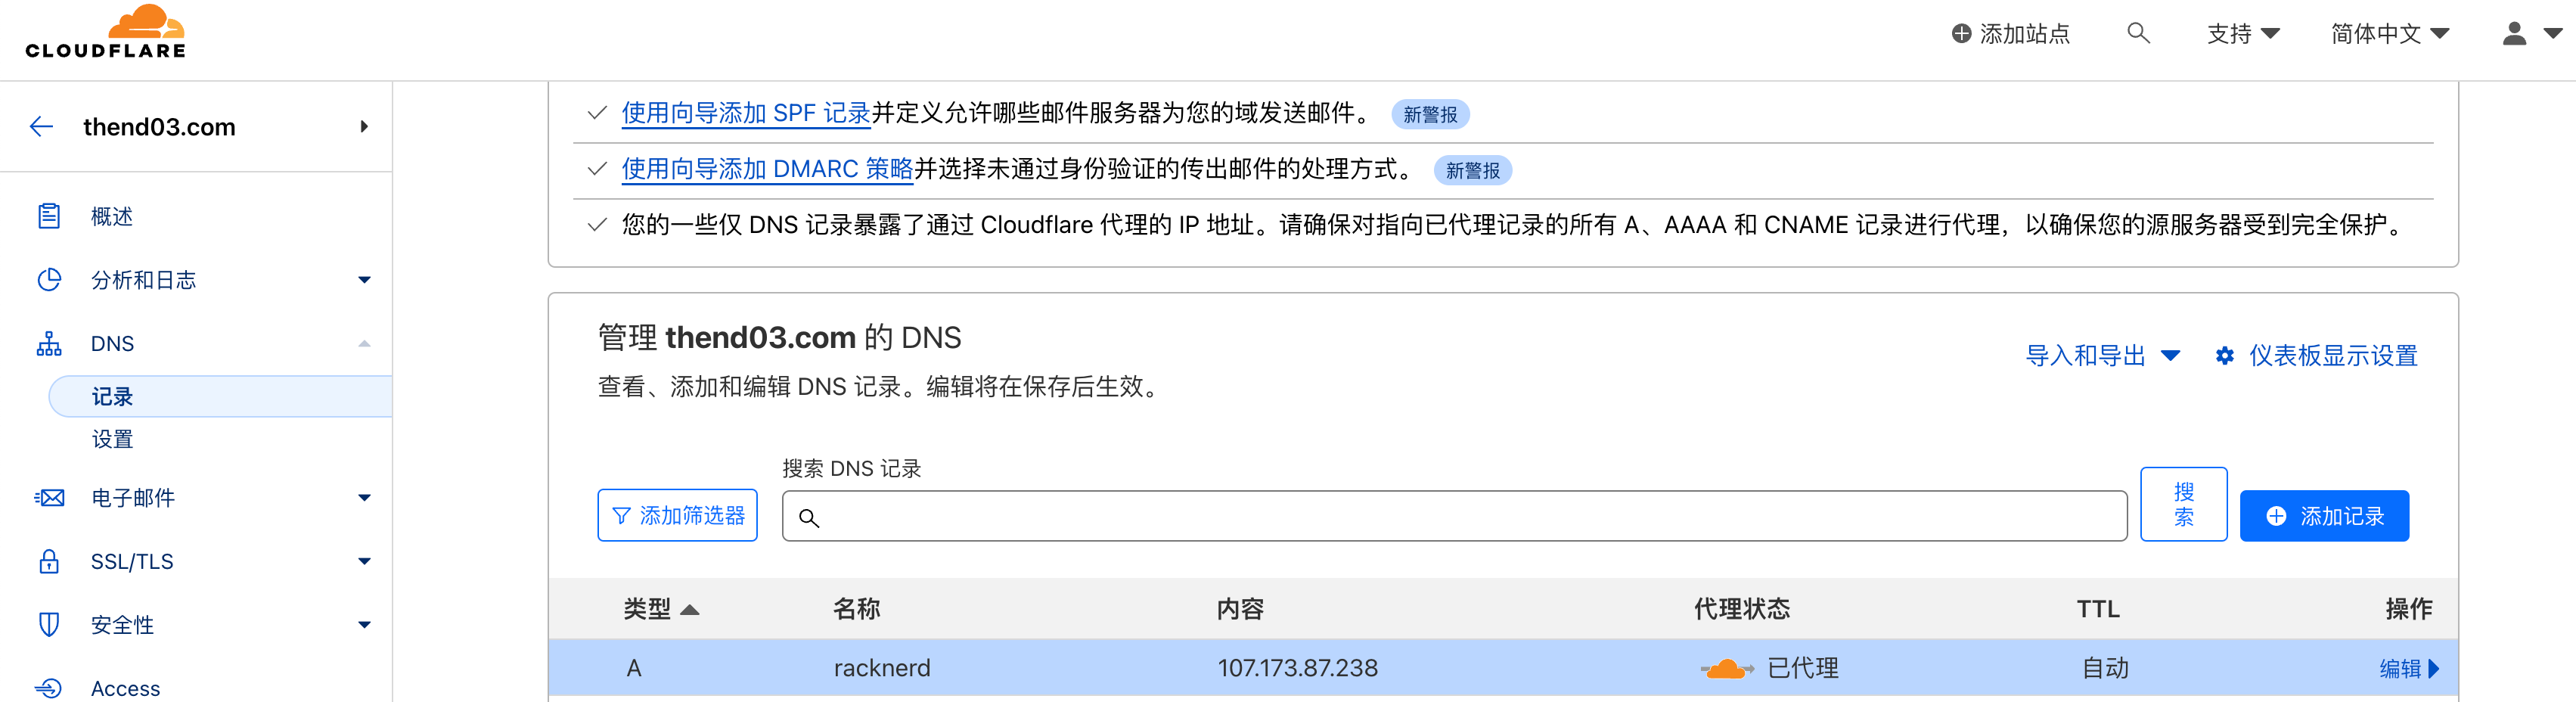
cloudflare配置域名解析
nginx处理好之后,回到cloudflare页面,配置域名到ip的解析,添加一条A记录,就可以在访问域名的时候请求到后端服务器。
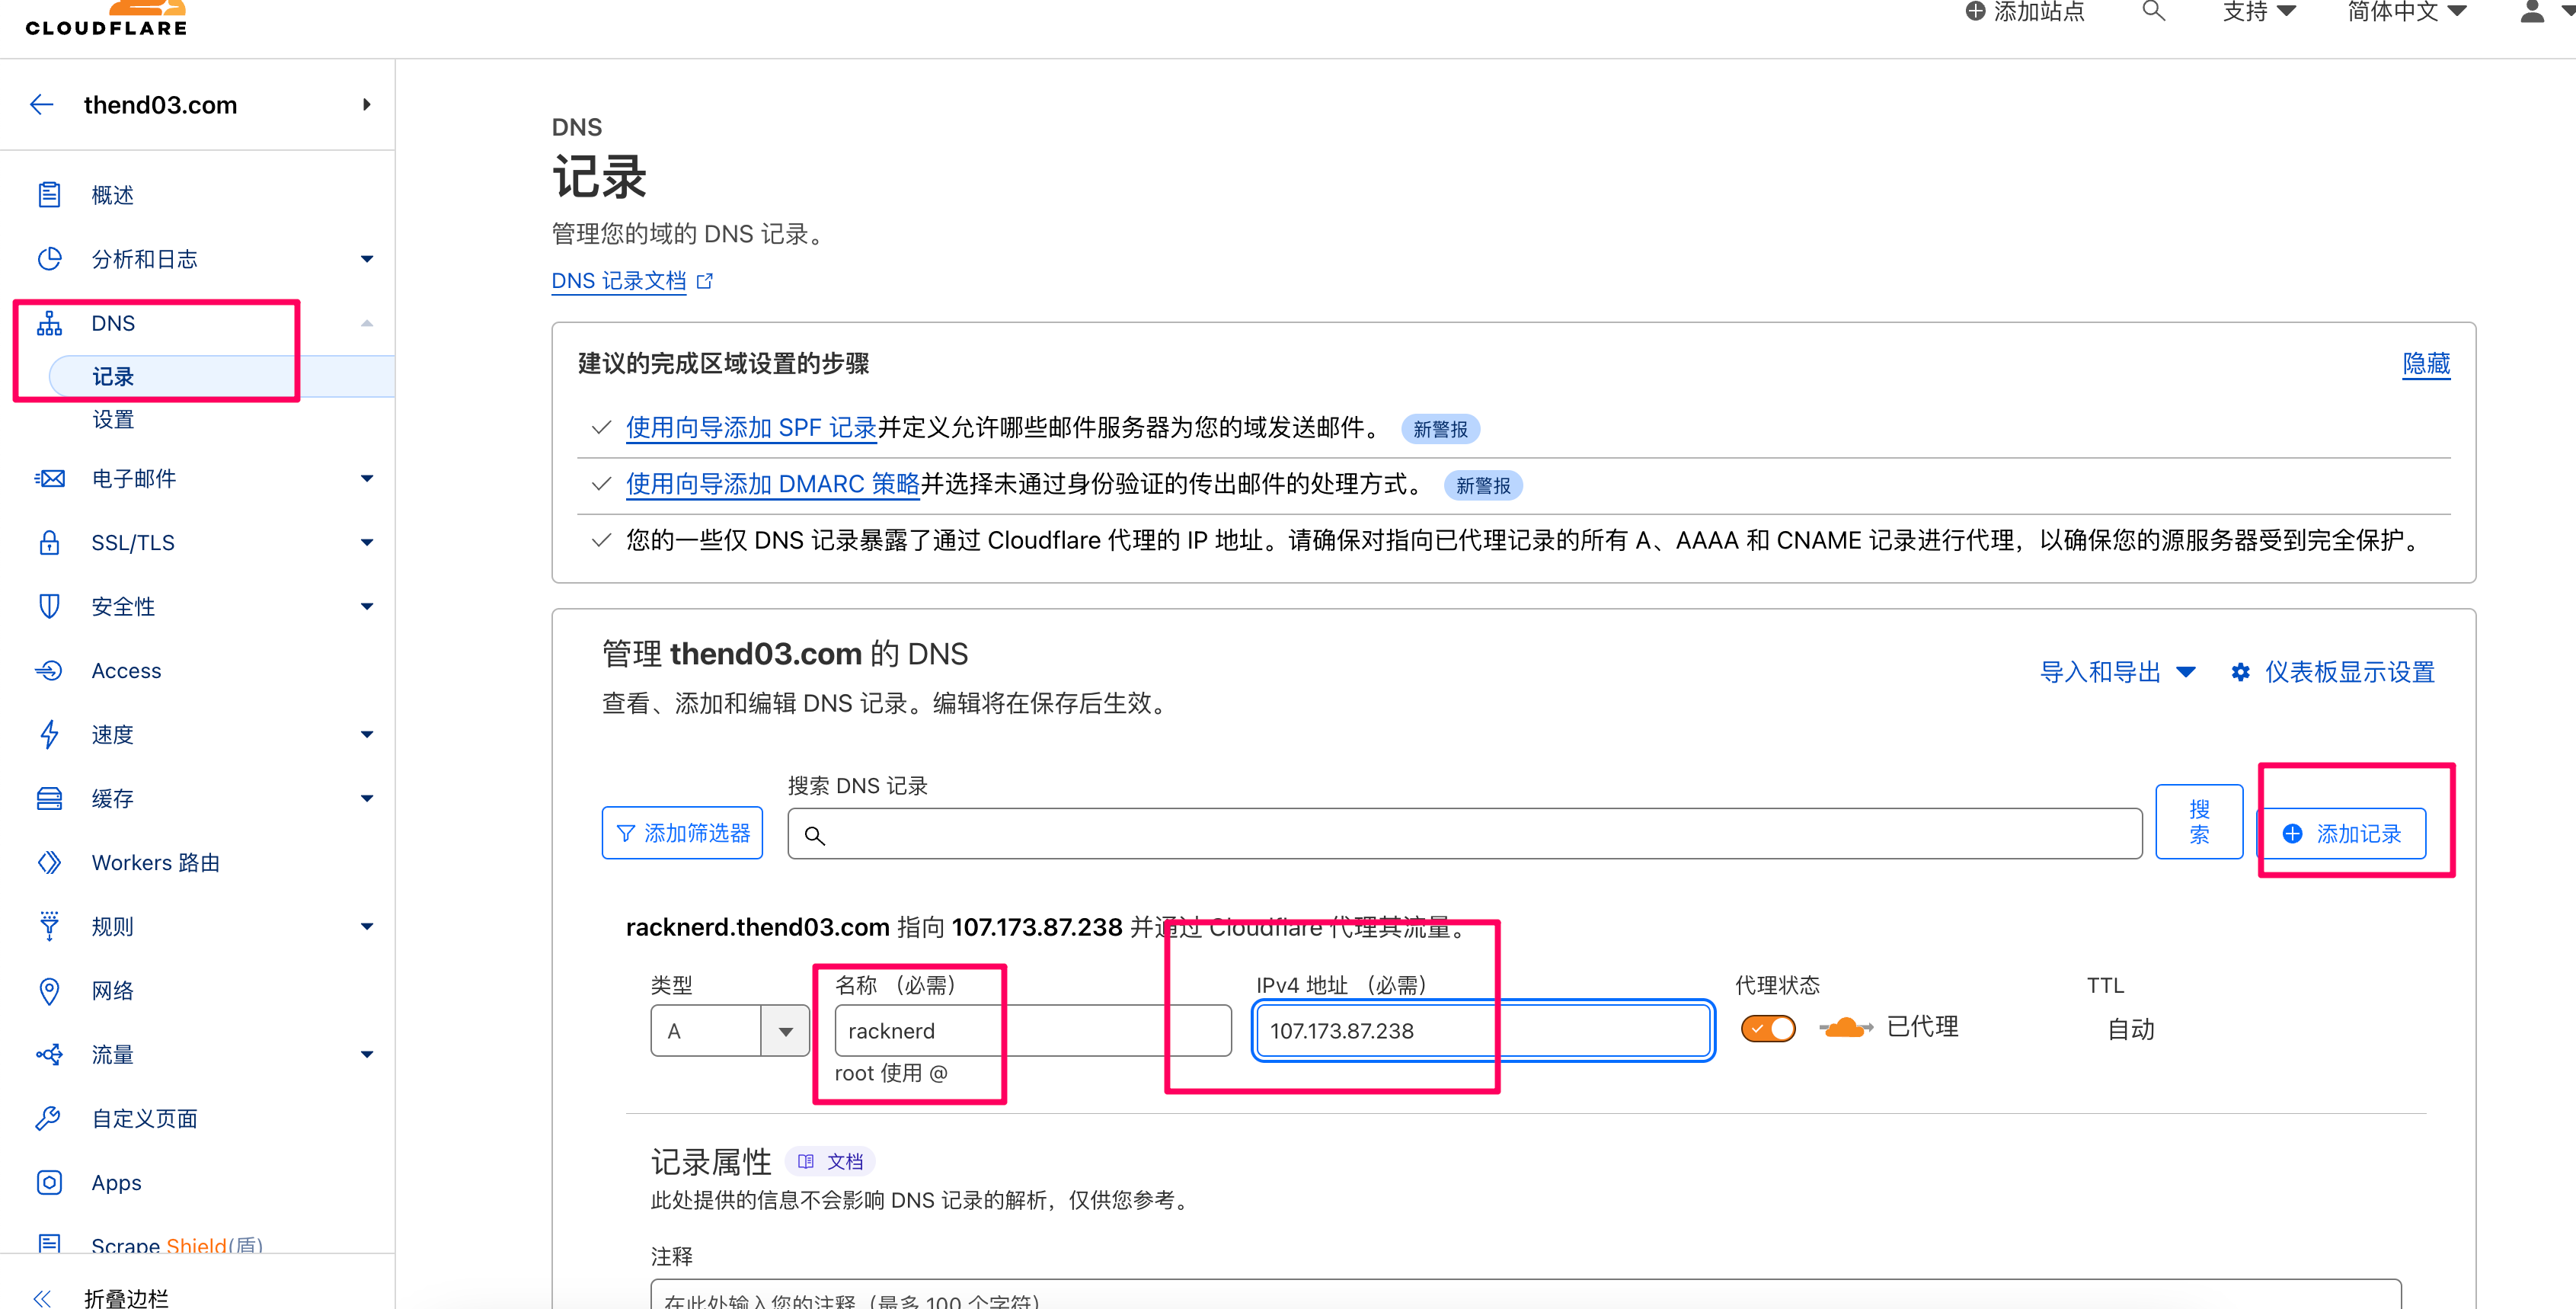
添加好之后,在域名管理那可以看到最新添加的解析记录
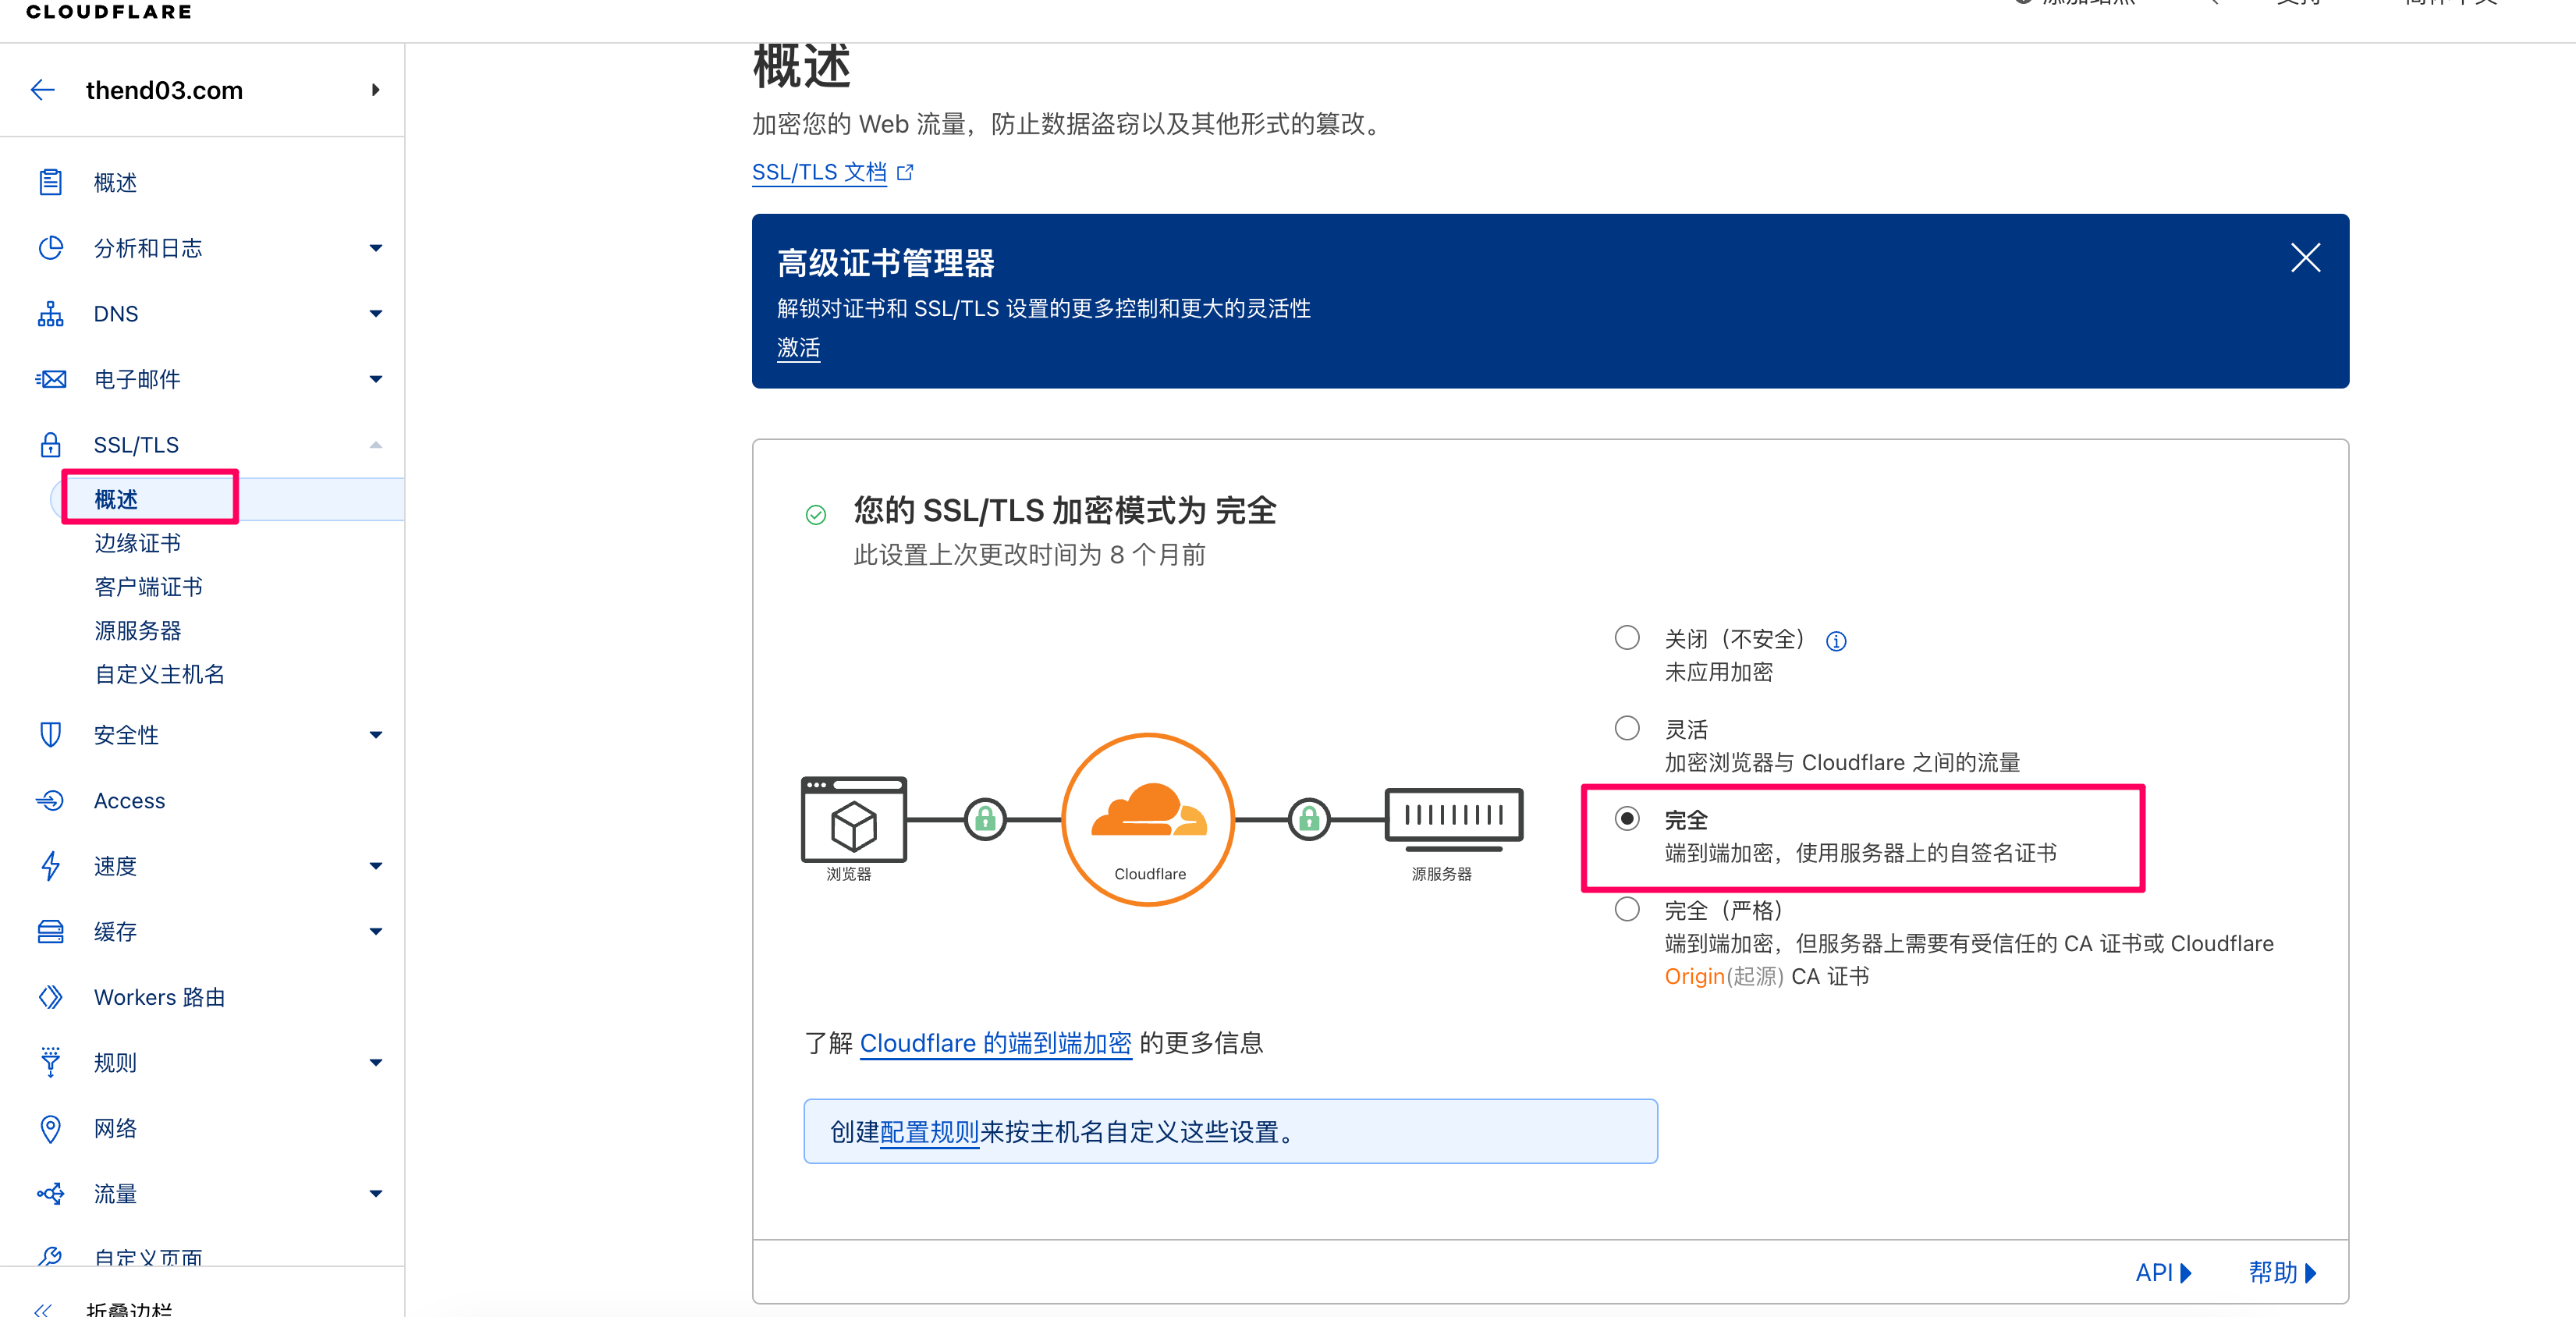
配置ssl/tls客户端策略
打开SSL/TLS概述,设置下客户端策略,这里选择端到端,加密等级比较高,并且我们使用的是自签名的证书
浏览器访问
解析配置好之后,就是浏览器使用域名访问了。
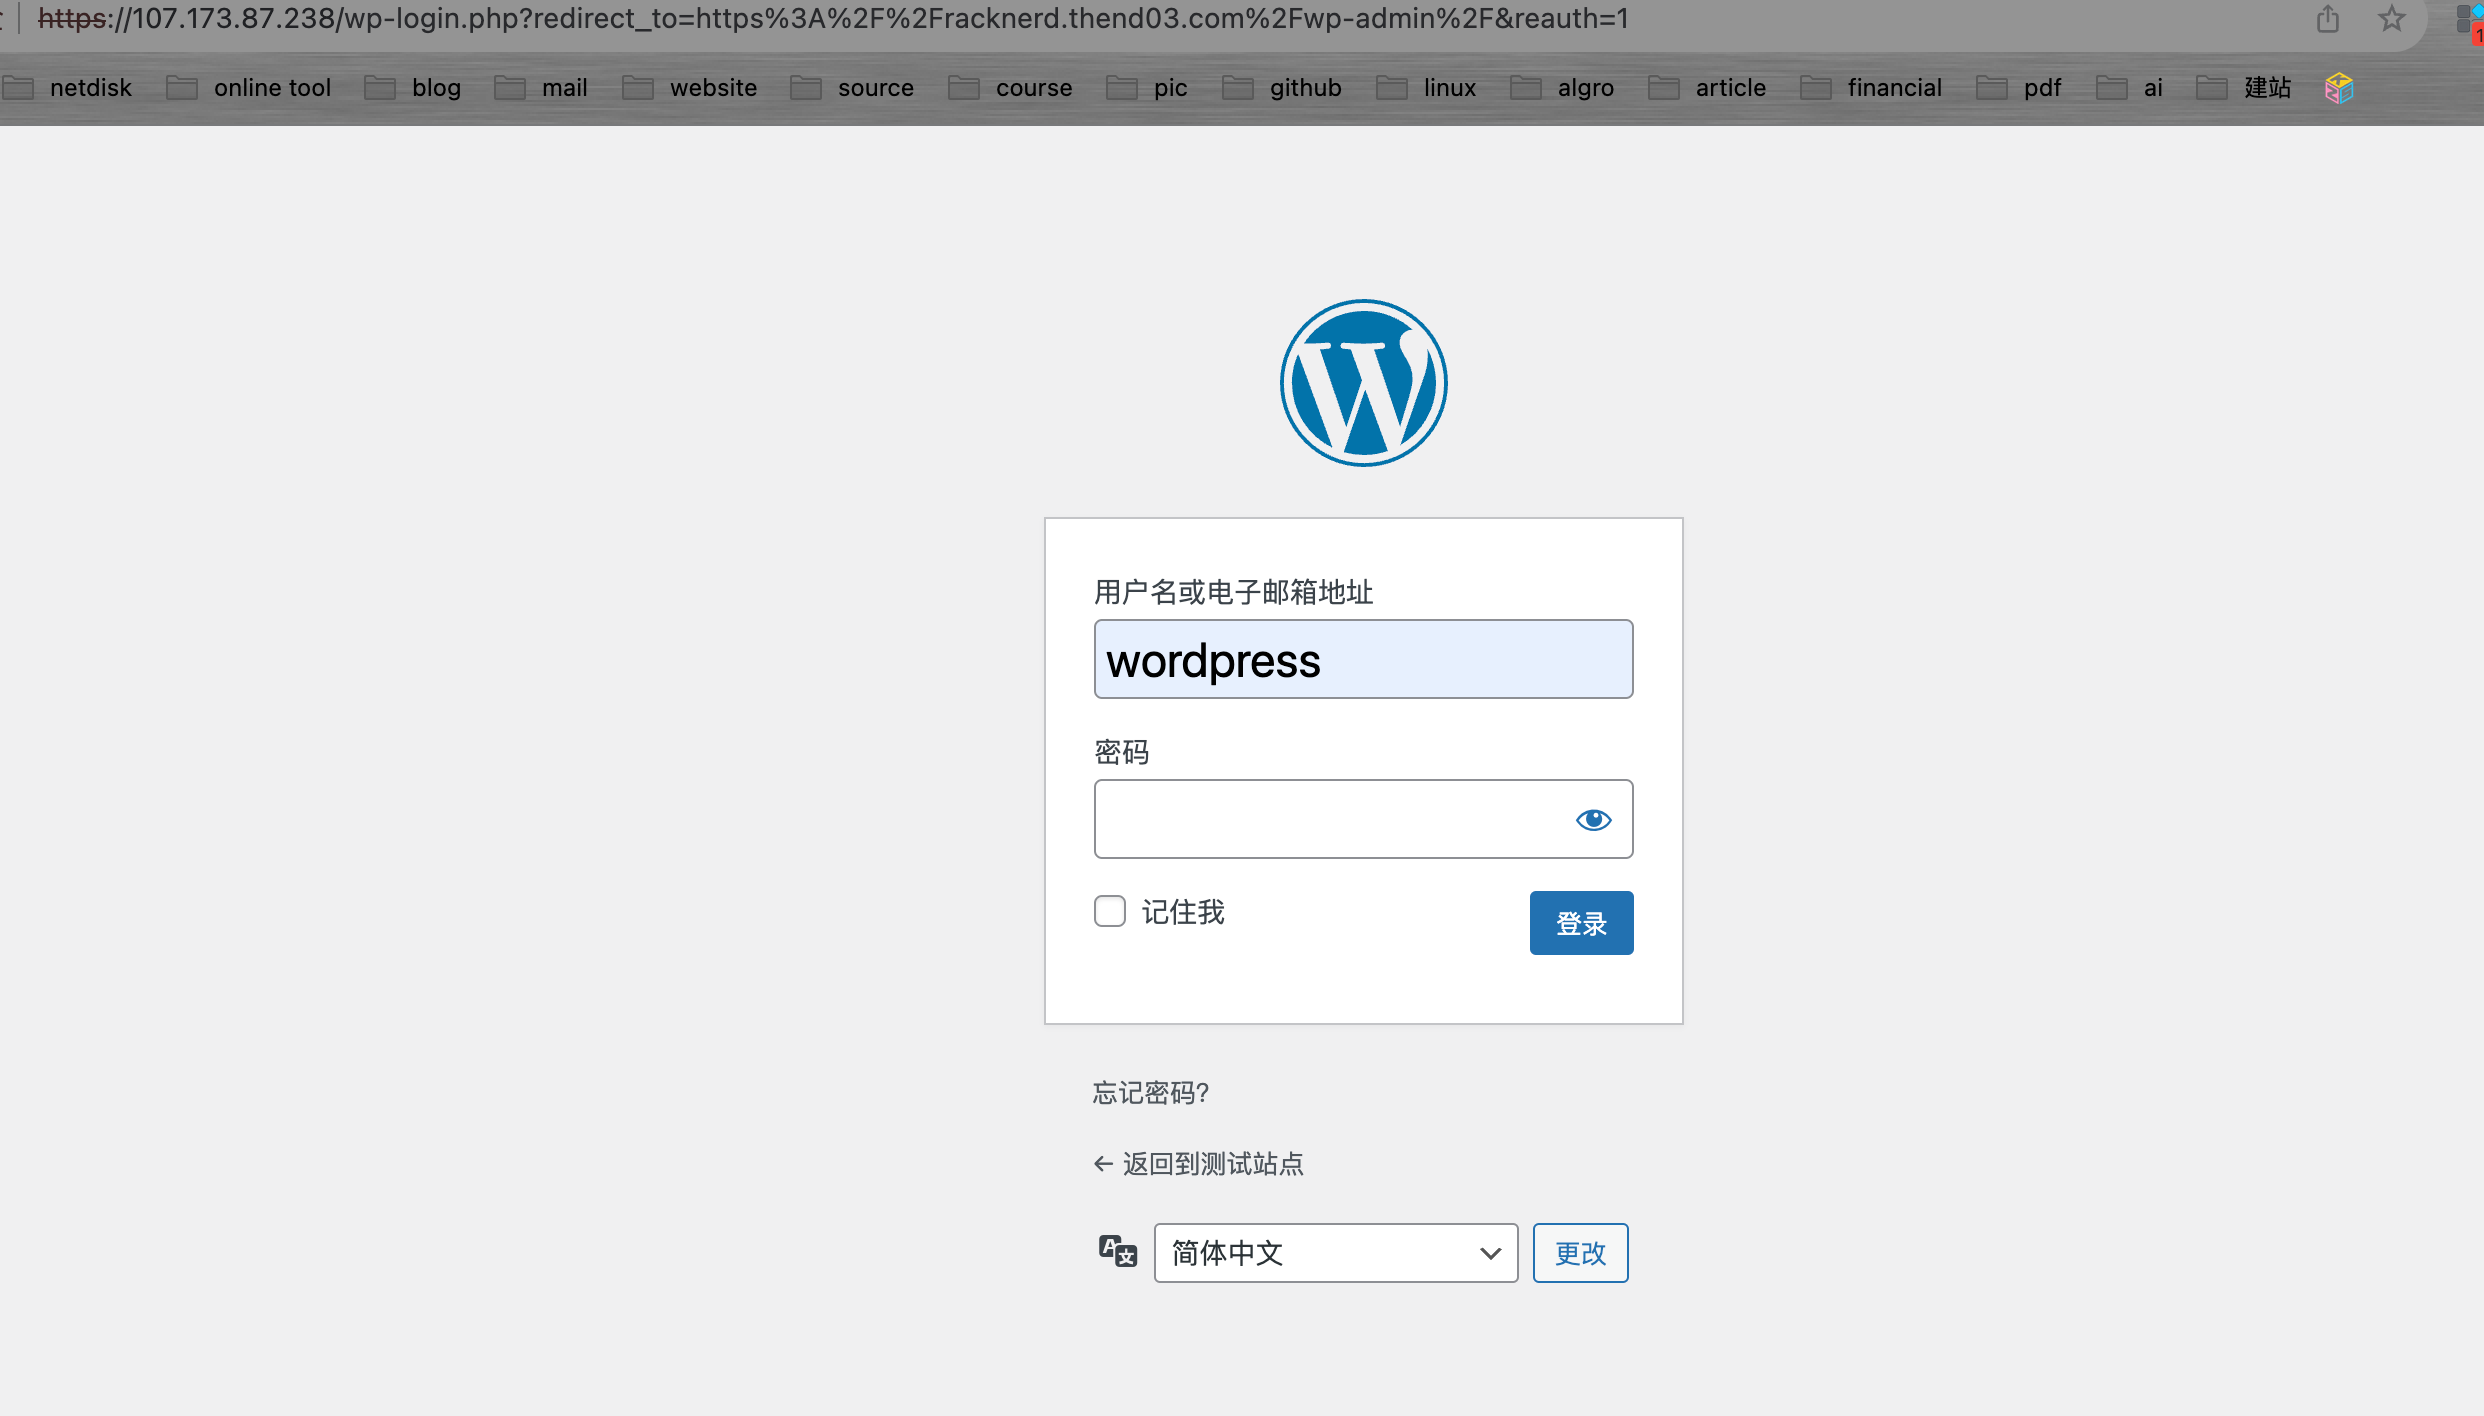
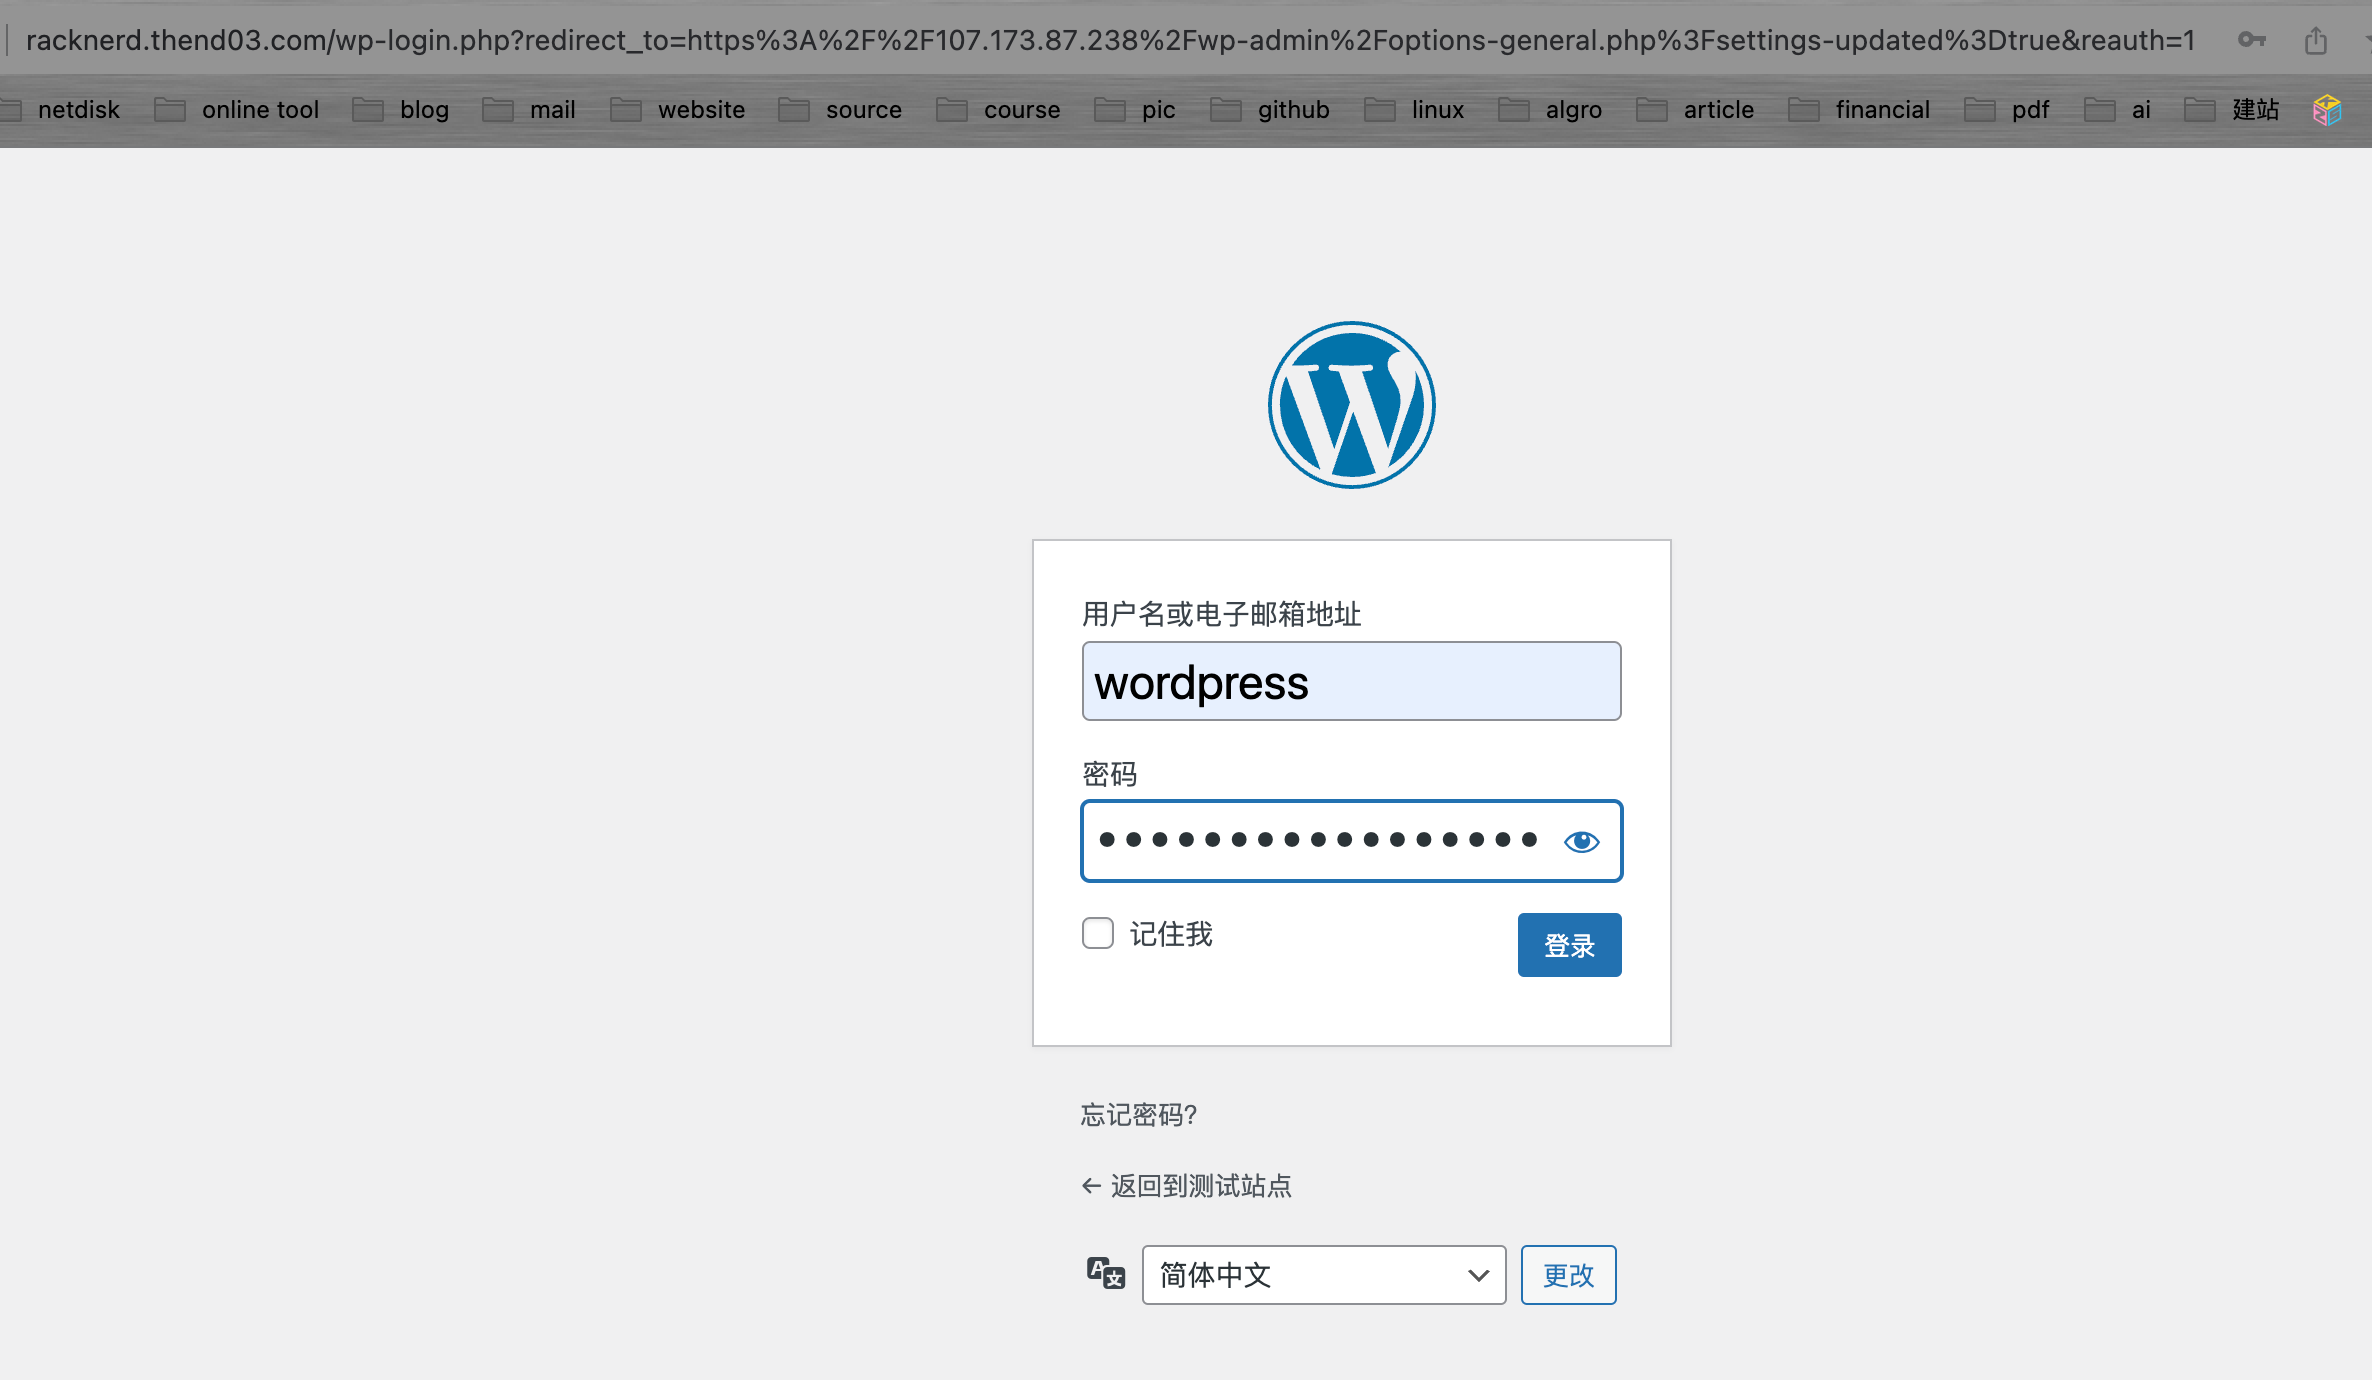
访问wp-admin管理后台,这时会跳转到ip,需要我们登录进去之后设置一下

可以看到域名跳转到了ip
打开设置,可以看到现在的站点还是ip的方式。需要修改为域名。
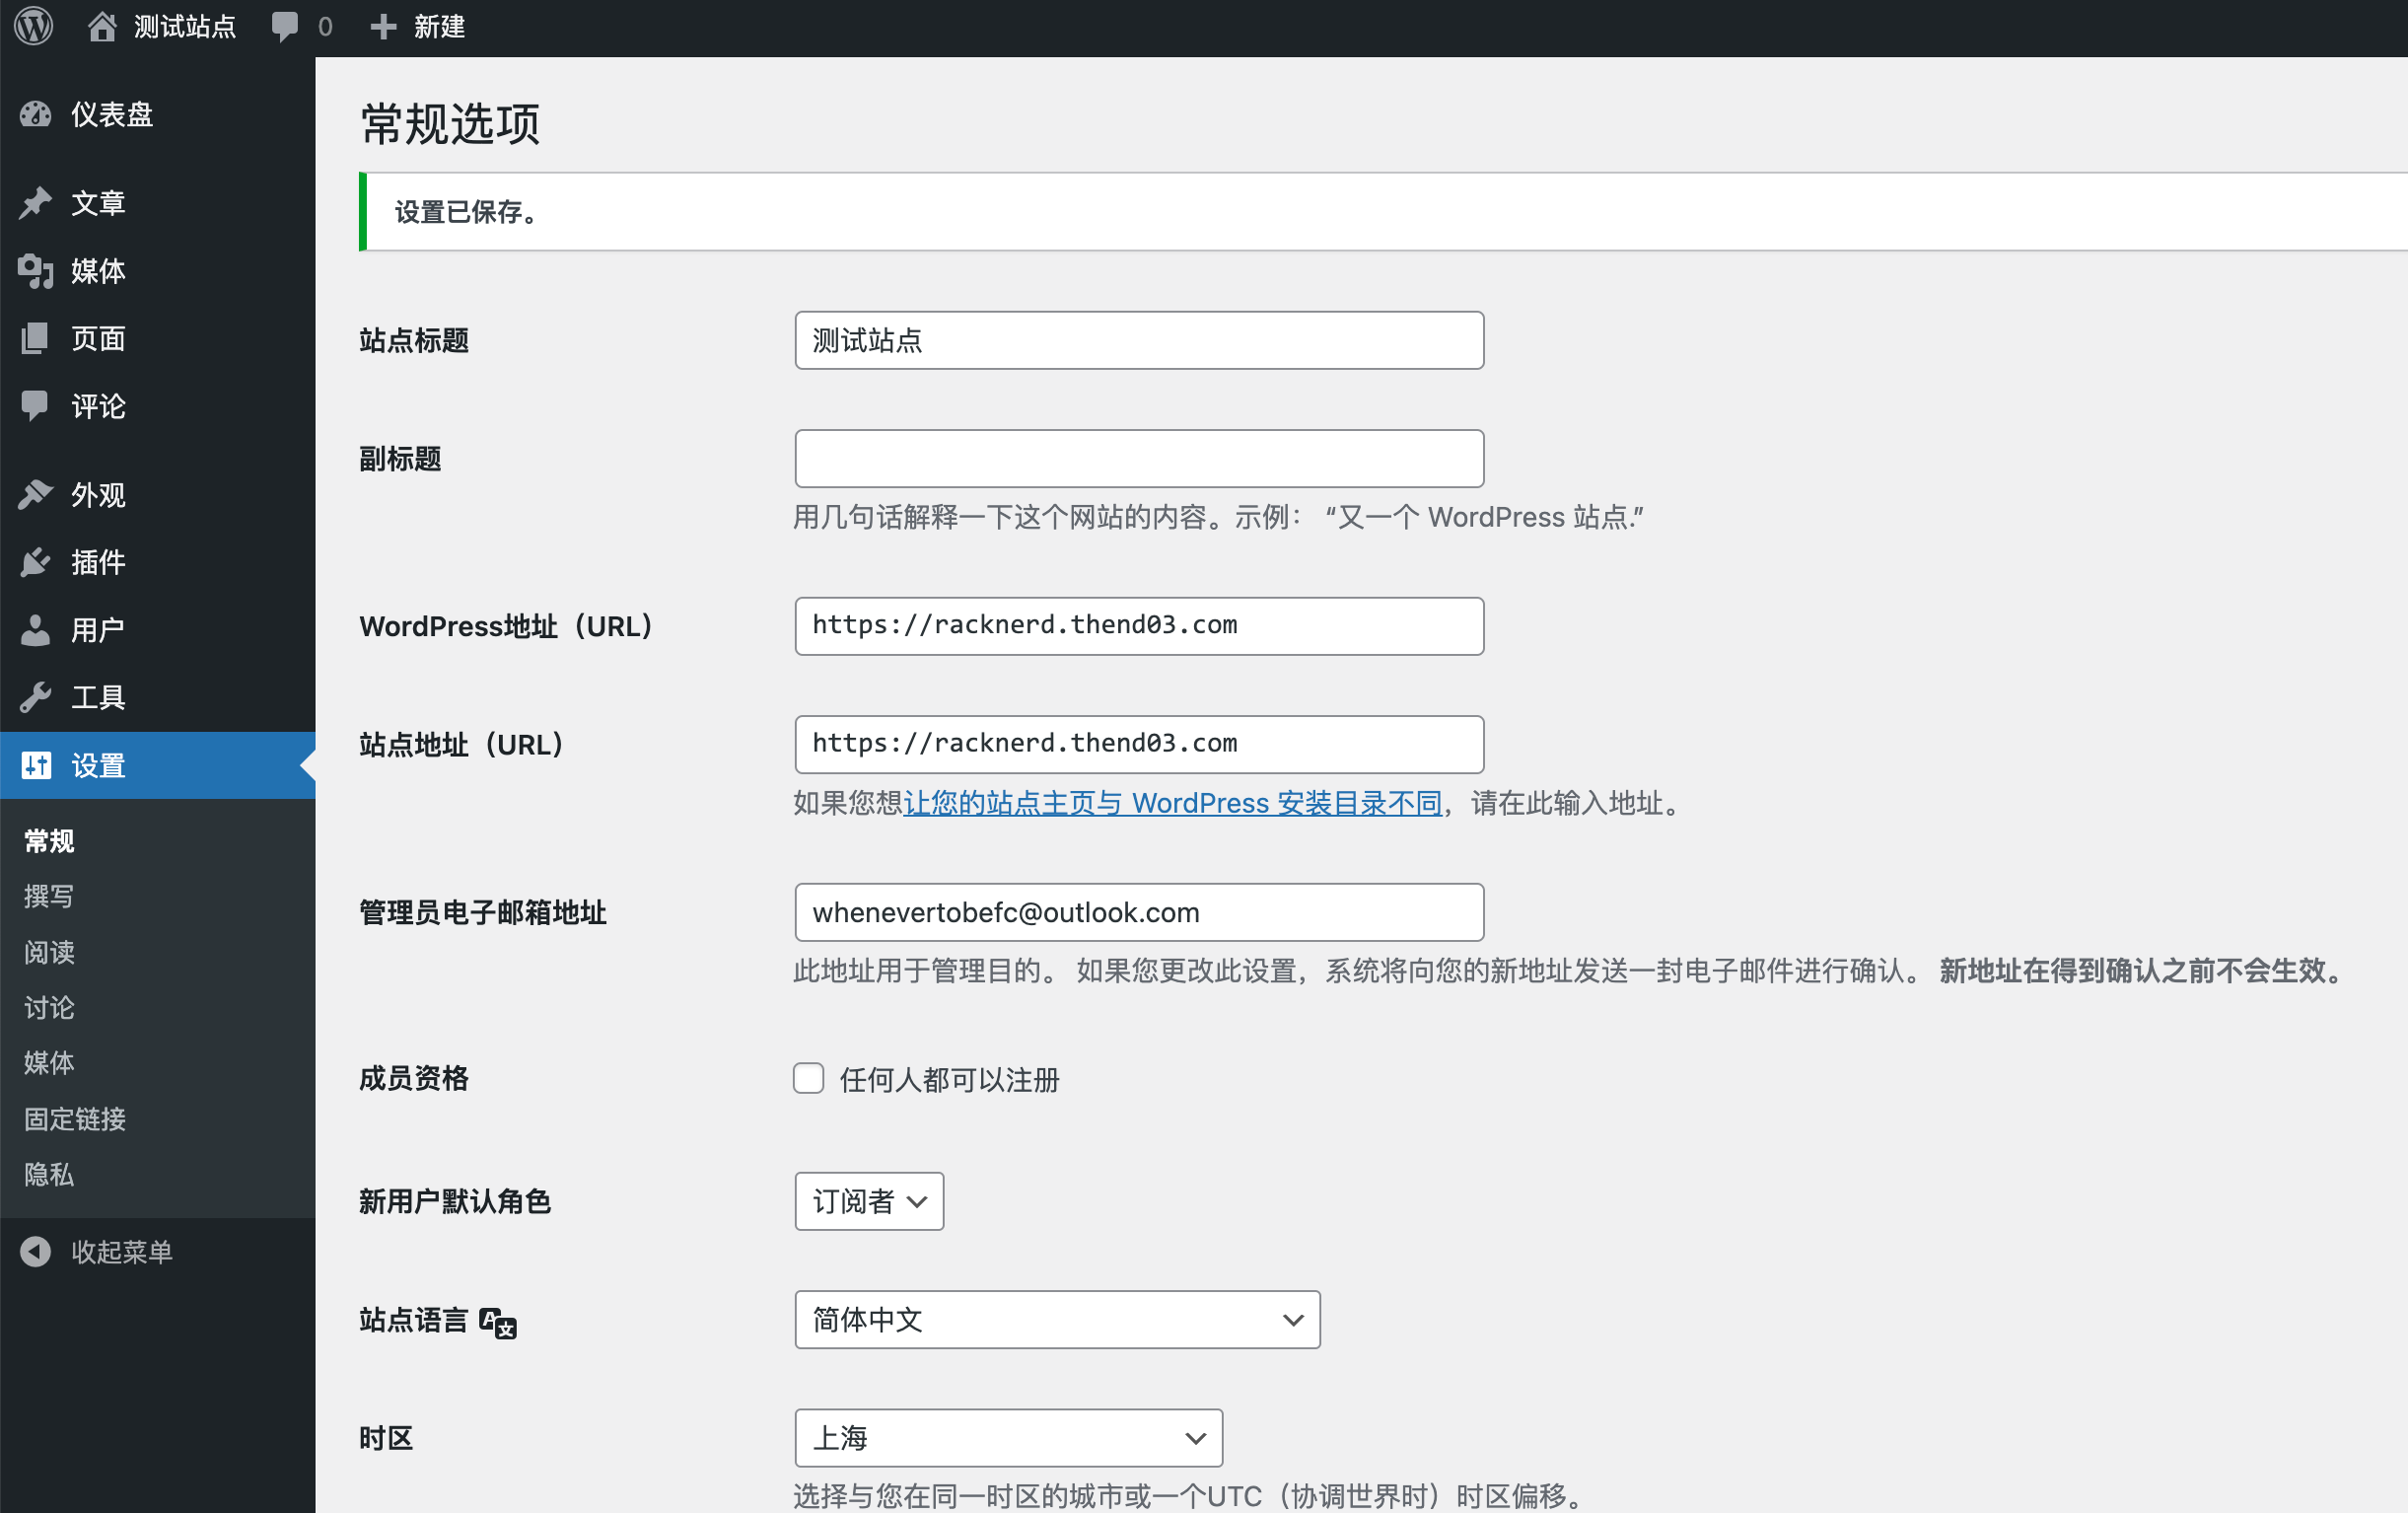

再次登录,地址栏就还是域名,没有变成ip。以后都可以用域名的方式访问了。
至此,wordpress的手动部署就告一段落了。后续再介绍宝塔面板,docker,docker-compose之类的安装部署。
以及如何选择模板搭建自己的目标站。